Transcription Telegram Bot
Build a Telegram bot that transcribes audio and video messages in 90+languages using TypeScript with Deno in Supabase Edge Functions.
Introduction
Section titled “Introduction”In this tutorial you will learn how to build a Telegram bot that transcribes audio and video messages in 90+ languages using TypeScript and the ElevenLabs Scribe model via the speech-to-text API.
https://www.youtube-nocookie.com/embed/CE4iPp7kd7Q?rel=0
Requirements
Section titled “Requirements”- An ElevenLabs account with an API key.
- A Supabase account (you can sign up for a free account via database.new).
- The Supabase CLI installed on your machine.
- The Deno runtime installed on your machine and optionally setup in your facourite IDE.
- A Telegram account.
Register a Telegram bot
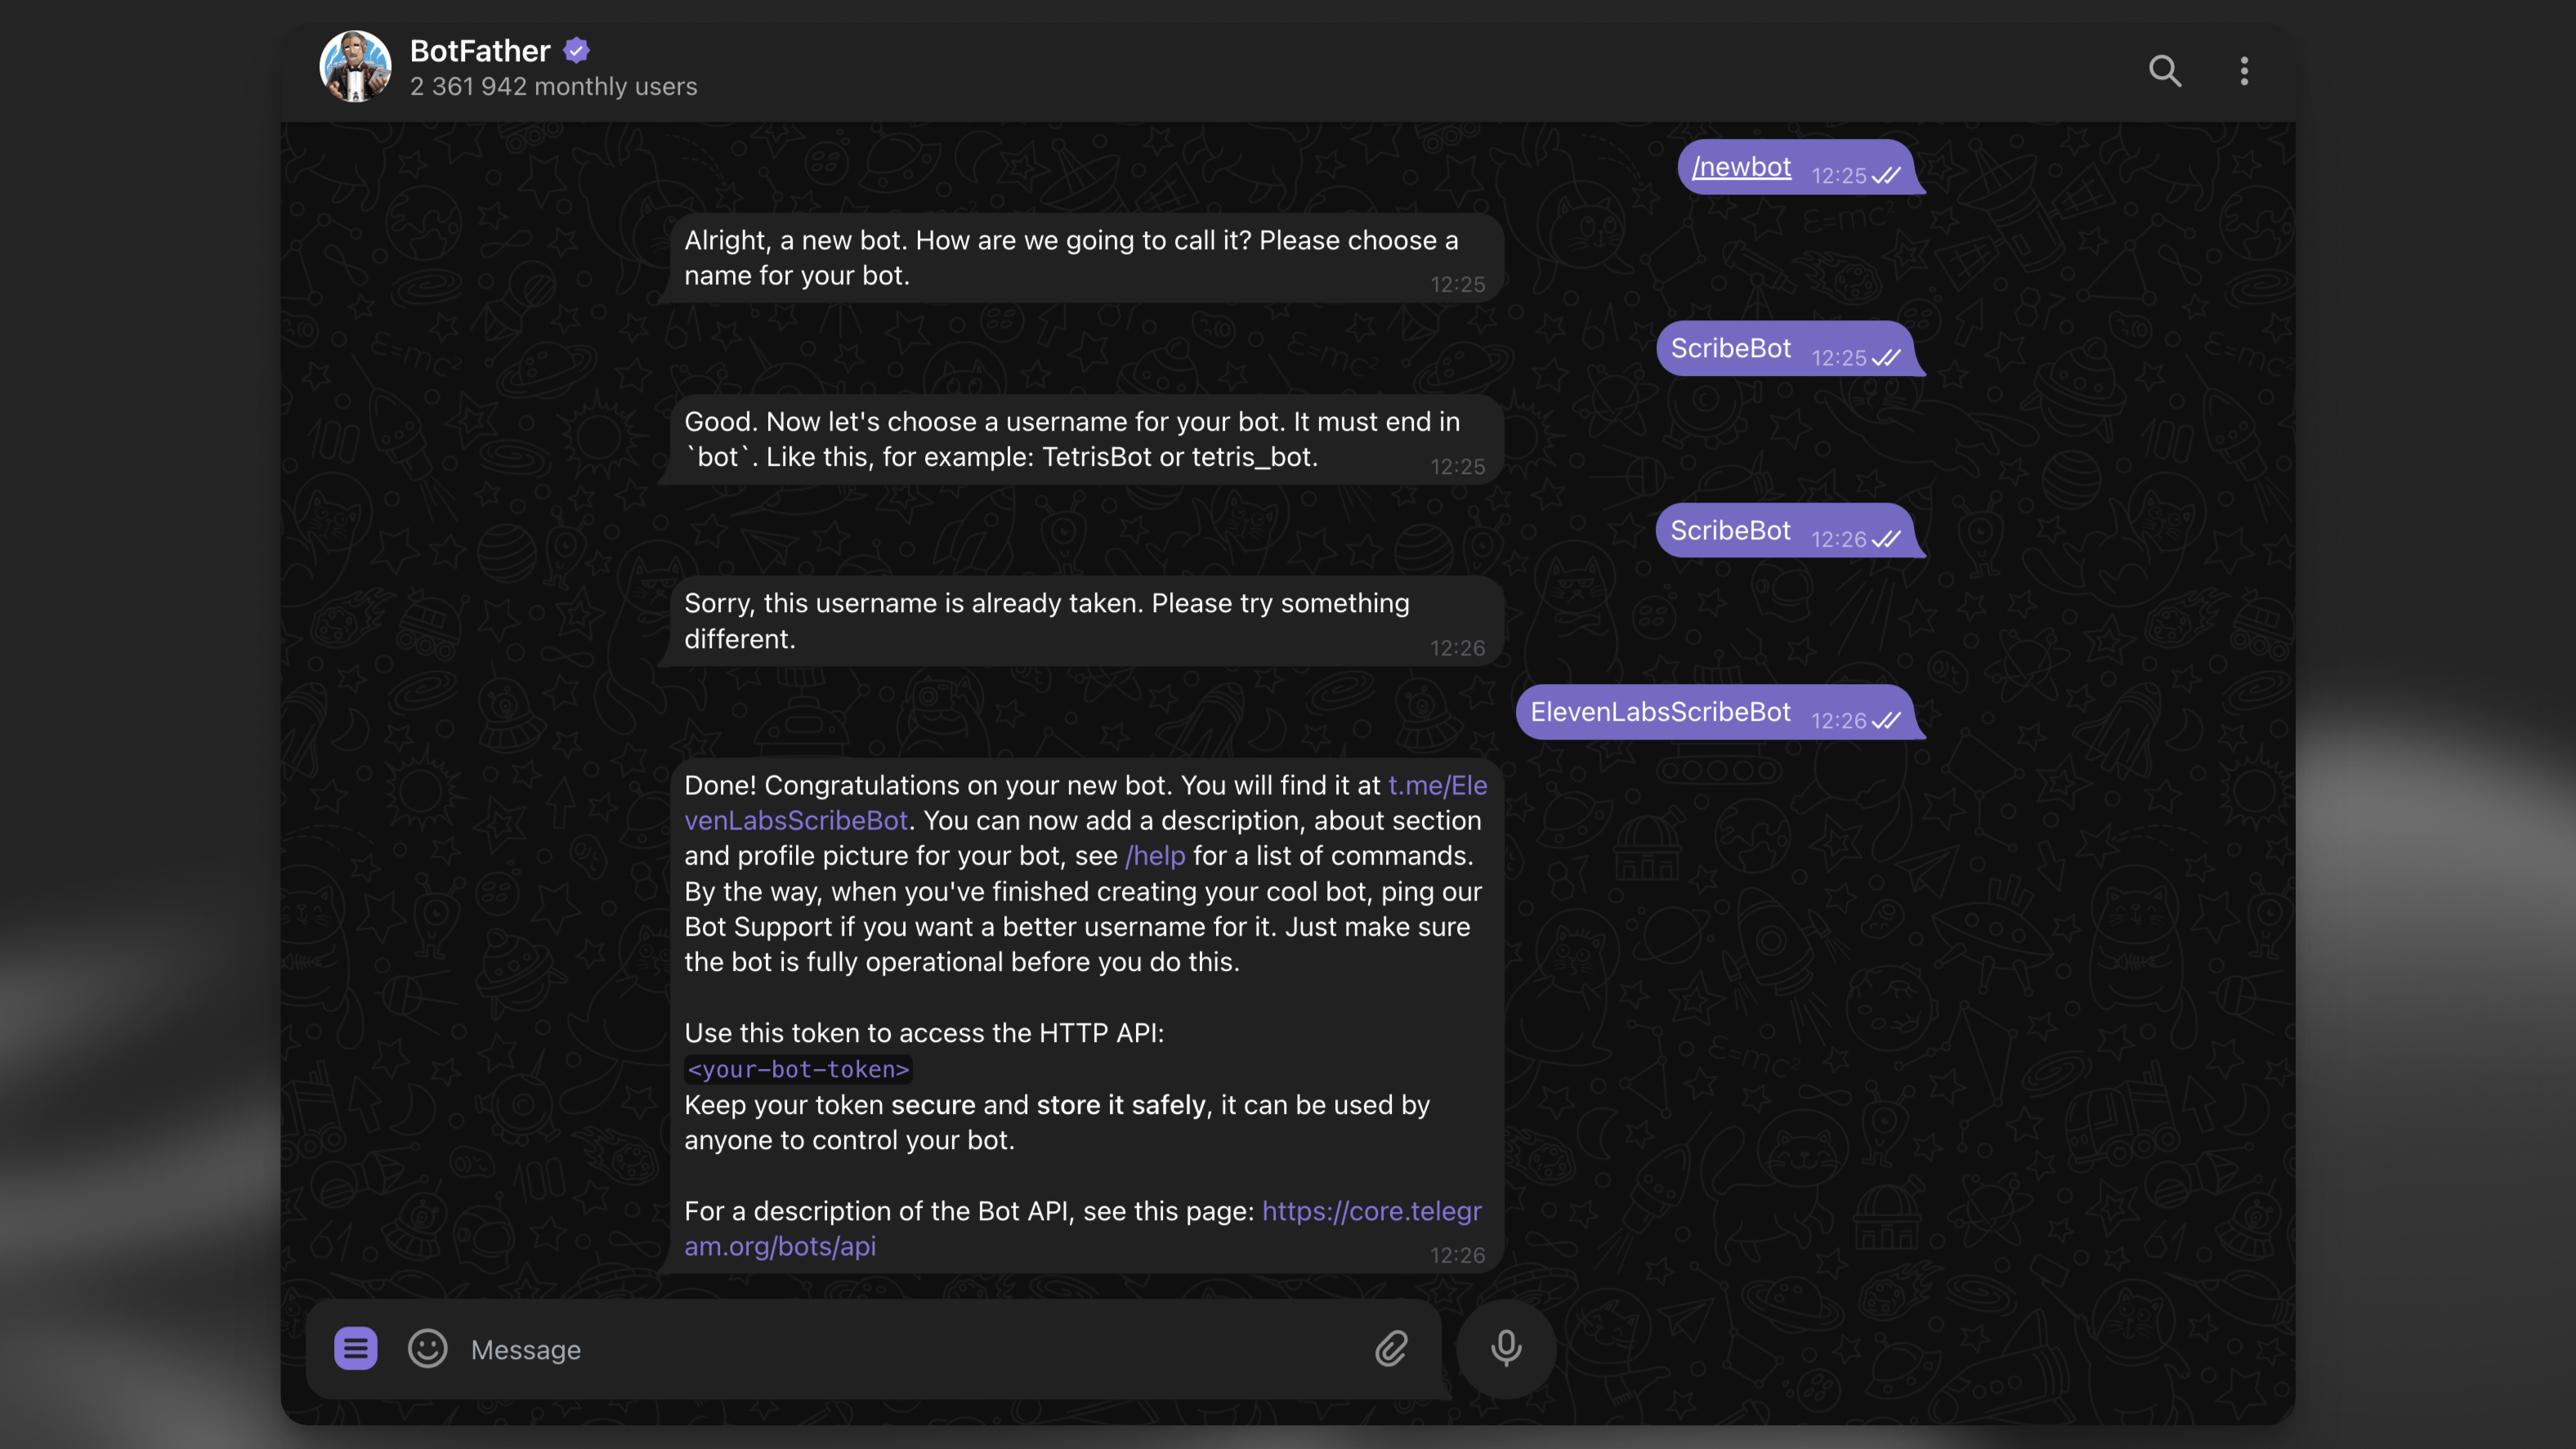
Section titled “Register a Telegram bot”Use the BotFather to create a new Telegram bot. Run the /newbot command and follow the instructions to create a new bot. At the end, you will receive your secret bot token. Note it down securely for the next step.
Create a Supabase project locally
Section titled “Create a Supabase project locally”After installing the Supabase CLI, run the following command to create a new Supabase project locally:
supabase initCreate a database table to log the transcription results
Section titled “Create a database table to log the transcription results”Next, create a new database table to log the transcription results:
supabase migrations new initThis will create a new migration file in the supabase/migrations directory. Open the file and add the following SQL:
CREATE TABLE IF NOT EXISTS transcription_logs (
  id BIGSERIAL PRIMARY KEY,
  file_type VARCHAR NOT NULL,
  duration INTEGER NOT NULL,
  chat_id BIGINT NOT NULL,
  message_id BIGINT NOT NULL,
  username VARCHAR,
  transcript TEXT,
  language_code VARCHAR,
  created_at TIMESTAMP WITH TIME ZONE DEFAULT CURRENT_TIMESTAMP,
  error TEXT
);

ALTER TABLE transcription_logs ENABLE ROW LEVEL SECURITY;
Create a Supabase Edge Function to handle Telegram webhook requests
Section titled “Create a Supabase Edge Function to handle Telegram webhook requests”Next, create a new Edge Function to handle Telegram webhook requests:
supabase functions new scribe-botIf you’re using VS Code or Cursor, select y when the CLI prompts “Generate VS Code settings for Deno? [y/N]”!
Set up the environment variables
Section titled “Set up the environment variables”Within the supabase/functions directory, create a new .env file and add the following variables:
# Find / create an API key at https://elevenlabs.io/app/settings/api-keys
ELEVENLABS_API_KEY=your_api_key

# The bot token you received from the BotFather.
TELEGRAM_BOT_TOKEN=your_bot_token

# A random secret chosen by you to secure the function.
FUNCTION_SECRET=random_secret
Dependencies
Section titled “Dependencies”The project uses a couple of dependencies:
- The open-source grammY Framework to handle the Telegram webhook requests.
- The @supabase/supabase-js library to interact with the Supabase database.
- The ElevenLabs JavaScript SDK to interact with the speech-to-text API.
Since Supabase Edge Function uses the Deno runtime, you don’t need to install the dependencies, rather you can import them via the npm: prefix.
Code the Telegram Bot
Section titled “Code the Telegram Bot”In your newly created scribe-bot/index.ts file, add the following code:
import { Bot, webhookCallback } from "https://deno.land/x/grammy@v1.34.0/mod.ts";
import "jsr:@supabase/functions-js/edge-runtime.d.ts";
import { createClient } from "jsr:@supabase/supabase-js@2";
import { ElevenLabsClient } from "npm:elevenlabs@1.50.5";

console.log(`Function "elevenlabs-scribe-bot" up and running!`);

const elevenlabs = new ElevenLabsClient({
  apiKey: Deno.env.get("ELEVENLABS_API_KEY") || "",
});

const supabase = createClient(
  Deno.env.get("SUPABASE_URL") || "",
  Deno.env.get("SUPABASE_SERVICE_ROLE_KEY") || ""
);

async function scribe({
  fileURL,
  fileType,
  duration,
  chatId,
  messageId,
  username,
}: {
  fileURL: string;
  fileType: string;
  duration: number;
  chatId: number;
  messageId: number;
  username: string;
}) {
  let transcript: string | null = null;
  let languageCode: string | null = null;
  let errorMsg: string | null = null;
  try {
    const sourceFileArrayBuffer = await fetch(fileURL).then((res) => res.arrayBuffer());
    const sourceBlob = new Blob([sourceFileArrayBuffer], {
      type: fileType,
    });

    const scribeResult = await elevenlabs.speechToText.convert({
      file: sourceBlob,
      model_id: "scribe_v2",
      tag_audio_events: false,
    });

    transcript = scribeResult.text;
    languageCode = scribeResult.language_code;

    // Reply to the user with the transcript
    await bot.api.sendMessage(chatId, transcript, {
      reply_parameters: { message_id: messageId },
    });
  } catch (error) {
    errorMsg = error.message;
    console.log(errorMsg);
    await bot.api.sendMessage(chatId, "Sorry, there was an error. Please try again.", {
      reply_parameters: { message_id: messageId },
    });
  }
  // Write log to Supabase.
  const logLine = {
    file_type: fileType,
    duration,
    chat_id: chatId,
    message_id: messageId,
    username,
    language_code: languageCode,
    error: errorMsg,
  };
  console.log({ logLine });
  await supabase.from("transcription_logs").insert({ ...logLine, transcript });
}

const telegramBotToken = Deno.env.get("TELEGRAM_BOT_TOKEN");
const bot = new Bot(telegramBotToken || "");
const startMessage = `Welcome to the ElevenLabs Scribe Bot\\! I can transcribe speech in 90\\+ languages with super high accuracy\\!
    \nTry it out by sending or forwarding me a voice message, video, or audio file\\!
    \n[Learn more about Scribe](https://elevenlabs.io/speech-to-text) or [build your own bot](https://elevenlabs.io/developers/guides/cookbooks/speech-to-text/telegram-bot)\\!
  `;
bot.command("start", (ctx) => ctx.reply(startMessage.trim(), { parse_mode: "MarkdownV2" }));

bot.on([":voice", ":audio", ":video"], async (ctx) => {
  try {
    const file = await ctx.getFile();
    const fileURL = `https://api.telegram.org/file/bot${telegramBotToken}/${file.file_path}`;
    const fileMeta = ctx.message?.video ?? ctx.message?.voice ?? ctx.message?.audio;

    if (!fileMeta) {
      return ctx.reply("No video|audio|voice metadata found. Please try again.");
    }

    // Run the transcription in the background.
    EdgeRuntime.waitUntil(
      scribe({
        fileURL,
        fileType: fileMeta.mime_type!,
        duration: fileMeta.duration,
        chatId: ctx.chat.id,
        messageId: ctx.message?.message_id!,
        username: ctx.from?.username || "",
      })
    );

    // Reply to the user immediately to let them know we received their file.
    return ctx.reply("Received. Scribing...");
  } catch (error) {
    console.error(error);
    return ctx.reply(
      "Sorry, there was an error getting the file. Please try again with a smaller file!"
    );
  }
});

const handleUpdate = webhookCallback(bot, "std/http");

Deno.serve(async (req) => {
  try {
    const url = new URL(req.url);
    if (url.searchParams.get("secret") !== Deno.env.get("FUNCTION_SECRET")) {
      return new Response("not allowed", { status: 405 });
    }

    return await handleUpdate(req);
  } catch (err) {
    console.error(err);
  }
});
Code deep dive
Section titled “Code deep dive”There’s a couple of things worth noting about the code. Let’s step through it step by step.
Handling the incoming request
To handle the incoming request, use the
Deno.servehandler. The handler checks whether the request has the correct secret and then passes the request to thehandleUpdatefunction.TypeScript const handleUpdate = webhookCallback(bot, 'std/http'); Deno.serve(async (req) => { try { const url = new URL(req.url); if (url.searchParams.get('secret') !== Deno.env.get('FUNCTION_SECRET')) { return new Response('not allowed', { status: 405 }); } return await handleUpdate(req); } catch (err) { console.error(err); } });Handle voice, audio, and video messages
The grammY frameworks provides a convenient way to filter for specific message types. In this case, the bot is listening for voice, audio, and video messages.
Using the request context, the bot extracts the file metadata and then uses Supabase Background Tasks
EdgeRuntime.waitUntilto run the transcription in the background.This way you can provide an immediate response to the user and handle the transcription of the file in the background.
TypeScript bot.on([':voice', ':audio', ':video'], async (ctx) => { try { const file = await ctx.getFile(); const fileURL = `https://api.telegram.org/file/bot${telegramBotToken}/${file.file_path}`; const fileMeta = ctx.message?.video ?? ctx.message?.voice ?? ctx.message?.audio; if (!fileMeta) { return ctx.reply('No video|audio|voice metadata found. Please try again.'); } // Run the transcription in the background. EdgeRuntime.waitUntil( scribe({ fileURL, fileType: fileMeta.mime_type!, duration: fileMeta.duration, chatId: ctx.chat.id, messageId: ctx.message?.message_id!, username: ctx.from?.username || '', }) ); // Reply to the user immediately to let them know we received their file. return ctx.reply('Received. Scribing...'); } catch (error) { console.error(error); return ctx.reply( 'Sorry, there was an error getting the file. Please try again with a smaller file!' ); } });Transcription with the ElevenLabs API
Finally, in the background worker, the bot uses the ElevenLabs JavaScript SDK to transcribe the file. Once the transcription is complete, the bot replies to the user with the transcript and writes a log entry to the Supabase database using supabase-js.
TypeScript const elevenlabs = new ElevenLabsClient({ apiKey: Deno.env.get('ELEVENLABS_API_KEY') || '', }); const supabase = createClient( Deno.env.get('SUPABASE_URL') || '', Deno.env.get('SUPABASE_SERVICE_ROLE_KEY') || '' ); async function scribe({ fileURL, fileType, duration, chatId, messageId, username, }: { fileURL: string; fileType: string; duration: number; chatId: number; messageId: number; username: string; }) { let transcript: string | null = null; let languageCode: string | null = null; let errorMsg: string | null = null; try { const sourceFileArrayBuffer = await fetch(fileURL).then((res) => res.arrayBuffer()); const sourceBlob = new Blob([sourceFileArrayBuffer], { type: fileType, }); const scribeResult = await elevenlabs.speechToText.convert({ file: sourceBlob, model_id: 'scribe_v2', tag_audio_events: false, }); transcript = scribeResult.text; languageCode = scribeResult.language_code; // Reply to the user with the transcript await bot.api.sendMessage(chatId, transcript, { reply_parameters: { message_id: messageId }, }); } catch (error) { errorMsg = error.message; console.log(errorMsg); await bot.api.sendMessage(chatId, 'Sorry, there was an error. Please try again.', { reply_parameters: { message_id: messageId }, }); } // Write log to Supabase. const logLine = { file_type: fileType, duration, chat_id: chatId, message_id: messageId, username, language_code: languageCode, error: errorMsg, }; console.log({ logLine }); await supabase.from('transcription_logs').insert({ ...logLine, transcript }); }
Deploy to Supabase
Section titled “Deploy to Supabase”If you haven’t already, create a new Supabase account at database.new and link the local project to your Supabase account:
supabase linkApply the database migrations
Section titled “Apply the database migrations”Run the following command to apply the database migrations from the supabase/migrations directory:
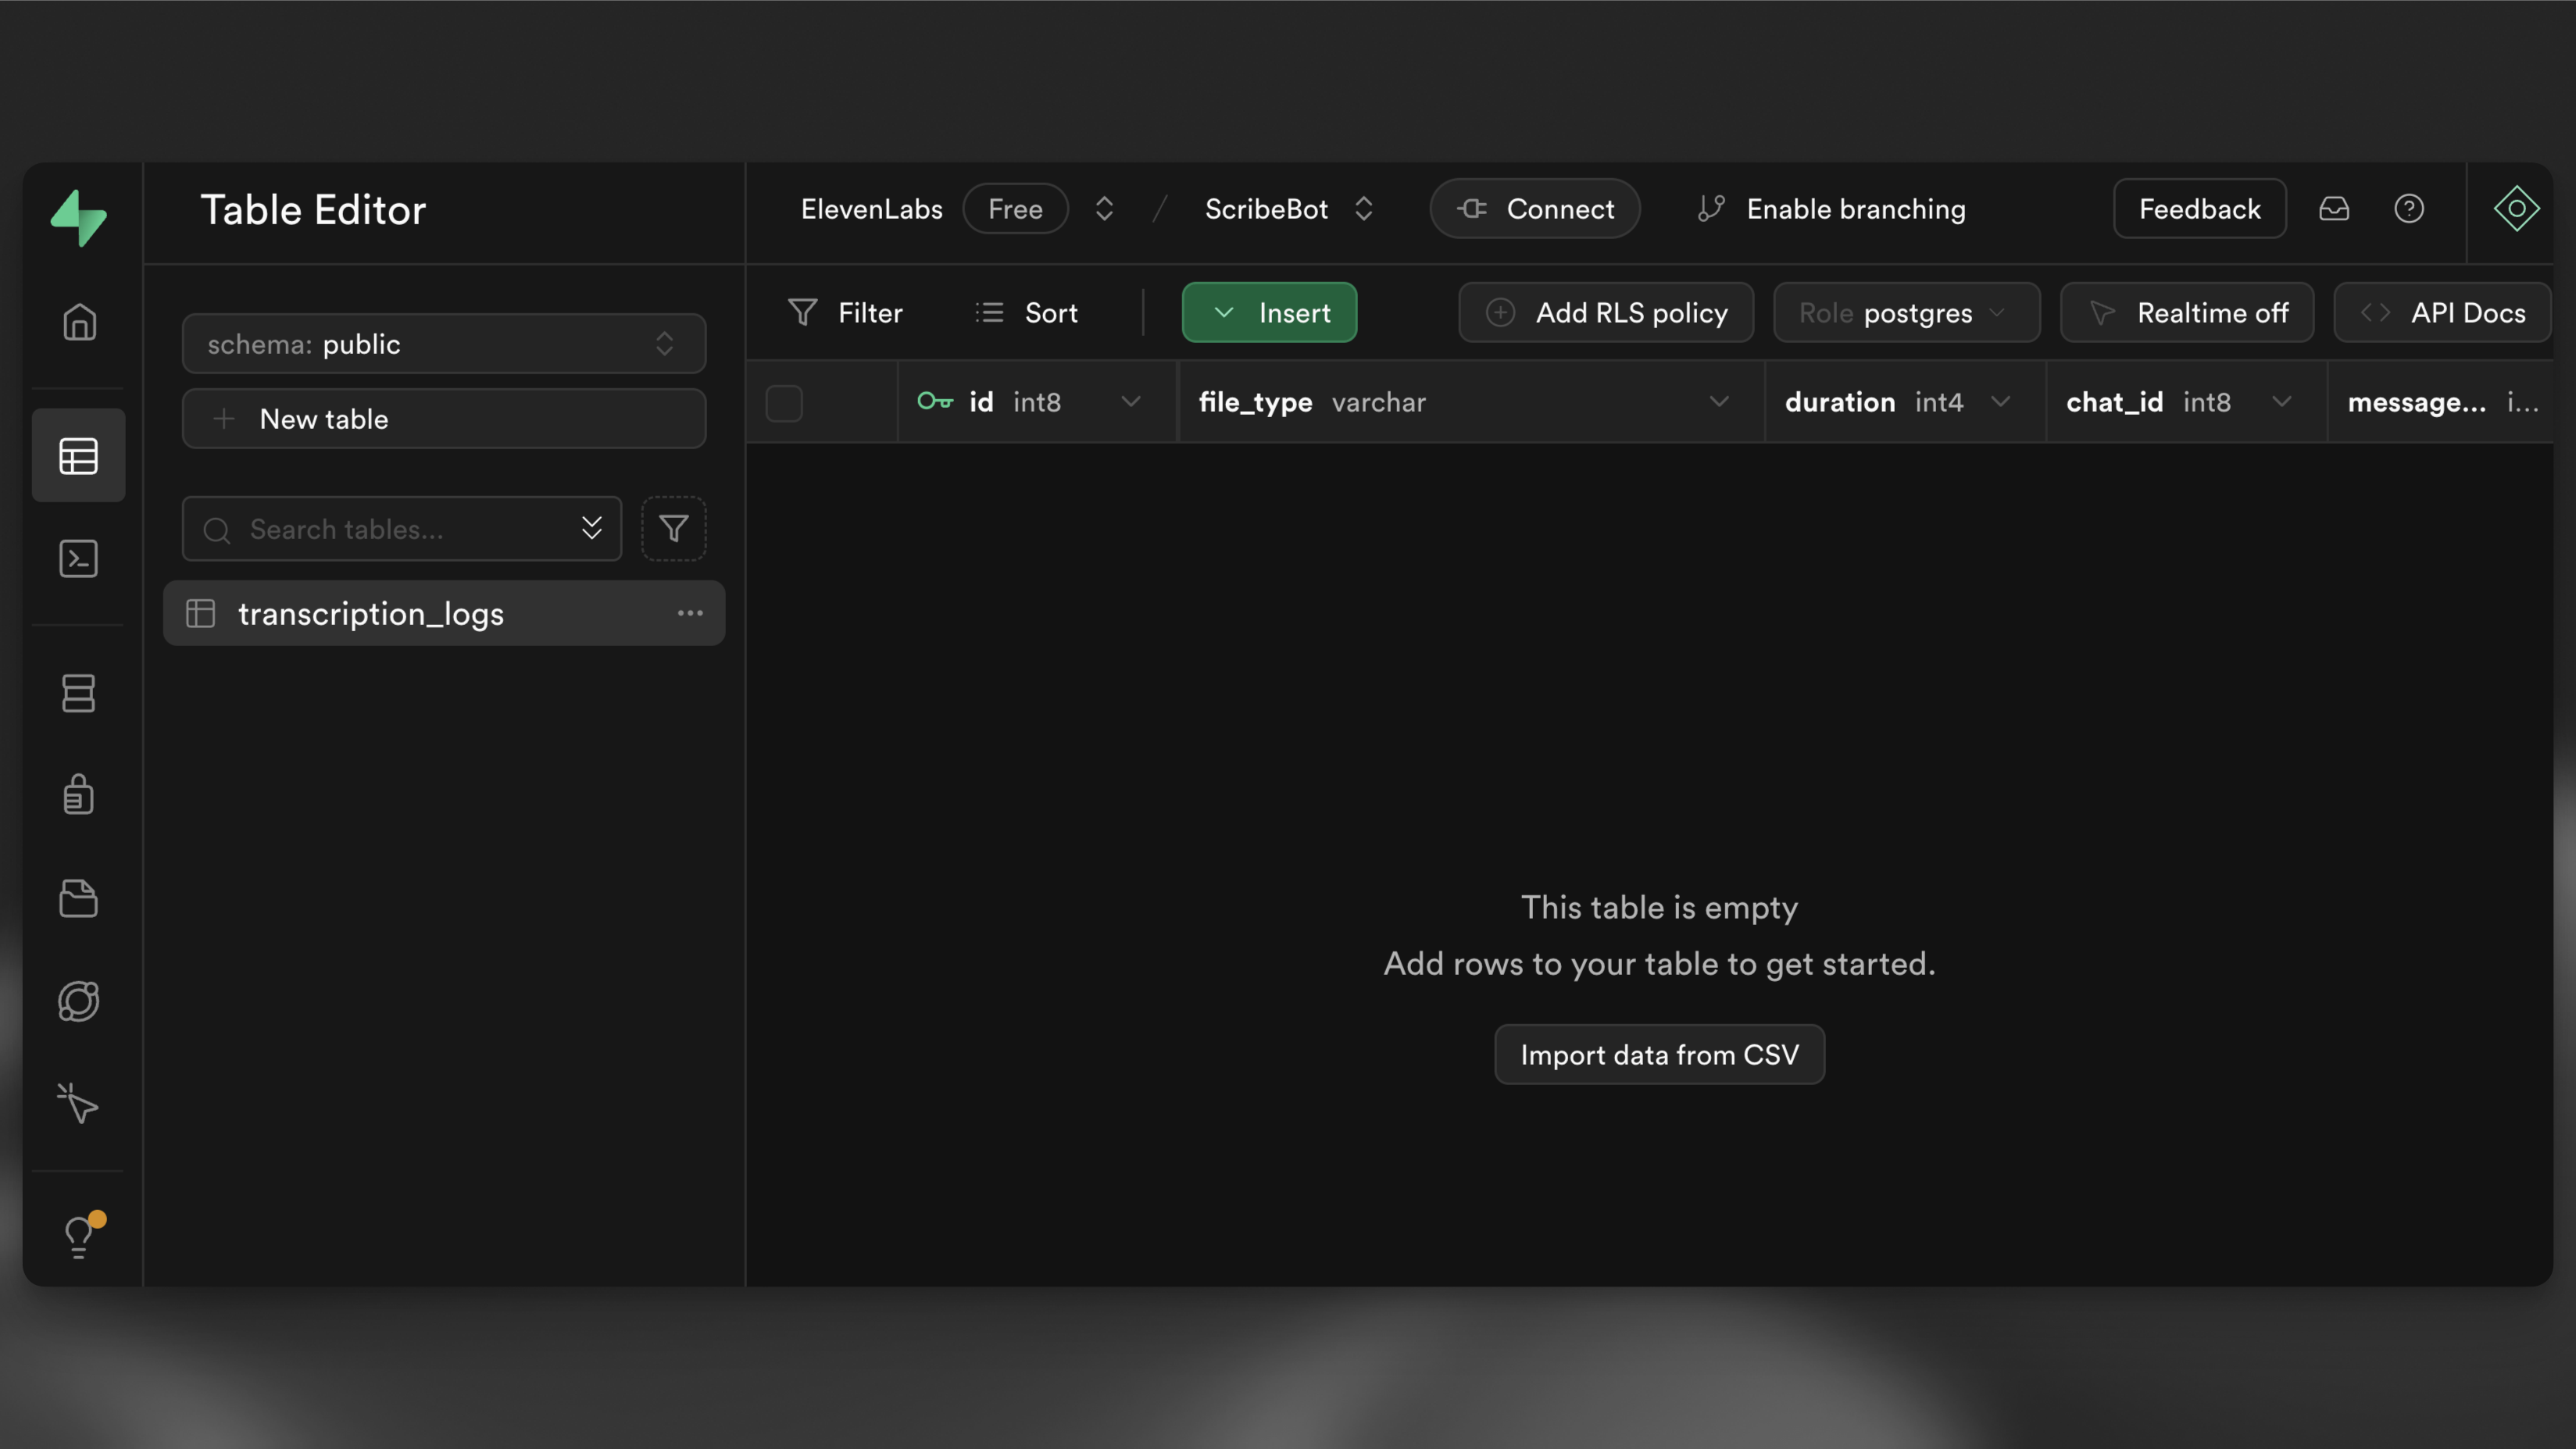
supabase db pushNavigate to the table editor in your Supabase dashboard and you should see and empty transcription_logs table.
Lastly, run the following command to deploy the Edge Function:
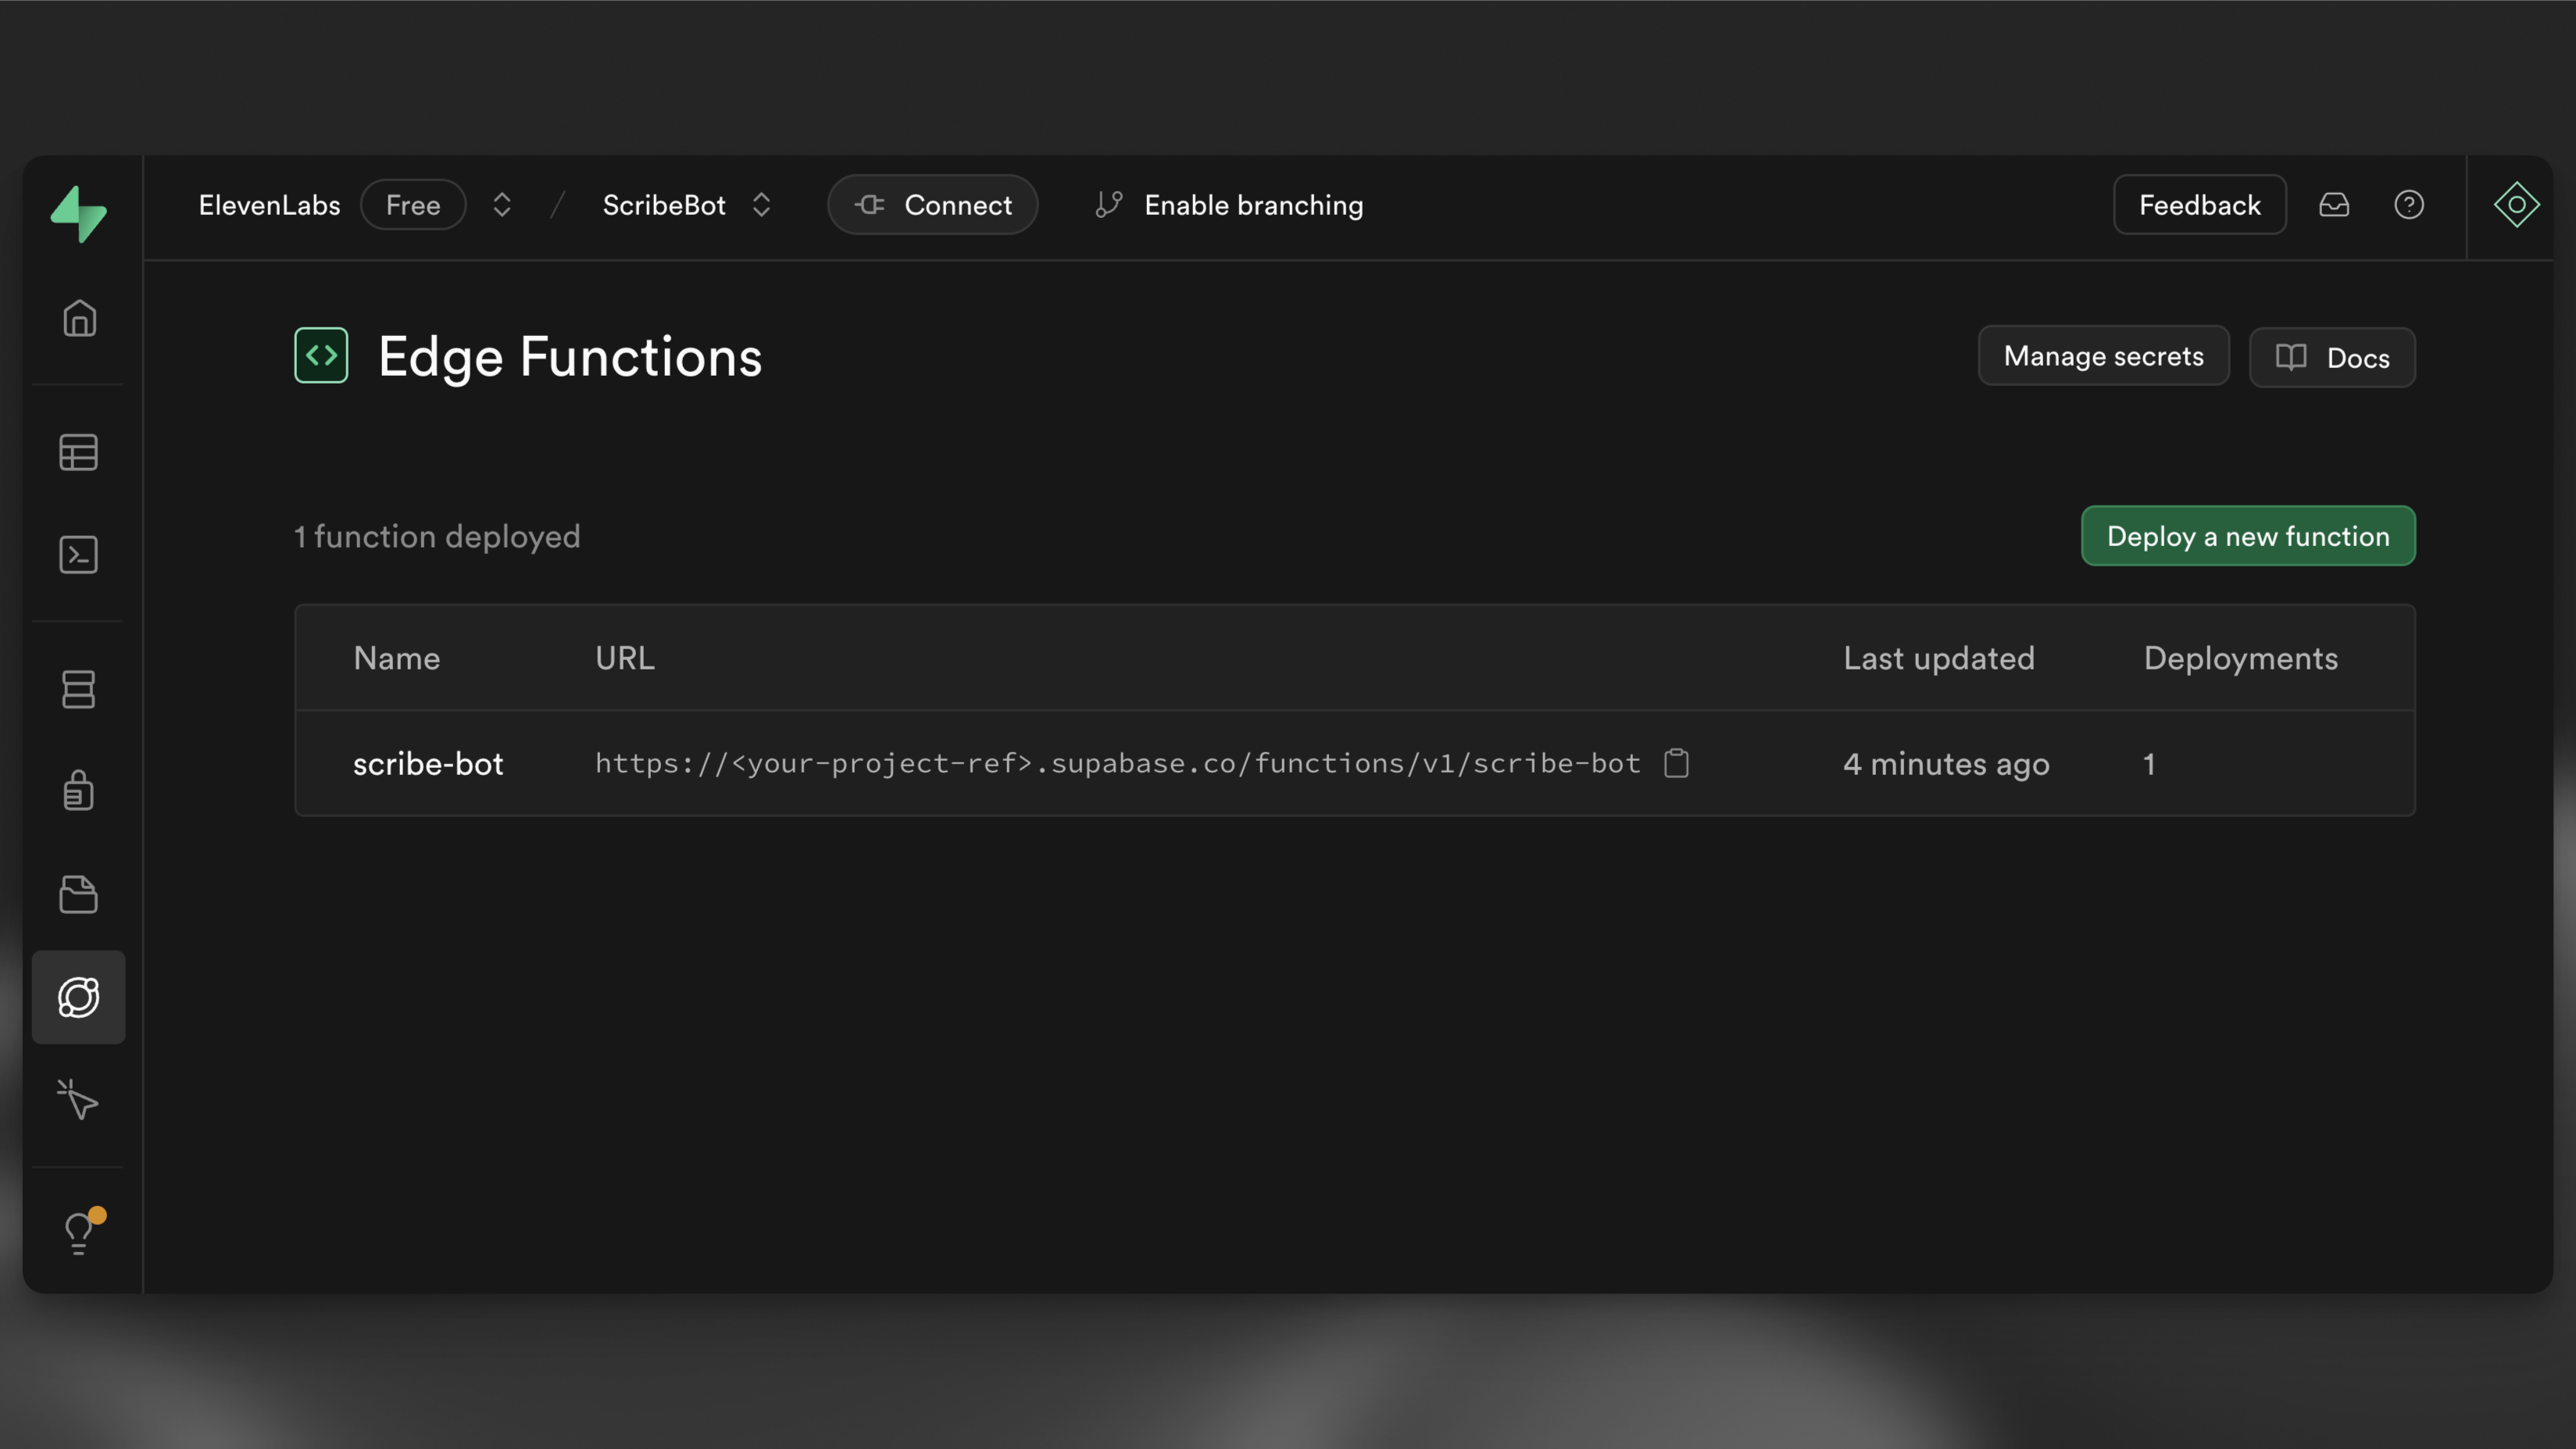
supabase functions deploy --no-verify-jwt scribe-botNavigate to the Edge Functions view in your Supabase dashboard and you should see the scribe-bot function deployed. Make a note of the function URL as you’ll need it later, it should look something like https://<project-ref>.functions.supabase.co/scribe-bot.
Set up the webhook
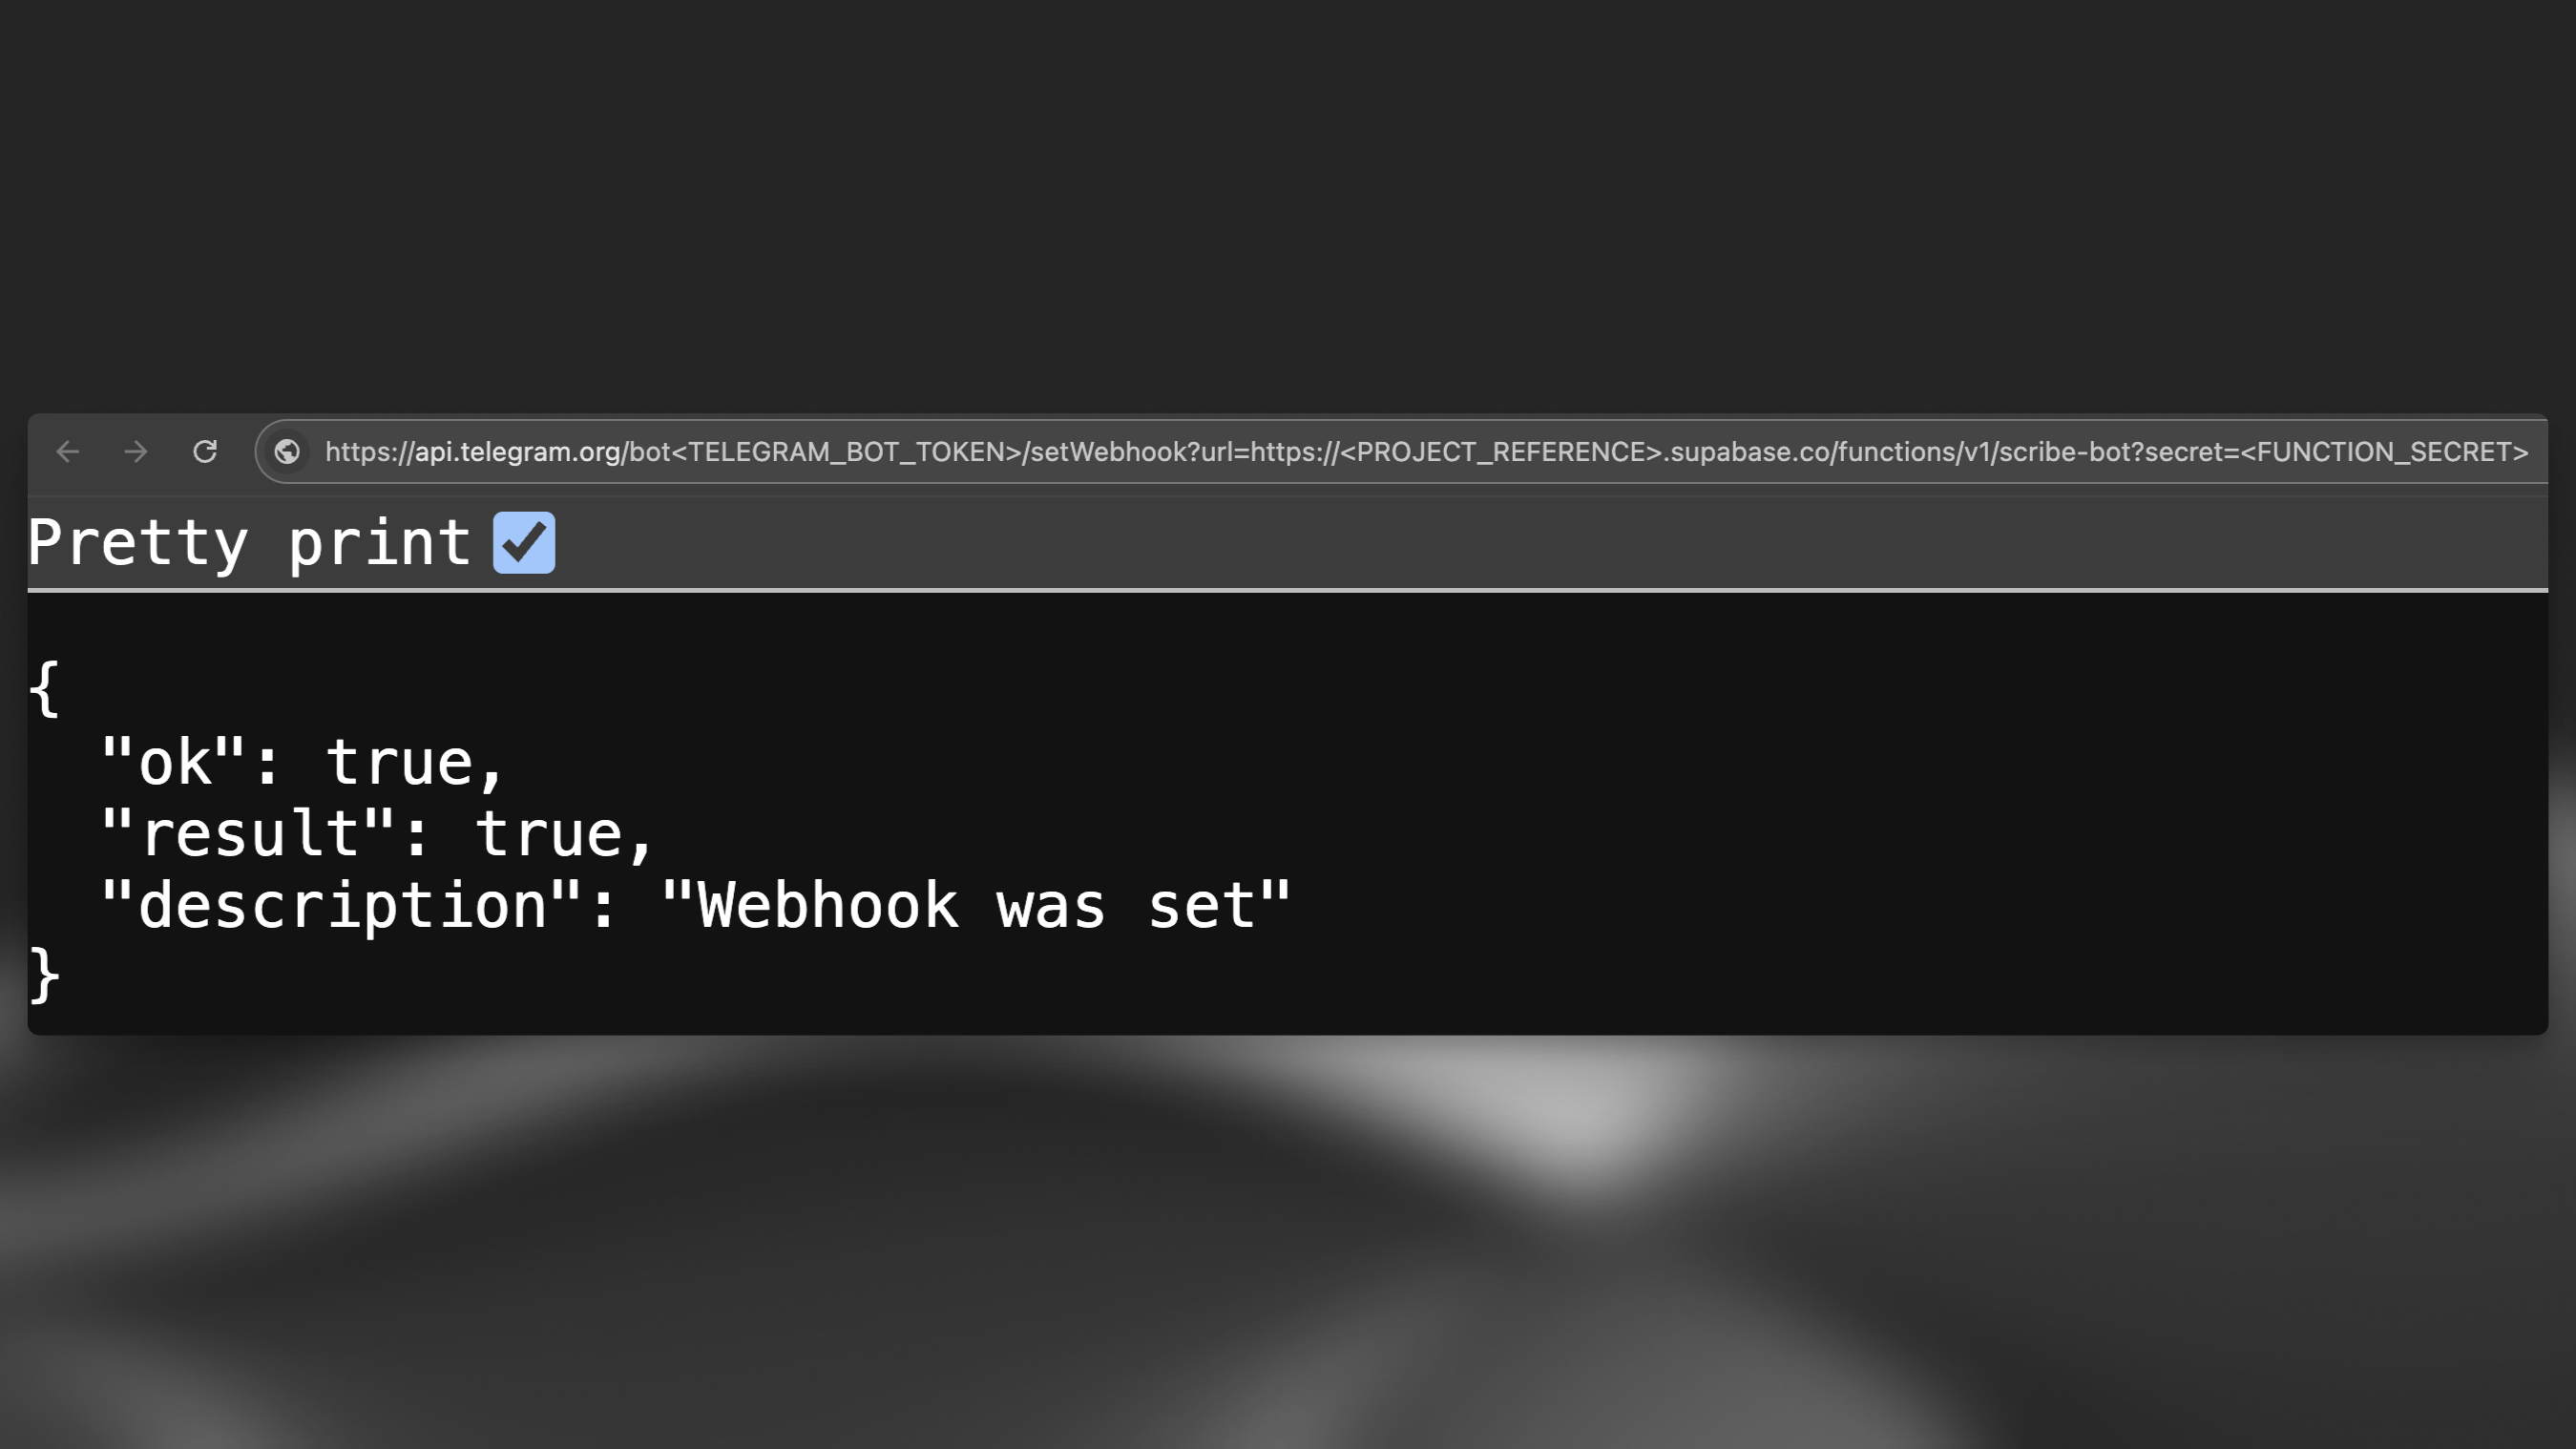
Section titled “Set up the webhook”Set your bot’s webhook url to https://<PROJECT_REFERENCE>.functions.supabase.co/telegram-bot (Replacing <...> with respective values). In order to do that, simply run a GET request to the following url (in your browser, for example):
https://api.telegram.org/bot<TELEGRAM_BOT_TOKEN>/setWebhook?url=https://<PROJECT_REFERENCE>.supabase.co/functions/v1/scribe-bot?secret=<FUNCTION_SECRET>Note that the FUNCTION_SECRET is the secret you set in your .env file.
Set the function secrets
Section titled “Set the function secrets”Now that you have all your secrets set locally, you can run the following command to set the secrets in your Supabase project:
supabase secrets set --env-file supabase/functions/.envTest the bot
Section titled “Test the bot”Finally you can test the bot by sending it a voice message, audio or video file.
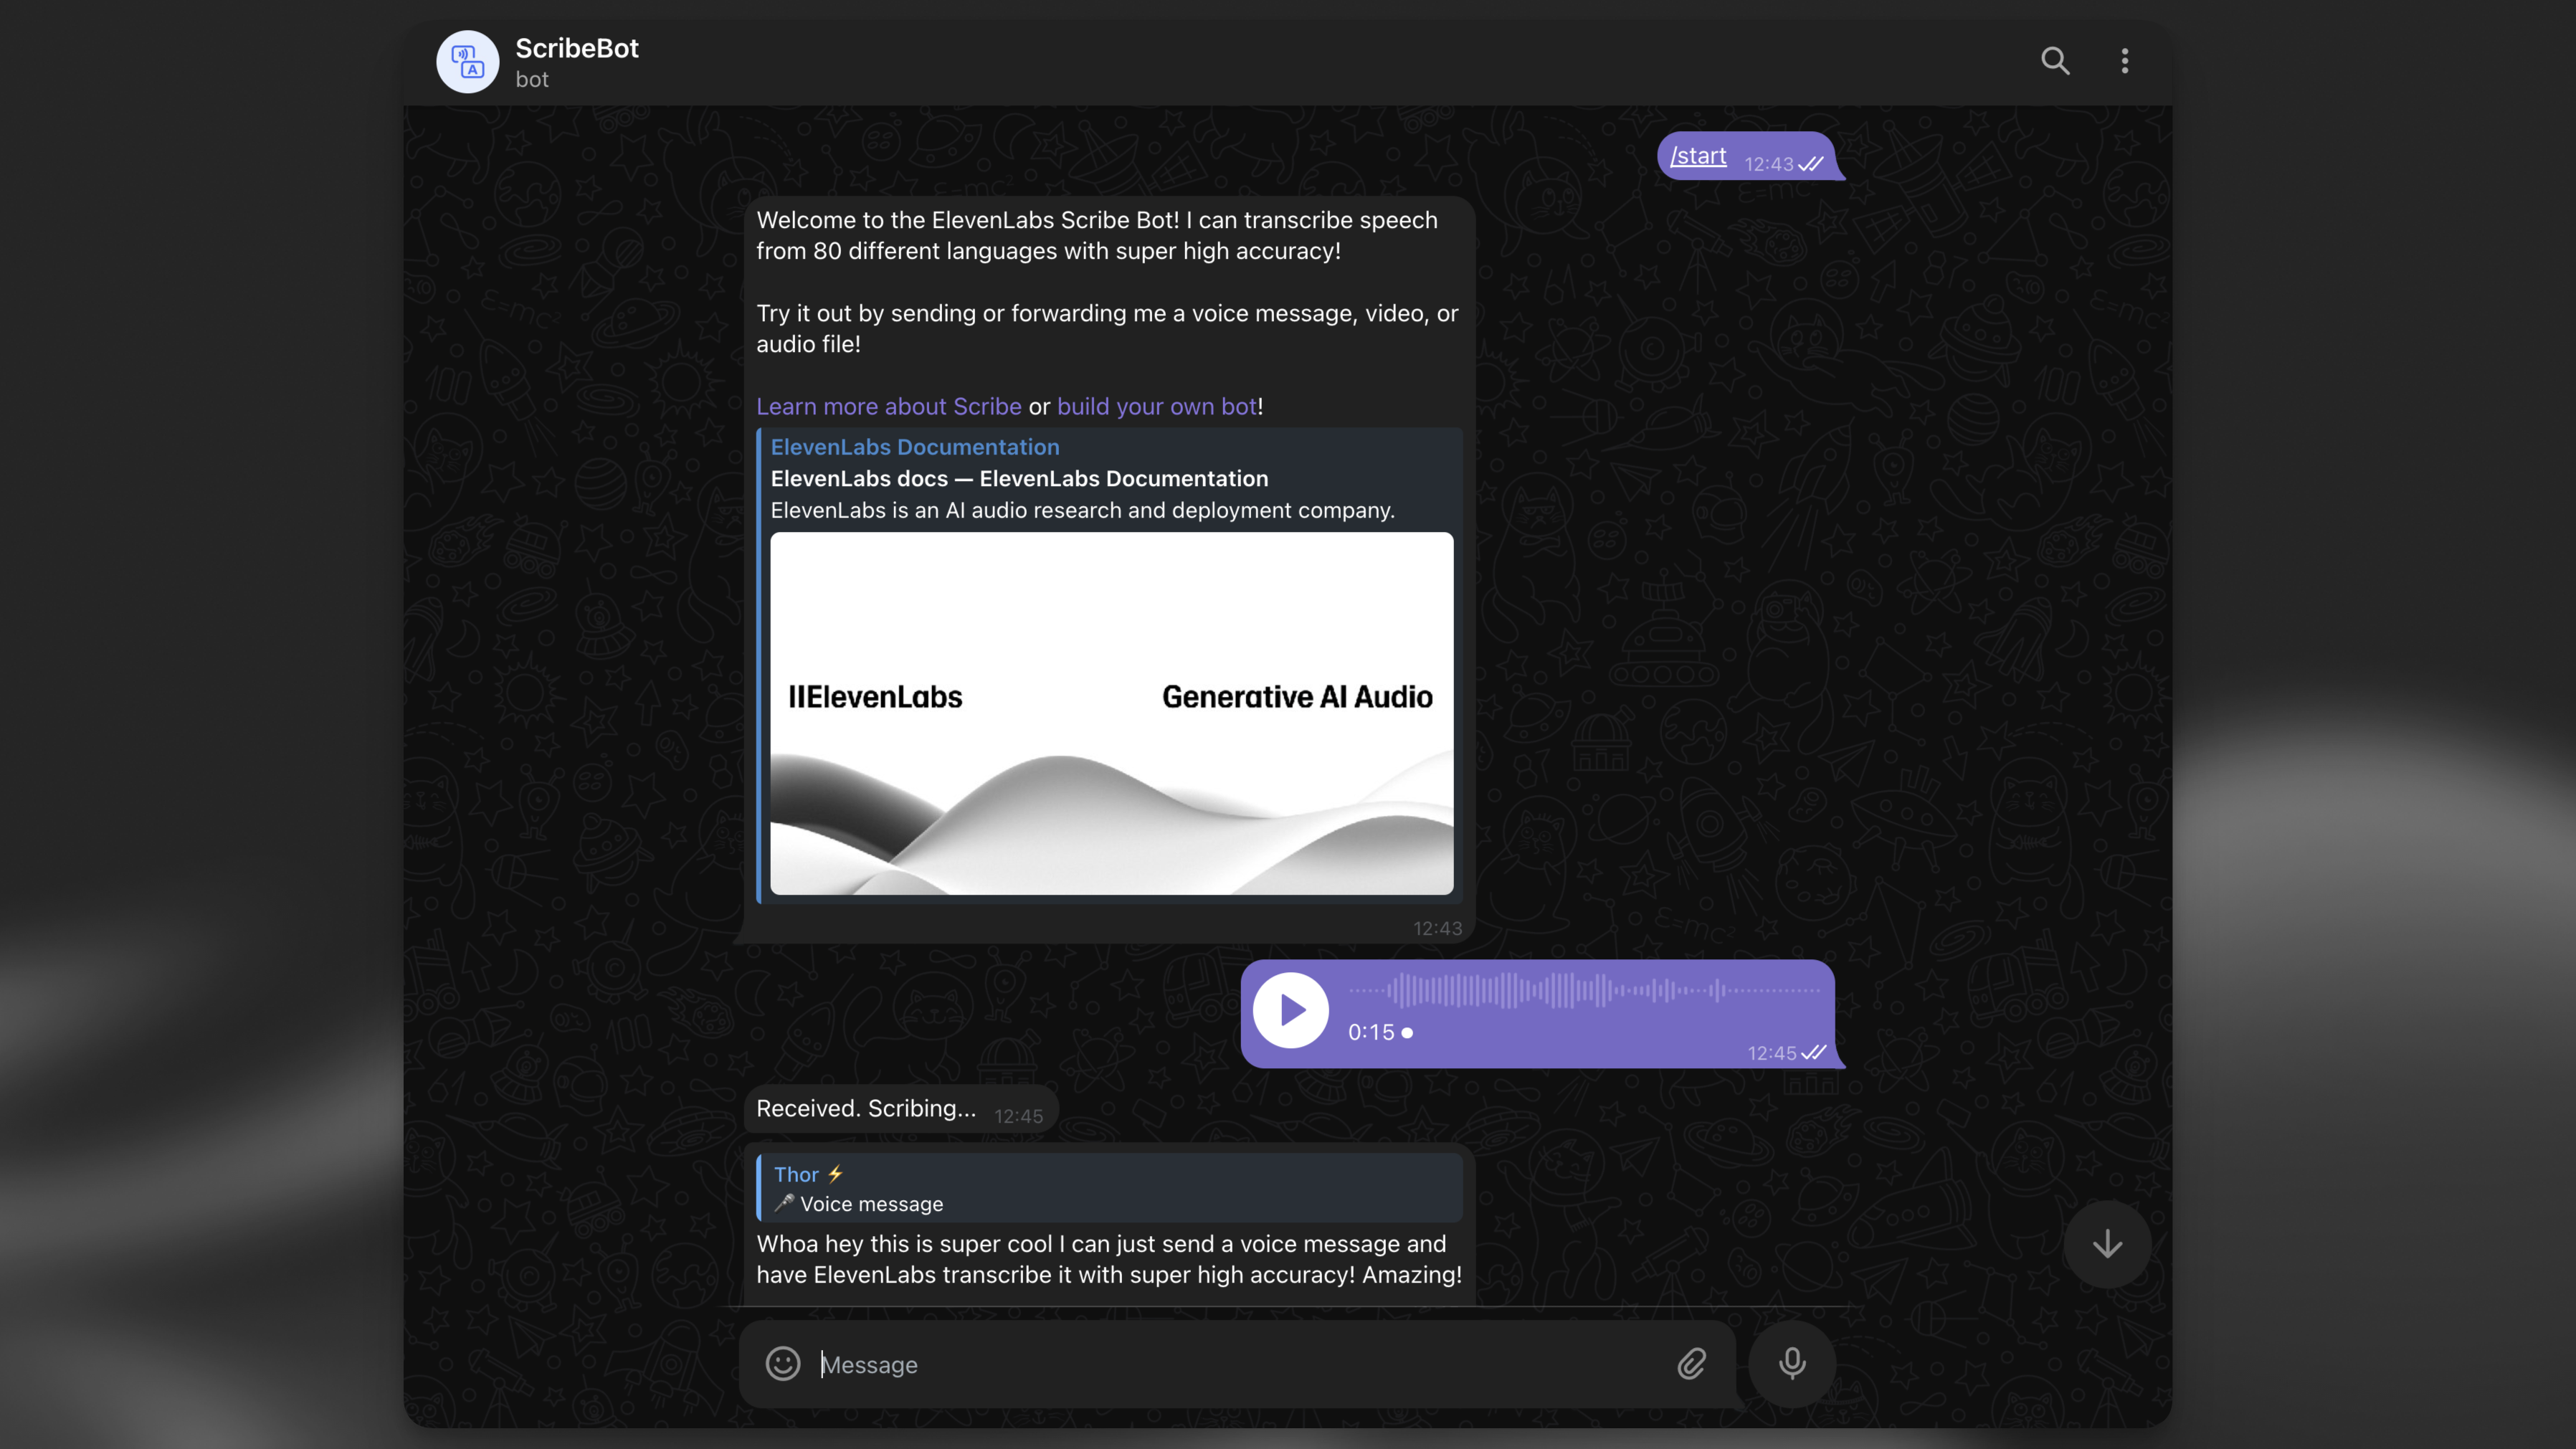
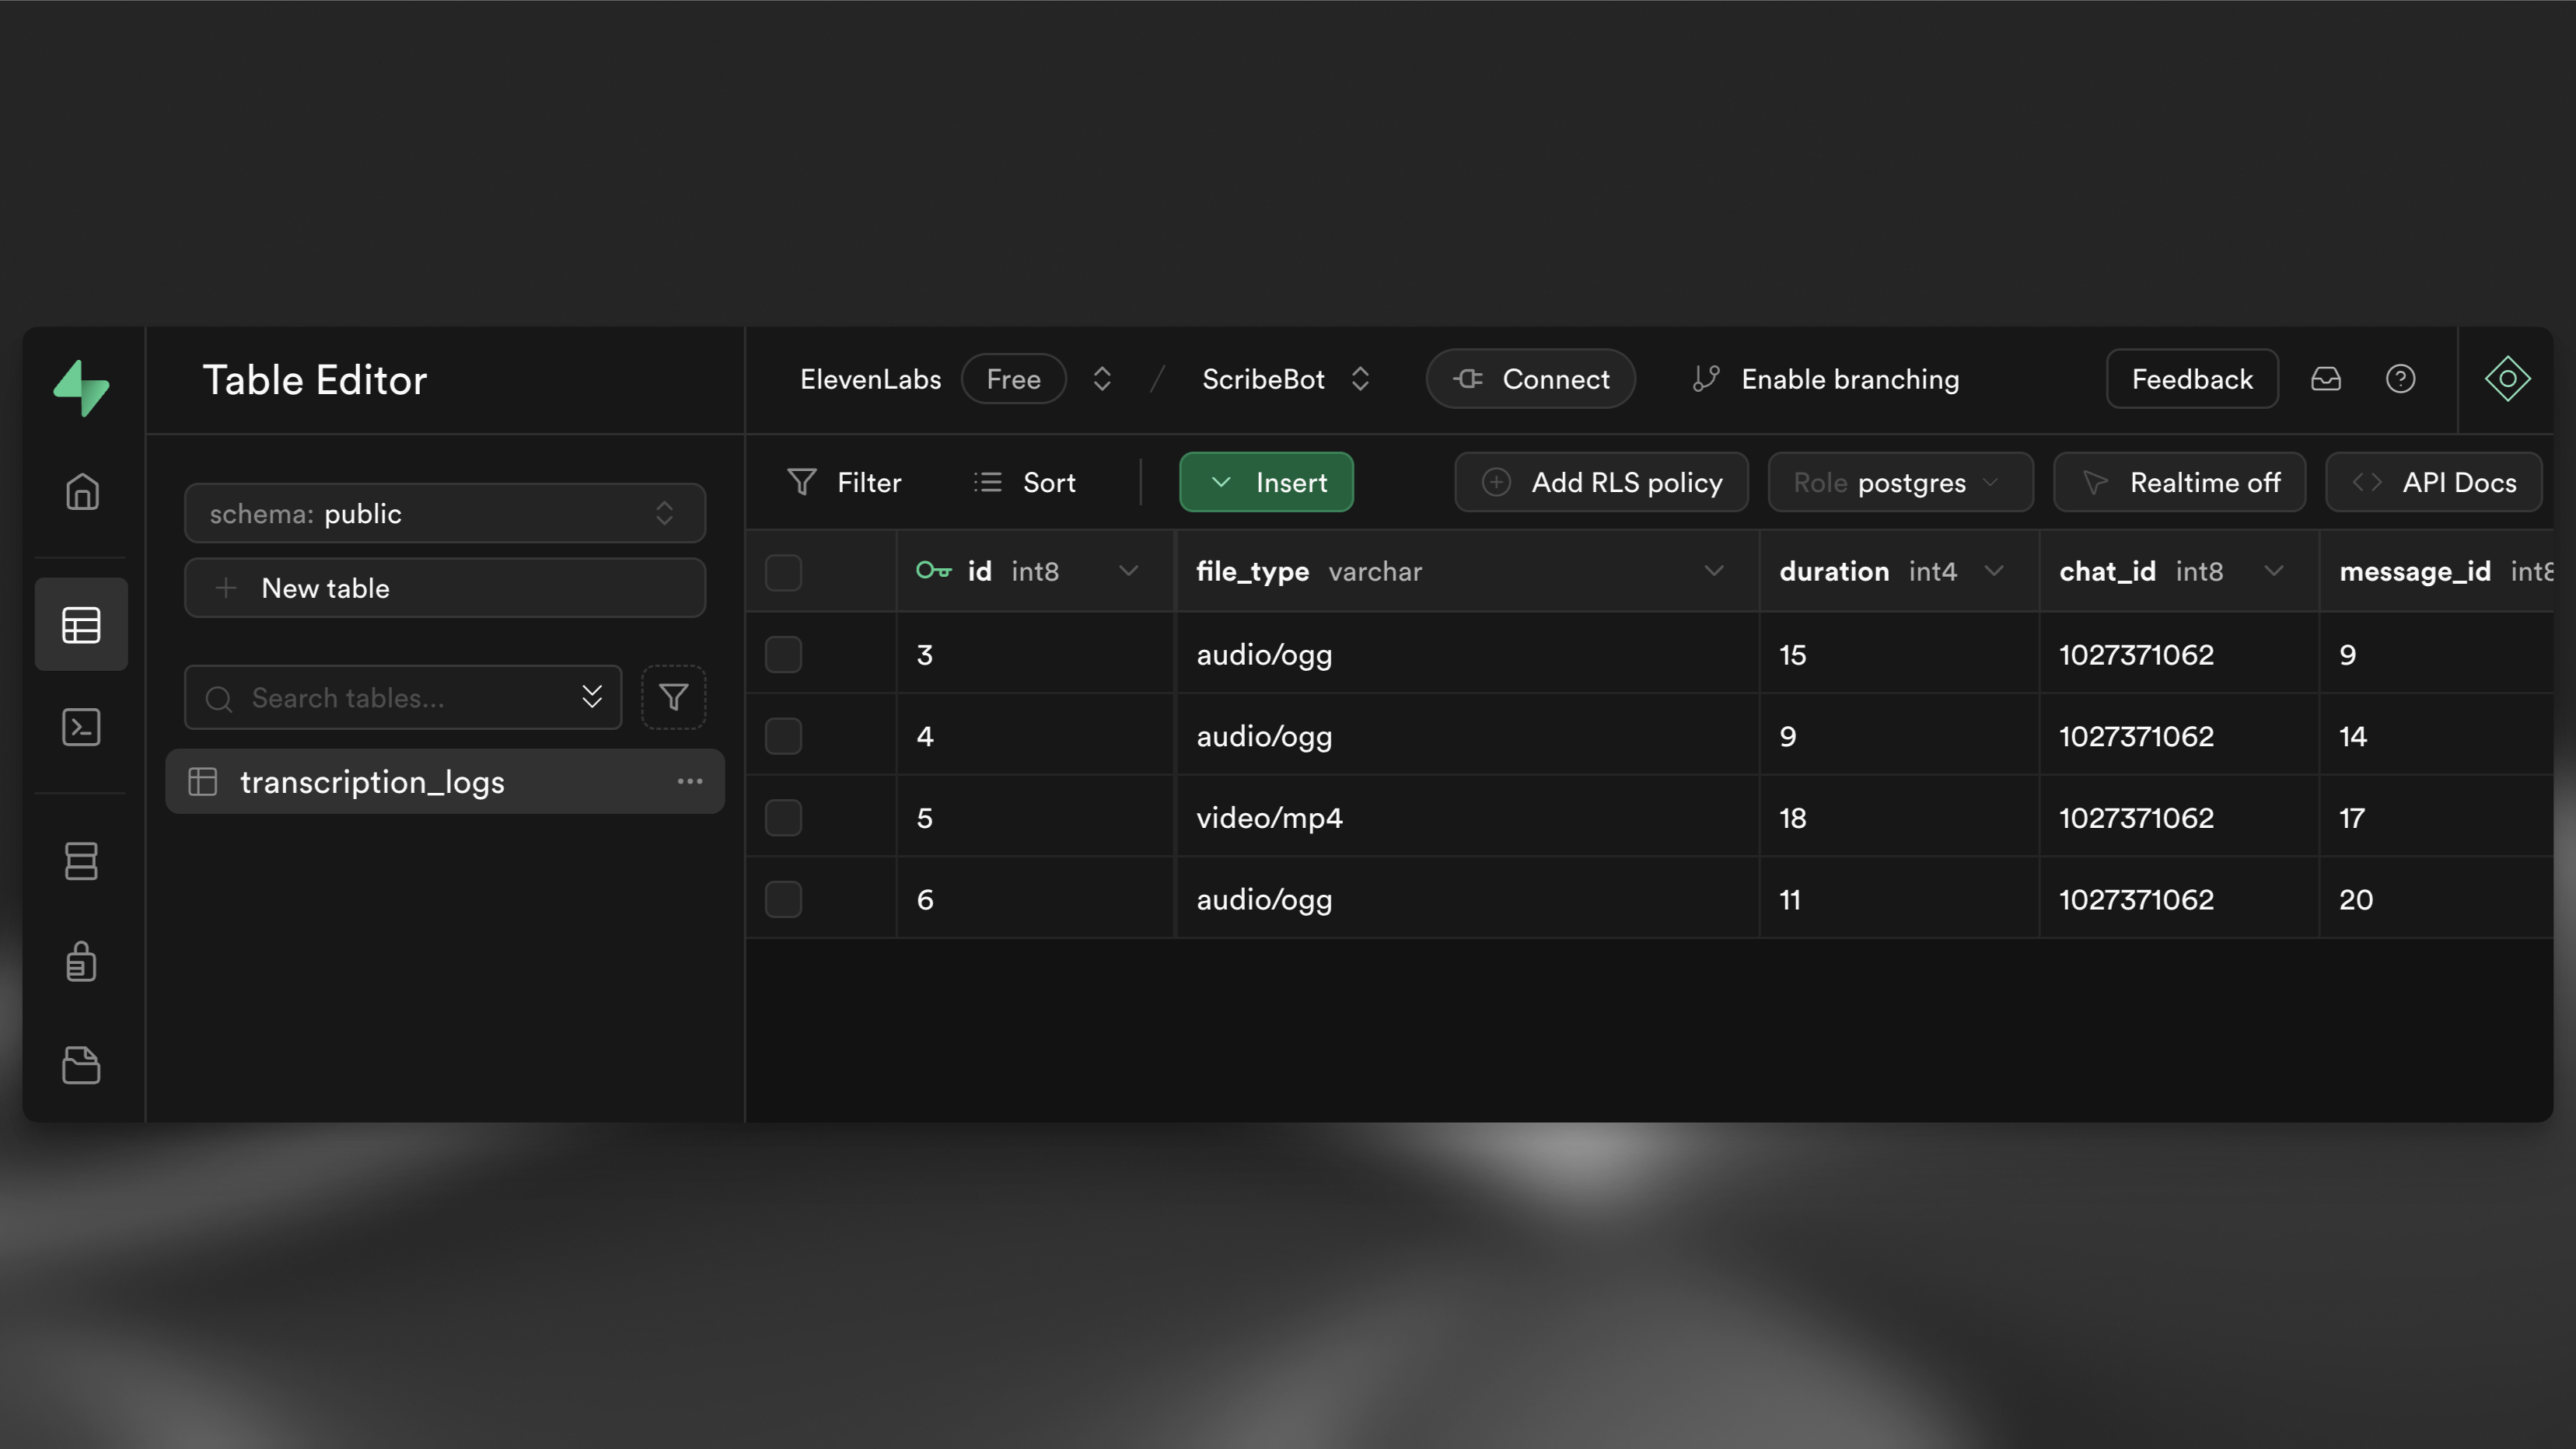
After you see the transcript as a reply, navigate back to your table editor in the Supabase dashboard and you should see a new row in your transcription_logs table.