ElevenCreative Studio
Create video and audio projects with Studio.
Overview
Section titled “Overview”ElevenCreative Studio 4.0 uses a prompt-first workflow for creating video and audio projects. Describe the project you want to create, and Studio Agent creates a first draft.
Video projects use a Library of reusable assets, including generated video clips, images, and speech. Arrange these assets on a multi-track timeline. Use the Library, Script, and Captions panels to manage assets and control narration, music, and sound effects.
Share the project with your team to collect comments and feedback.
Create a new project
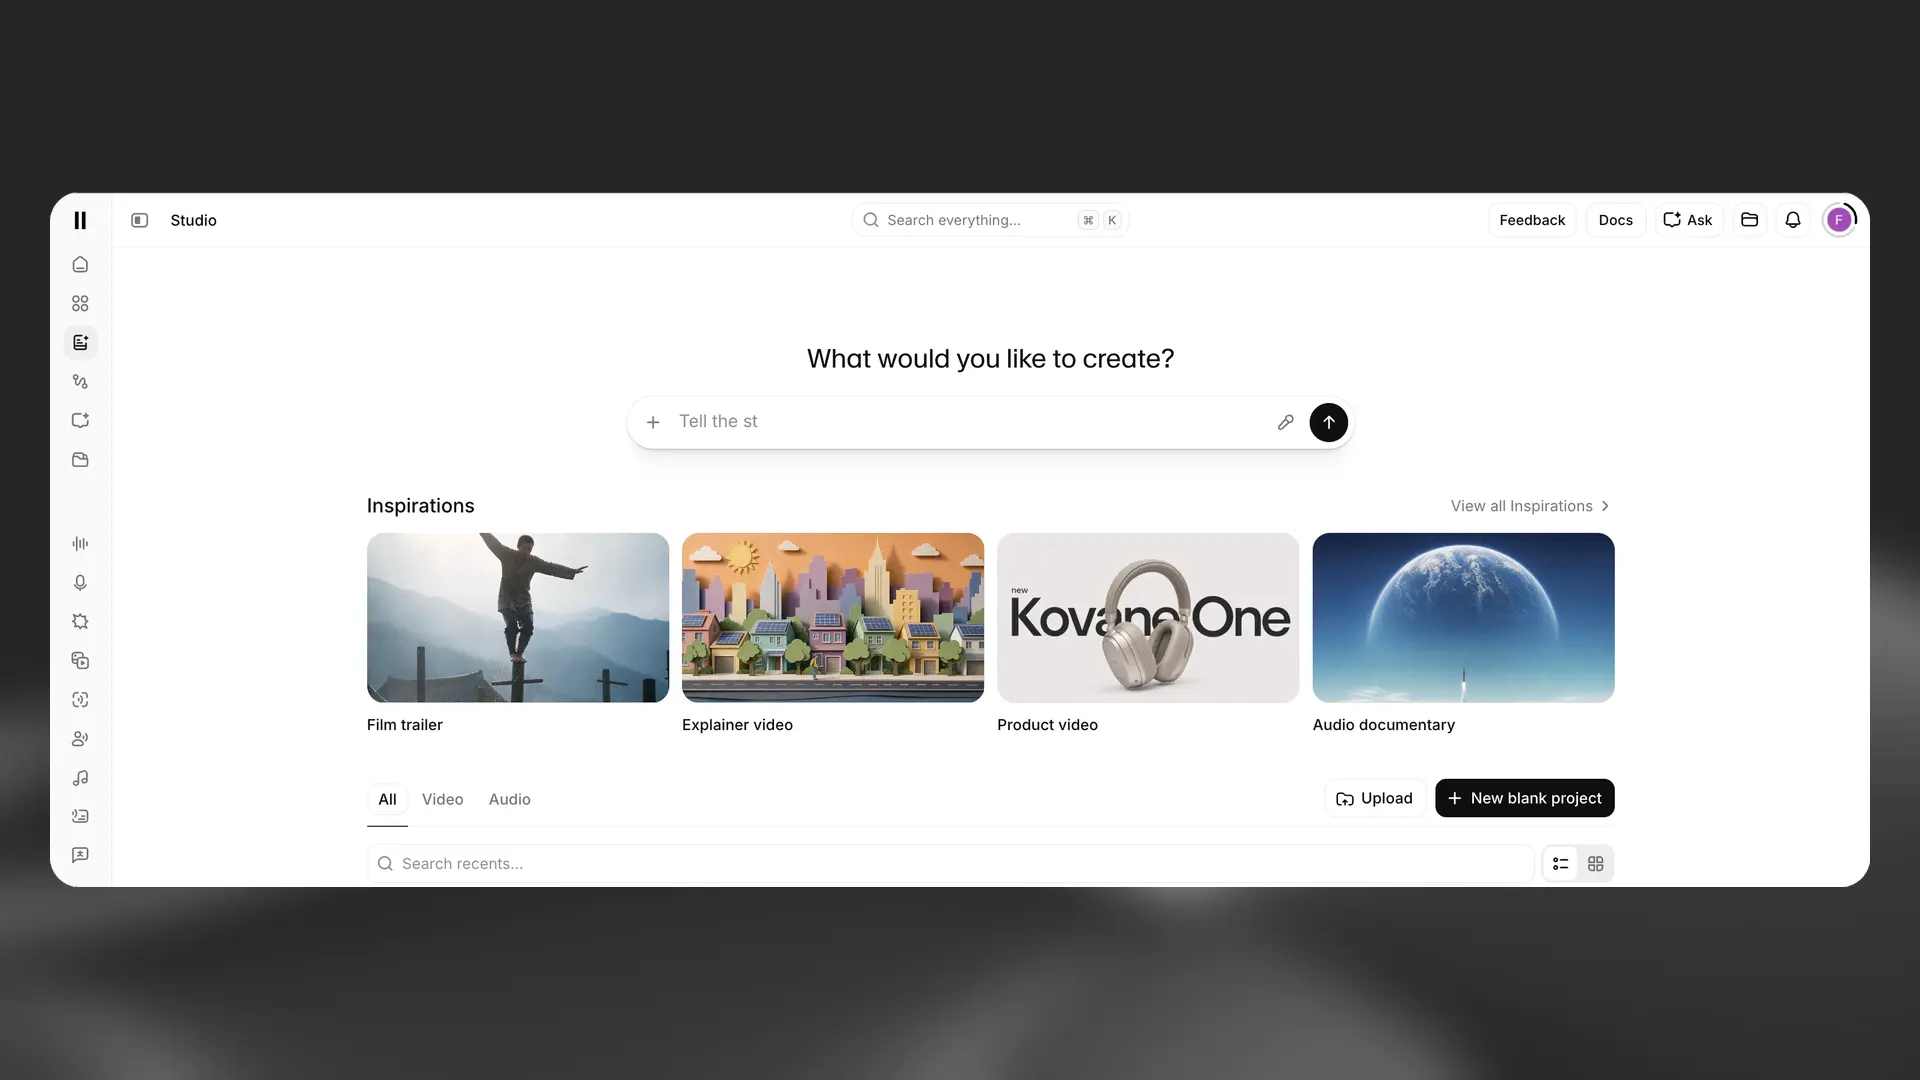
Describe the project in the prompt bar, or select an Inspiration card to start from an example. To start with your own script or document, select Upload.
Select settings
Configure the project settings in the dialog, then select Create.
Enhance your project
Add video, narration, music, and sound effects with the timeline editor.
Collaborate with others
Select Share to send the project to teammates and collect feedback.
Export your project
Select Export to export the project as audio or video.
Starting options
Section titled “Starting options”Studio selects some settings when you create a project.
The default model for most new projects is Eleven Multilingual v2. You can select another model, including Eleven v3, in Project settings.
Studio selects the quality setting based on your subscription plan. The quality setting does not affect credit usage.
- Free, Starter, and Creator: 128 kbps MP3, or WAV generated from a 128 kbps source.
- Pro, Scale, Business, and Enterprise: 16-bit, 44.1 kHz WAV, or 192 kbps MP3 (Ultra Lossless).
Quick start
Section titled “Quick start”At the top of the Studio page, use the What would you like to create? prompt bar to describe your project. Studio Agent uses the description to create a first draft. You can also upload existing media or create a blank project.
Upload
Upload
Select Upload to start from existing media. Text and audio files open in the audio layout. Video files open in the video layout with captions available.
New blank project
Start a project from scratch
Select + New blank project to open the project type selector:
- Video project (New) opens the new video editor with the Library, Script, and Captions panels and Studio Agent.
- Audio project creates a blank audio project for long-form narration, podcasts, and audiobooks.
- Video project opens the previous version of Studio for video.
Get started
Section titled “Get started”The Inspirations section contains example projects. Select a card to use it as the starting point for a new project. Select View all Inspirations to search the complete library by category.
Available inspirations
Section titled “Available inspirations”| Inspiration | Type | Description |
|---|---|---|
| Film trailer | Video | Cinematic short-form video with dramatic pacing and music |
| Explainer video | Video | Clear, structured video for explaining a concept or product |
| Product video | Video | Showcase a product with visuals, voiceover, and music |
| Audio documentary | Video / Audio | Long-form narrative audio or video in documentary style |
| How to tutorial | Video | Step-by-step instructional video format |
| Audio podcast | Audio | Conversational or interview-style audio content |
| Captions | Video | Video project with automatic captioning ready to apply |
The available categories may change as the Inspirations library is updated.
Studio Agent
Section titled “Studio Agent”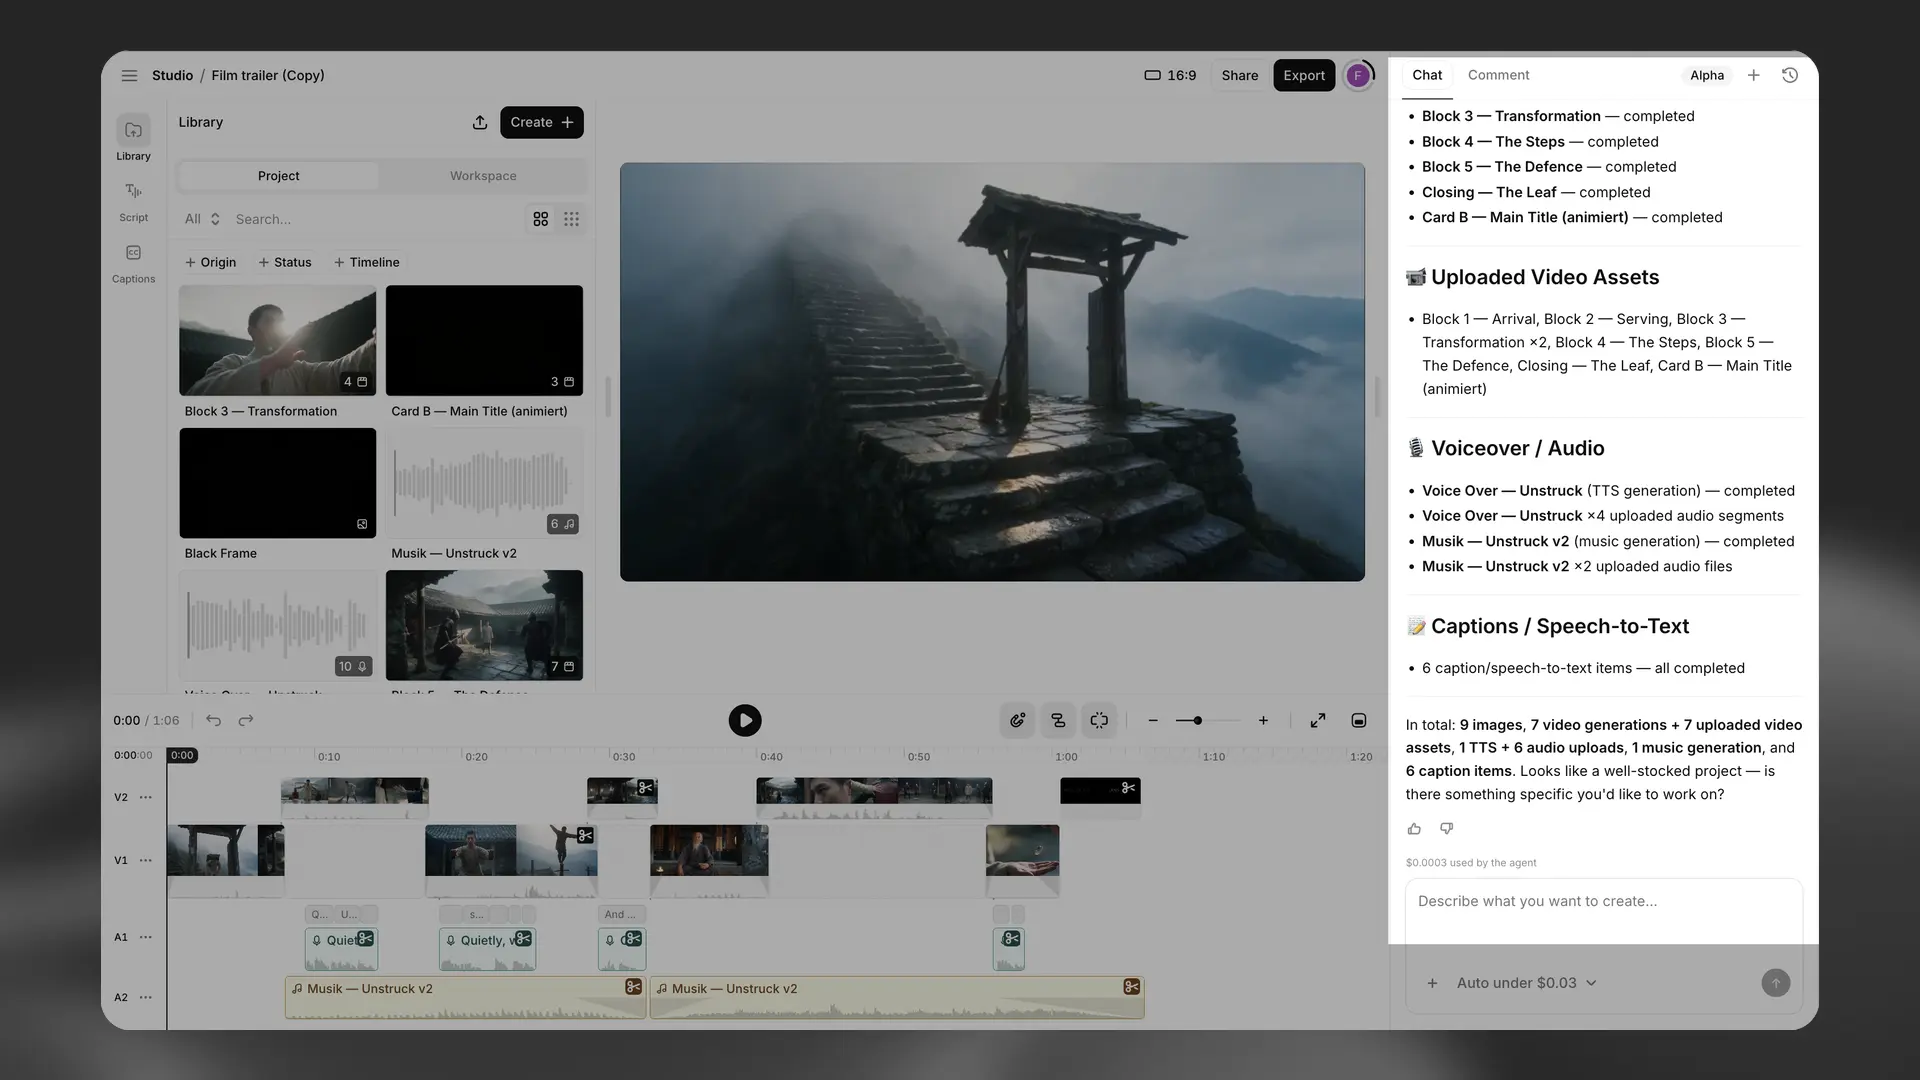
Overview
Section titled “Overview”Studio Agent is an AI co-editor built directly into ElevenCreative Studio Video projects.
Describe what you want to create, upload files, or select assets from past generations. Studio Agent asks about the video length, tone, structure, and transitions before building a first draft on the timeline. It adds clips, voiceovers, voices, sound effects, and captions. You can edit the timeline at any point, then continue working with Studio Agent.
Key features
Section titled “Key features”Analyze clips
Studio Agent builds a frame-level map of the video to identify what happens in the footage. For example, enter “add a swoosh when the logo appears” to place audio at that point.
In-chat asset discovery
Search, preview, and place voice models and sound effects in the chat without opening the Voice Library or Sound Effects catalog.
Model selection and confirmation
Studio Agent selects from five image models and five video models based on your request. You can select a different model when you confirm the generation.
Plan and create modes
Section titled “Plan and create modes”Use the toggle at the top of the editor to switch between two modes:
Create mode allows Studio Agent to edit the timeline, insert clips, generate media, apply text overlays, and adjust audio.
Plan mode allows Studio Agent to outline its approach without changing the timeline. Use this mode to review the proposed changes.
In Plan mode, Studio Agent can:
- Analyze footage and transcribe speech.
- Search assets and voice models.
- Draft scripts and scene plans.
- Plan timeline edits and calculate gap management.
- Provide guidance for TikTok, YouTube, and Instagram.
Manual control
Section titled “Manual control”You can edit the timeline at any point, then continue working with Studio Agent.
Limits and file handling
Section titled “Limits and file handling”File size
Studio Agent does not impose an additional file size limit.
Availability
Studio Agent is available in the web app. It is not available through the API.
Pricing
Section titled “Pricing”Studio Agent is available on all plans. Chat usage consumes credits based on five token categories: input, output, thinking, cache read, and cache write. The cost depends on token consumption in each category.
Speech, image, music, sound effects, and video generation are billed at the standard rates for those capabilities. Commercial usage rights are determined by your subscription plan, consistent with other ElevenLabs products.
Standard subscription plans use credits. Enterprise plans may use fiat billing. Contact Enterprise Sales for details.
To upgrade your plan, visit your Subscription page.
Generating and editing
Section titled “Generating and editing”Select Export to render the current chapter or project. Studio generates any required narration and creates an audio or video file based on the project’s tracks and settings.
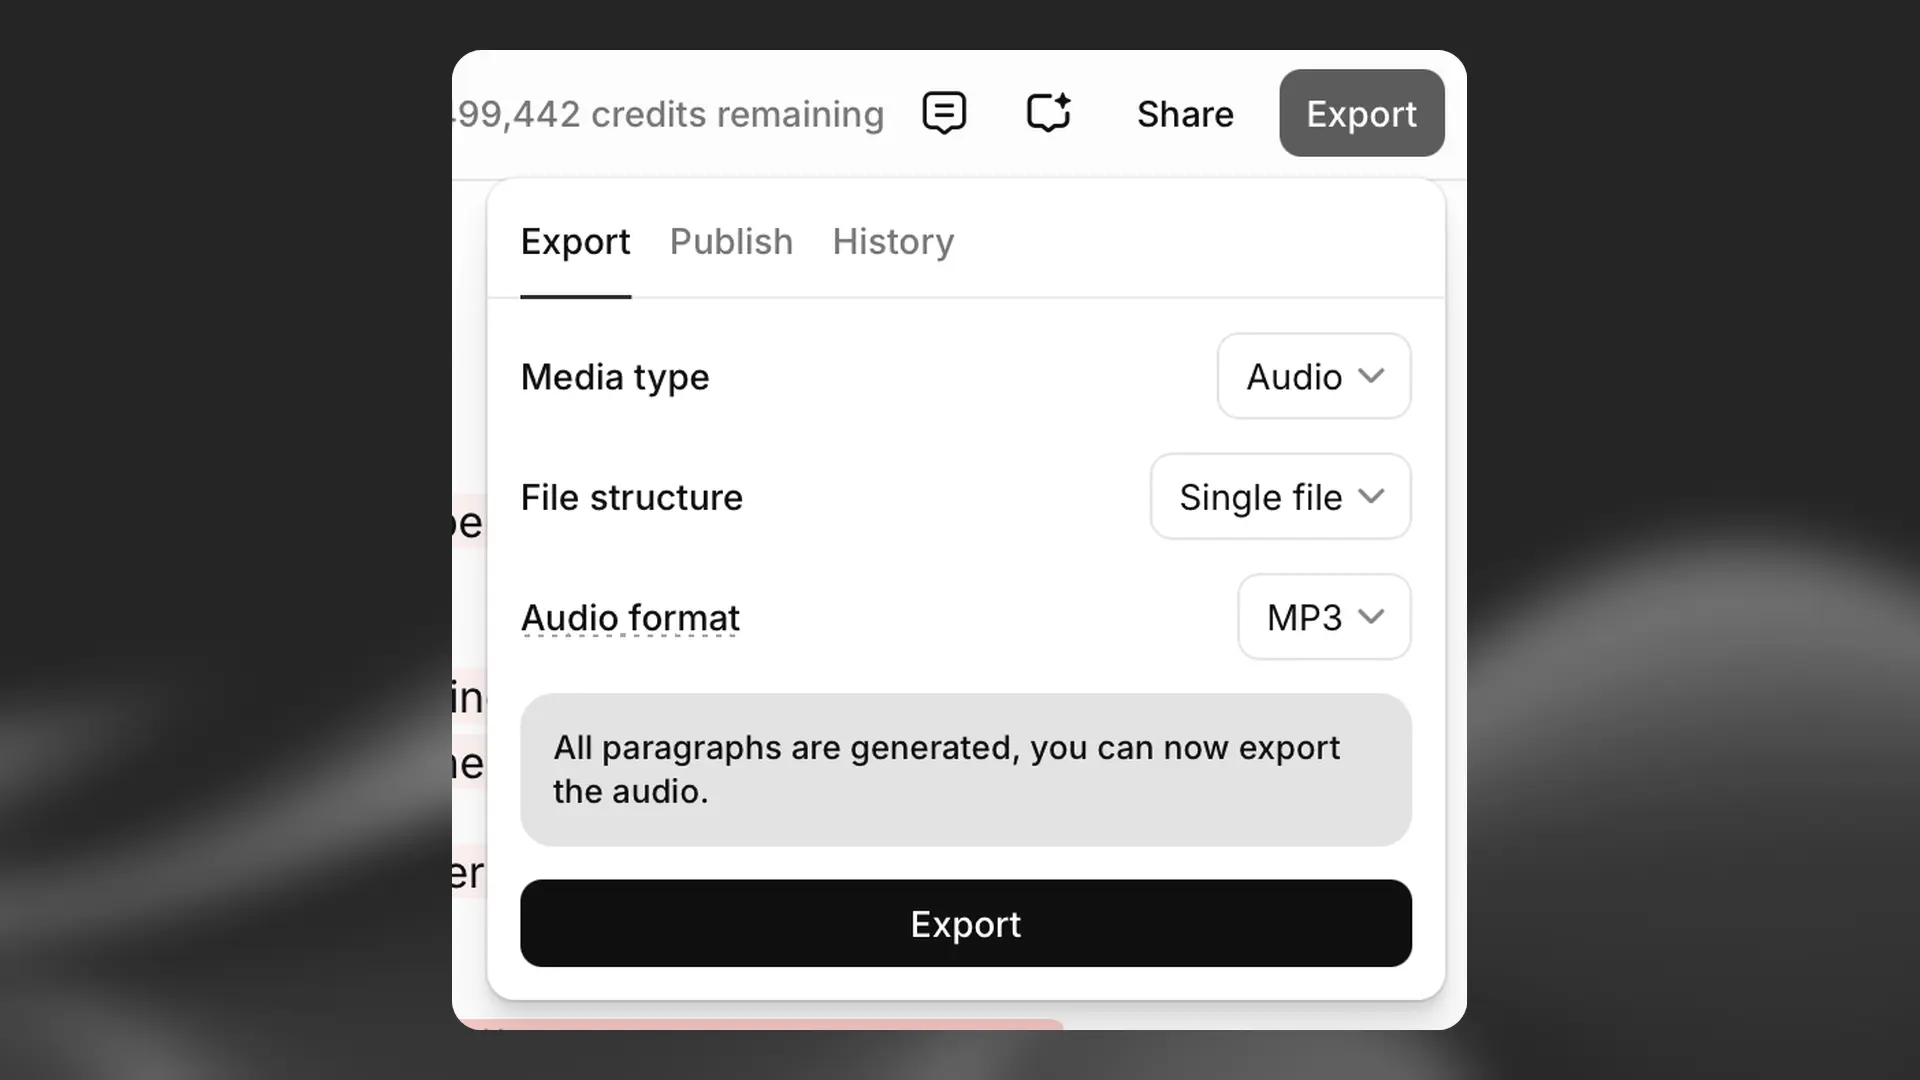
You can continue editing after export. Select Export again to create a version that includes the updated media.
Audio projects
Section titled “Audio projects”Contextual sidebar for Audio projects
Contextual sidebar for Audio projects
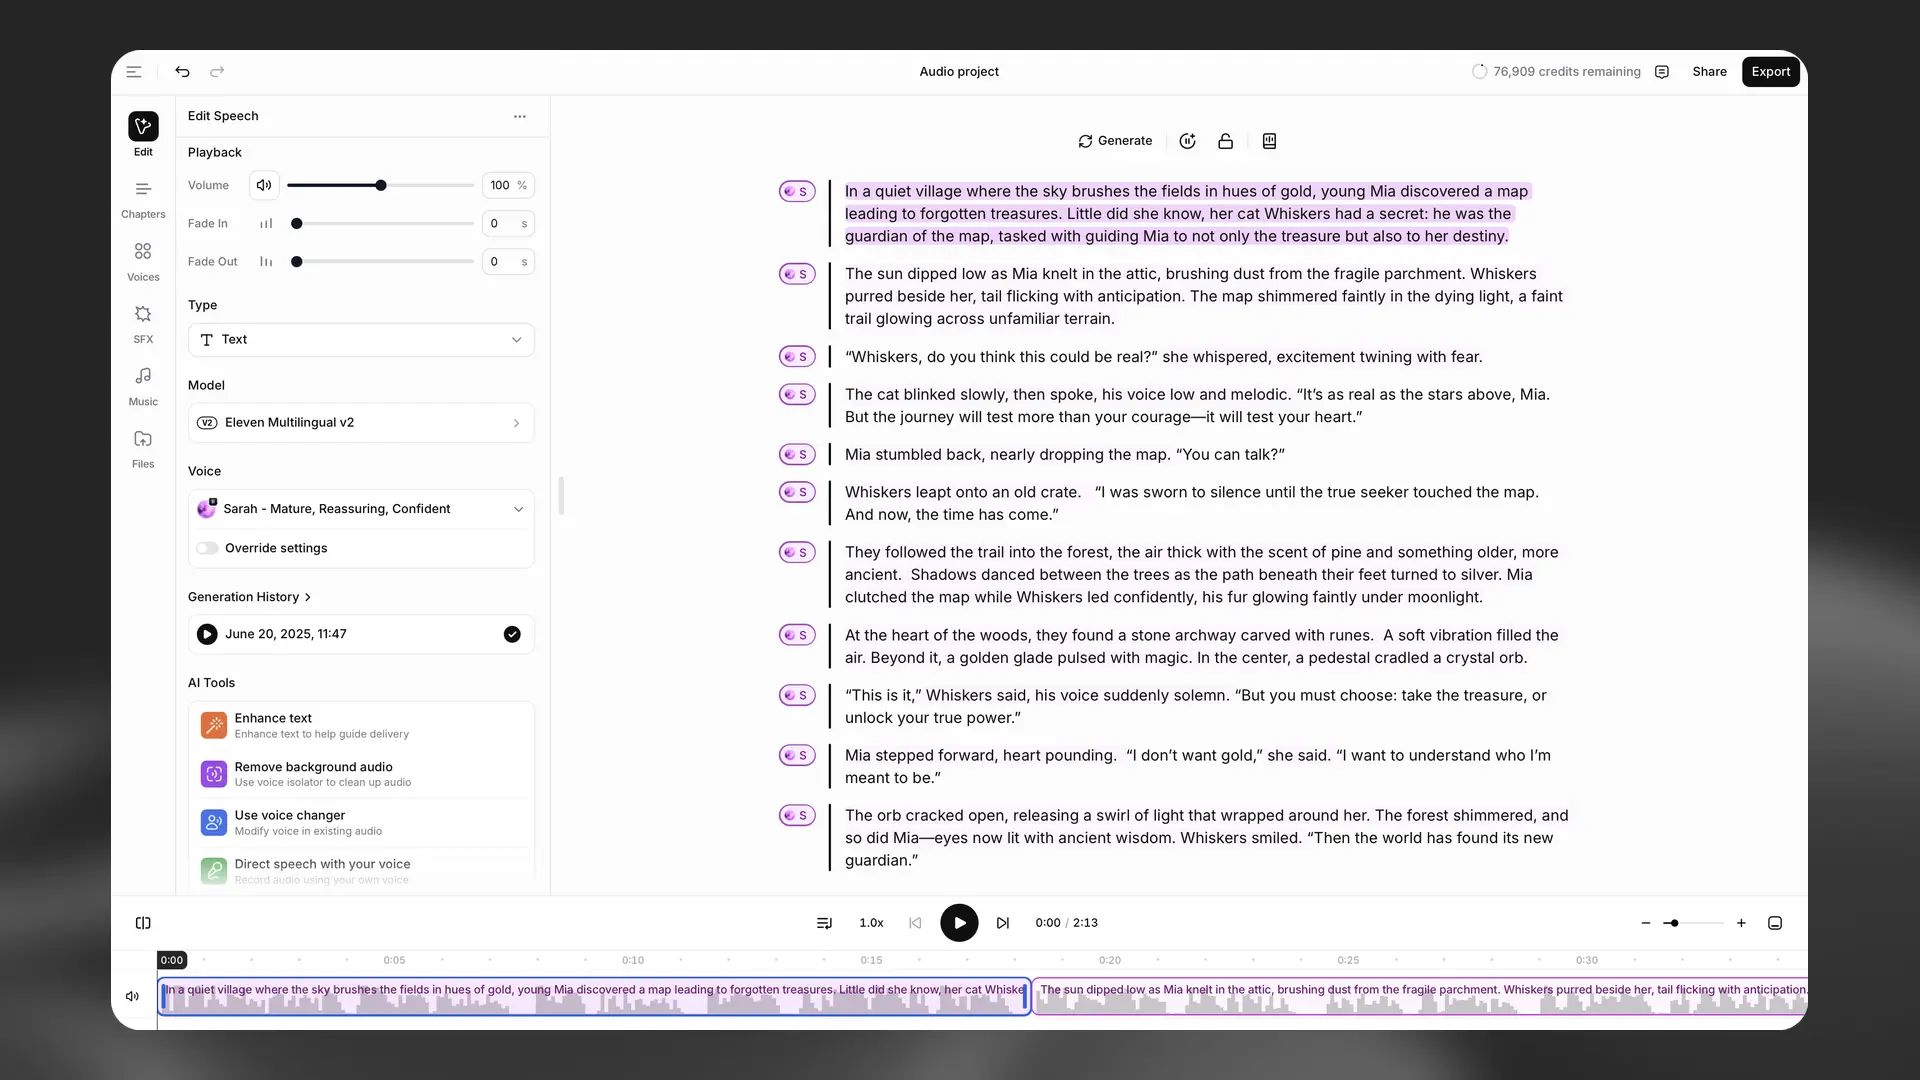
The contextual sidebar shows tools and details for the selected item.
For narration, the sidebar includes Playback controls, Type, Model, Voice, Override settings, and Generation history. The AI Tools section provides these actions:
- Enhance text refines the text to guide delivery.
- Remove background audio uses Voice Isolator to remove background audio.
- Use voice changer modifies the voice in existing audio.
- Direct speech with your voice records reference audio to guide delivery with Actor Mode.
For media clips, the sidebar shows the relevant clip properties and actions.
Timeline and tracks
Timeline and tracks
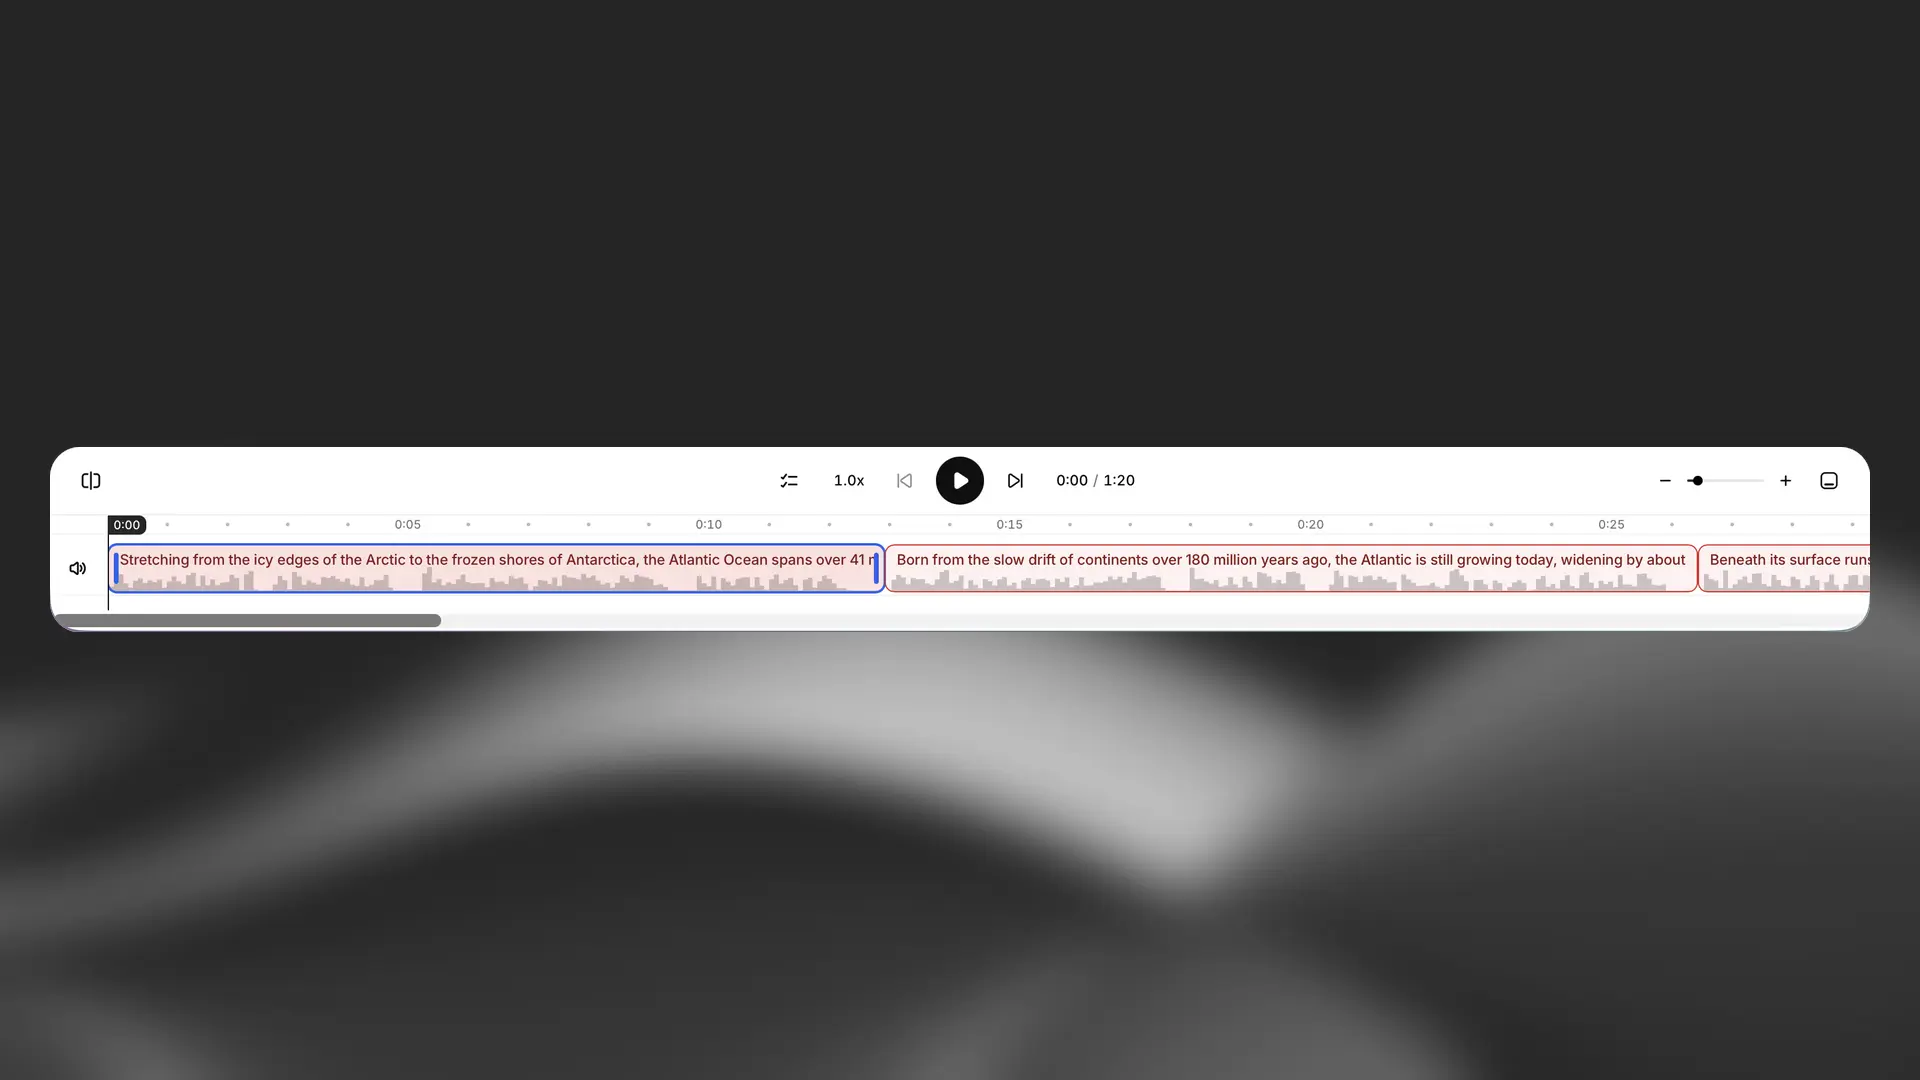
The timeline gives you a chapter‑wide view of your project so you can see narration, music, and SFX at a glance.
Adjust timing between paragraphs or individual sentences. You can also trim, split, and duplicate clips or zoom and pan across longer chapters. Waveforms show relative loudness across tracks.
Chapters sidebar
Chapters sidebar
When you create a new Audio project, you’ll have access to the Chapters sidebar, and if you import a document, chapters will be automatically detected.
Select the Chapters tab to manage chapters in an existing project.
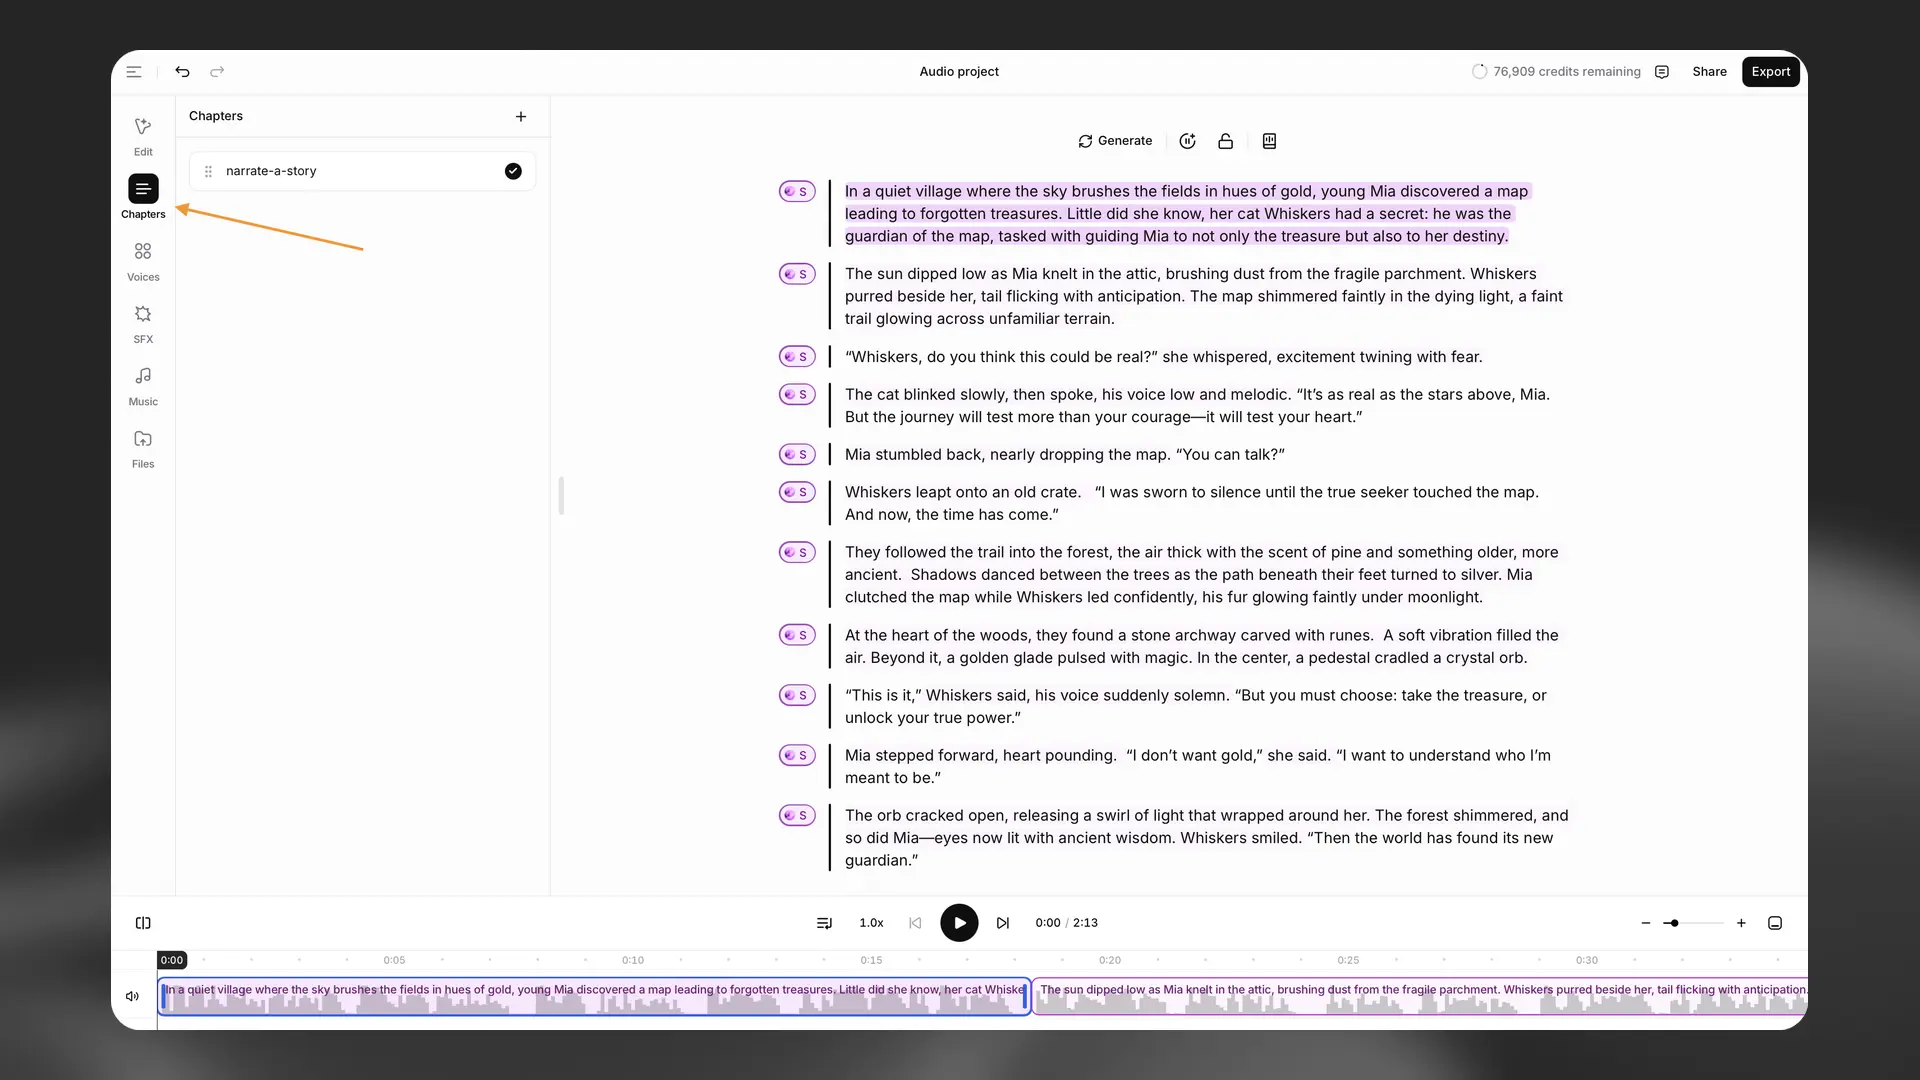
Select + to add a chapter. Use Chapter actions to rename or remove a chapter. Drag chapters to reorder them.
Generate/Regenerate
Generate/Regenerate
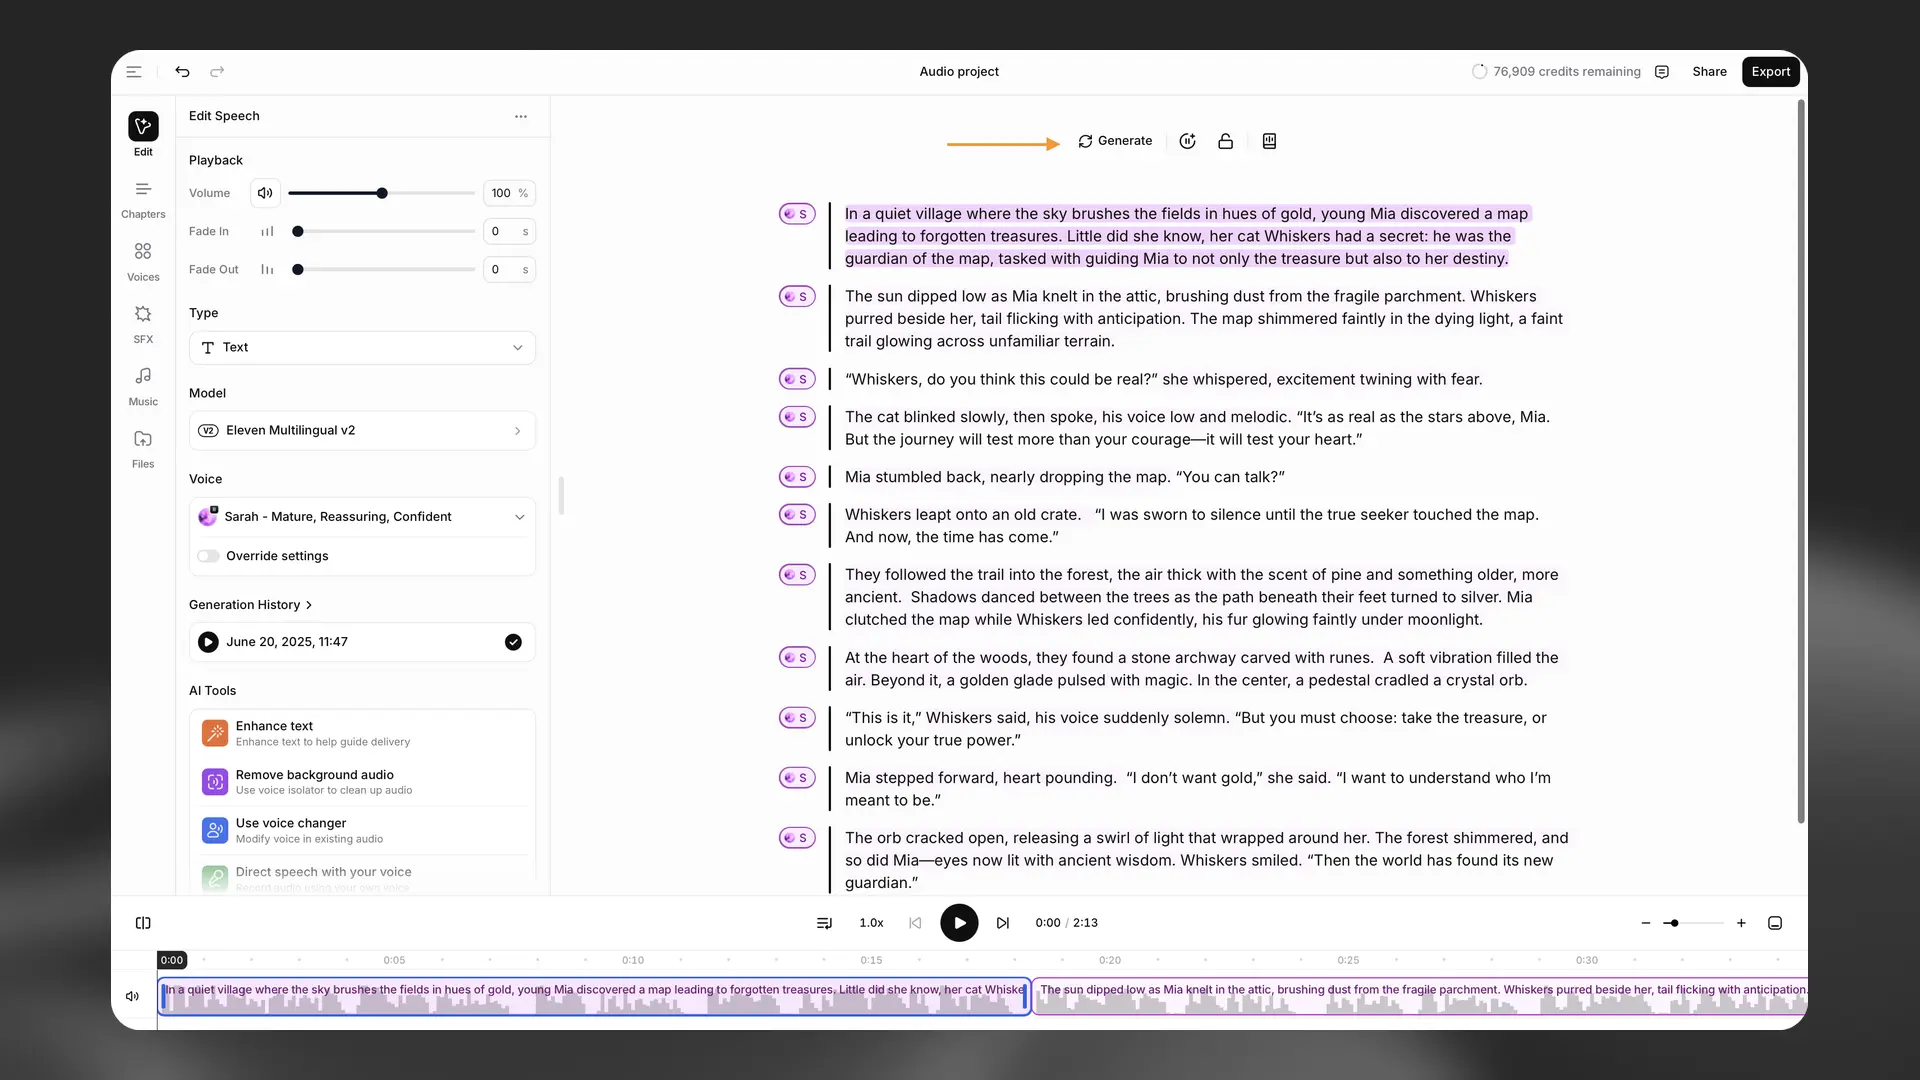
Select Generate to generate audio for the selected text. Generating audio consumes credits.
Changing the text or voice removes the paragraph’s generated status. Select Generate to generate it again.
The status of a paragraph (converted or unconverted) is indicated by the bar to the left of the paragraph. Unconverted paragraphs have a pale grey bar while converted paragraphs have a dark grey bar.
When the button displays Regenerate, the next generation does not consume credits. You can regenerate twice without using credits if you do not change the voice or text.
This action applies to narration and other generated speech. Timeline items like video, external audio, music, SFX, and captions are arranged on the timeline and rendered when you export.
Play
Play
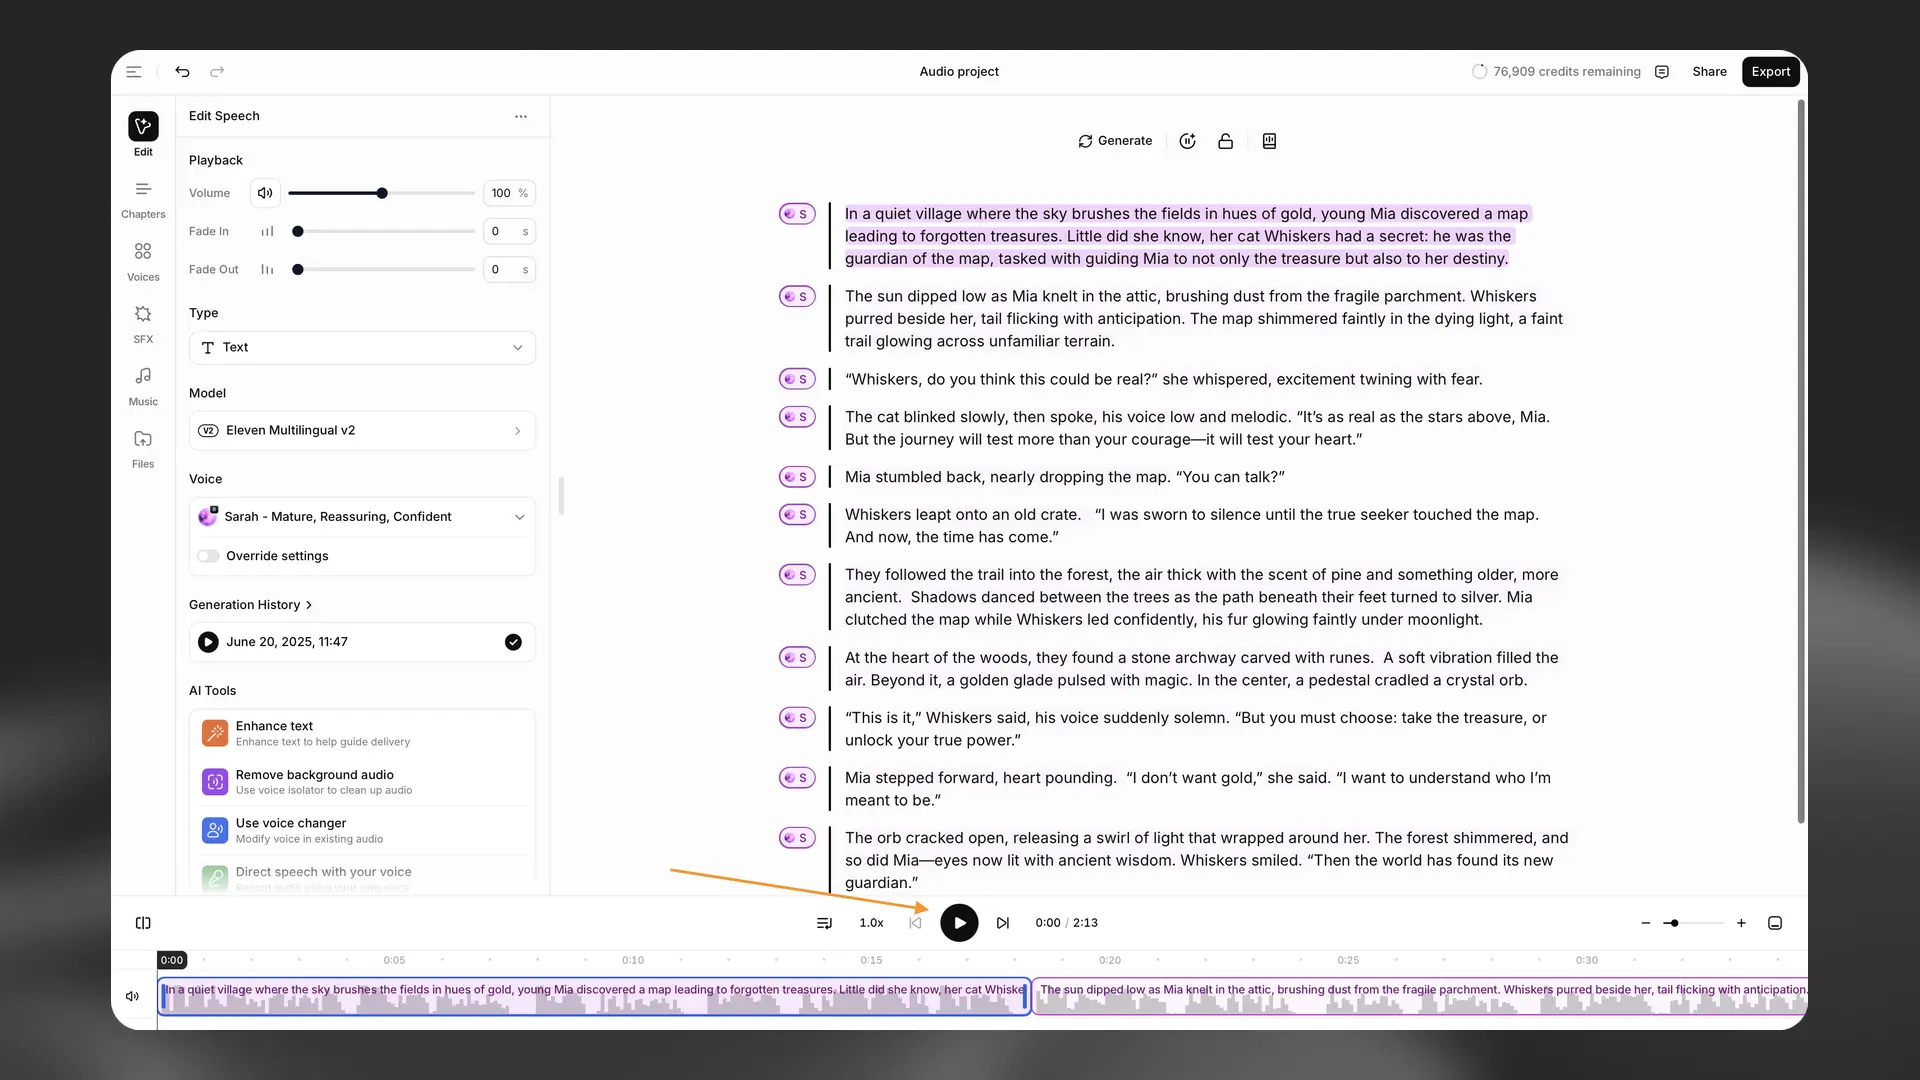
You can use the Play button in the player at the bottom of the ElevenCreative Studio interface to play audio that has already been generated, or generate audio if a paragraph has not yet been converted. Generating audio will cost credits. If you have already generated audio, then the Play button will play the audio that has already generated and you won’t be charged any credits. There are three modes when using the Play button. Until end (generate clips ahead) will play existing audio, or generate new audio for paragraphs that have not yet been generated, from the selected paragraph to the end of the current chapter, generating multiple clips ahead. Until end (generate one at a time) will play existing audio or generate new audio from the selected paragraph to the end of the current chapter, but generates only one clip at a time. Selection will play or generate audio only for the selected paragraph. When a video track is present, the player also previews video in sync with the playhead. Playing existing audio or video never consumes credits; only generating narration does.
Generation history
Generation history
The generation history for a paragraph appears in the contextual sidebar when the paragraph is selected. This shows all the previously generated audio for the selected paragraph, allowing you to listen to and download each individual generation.
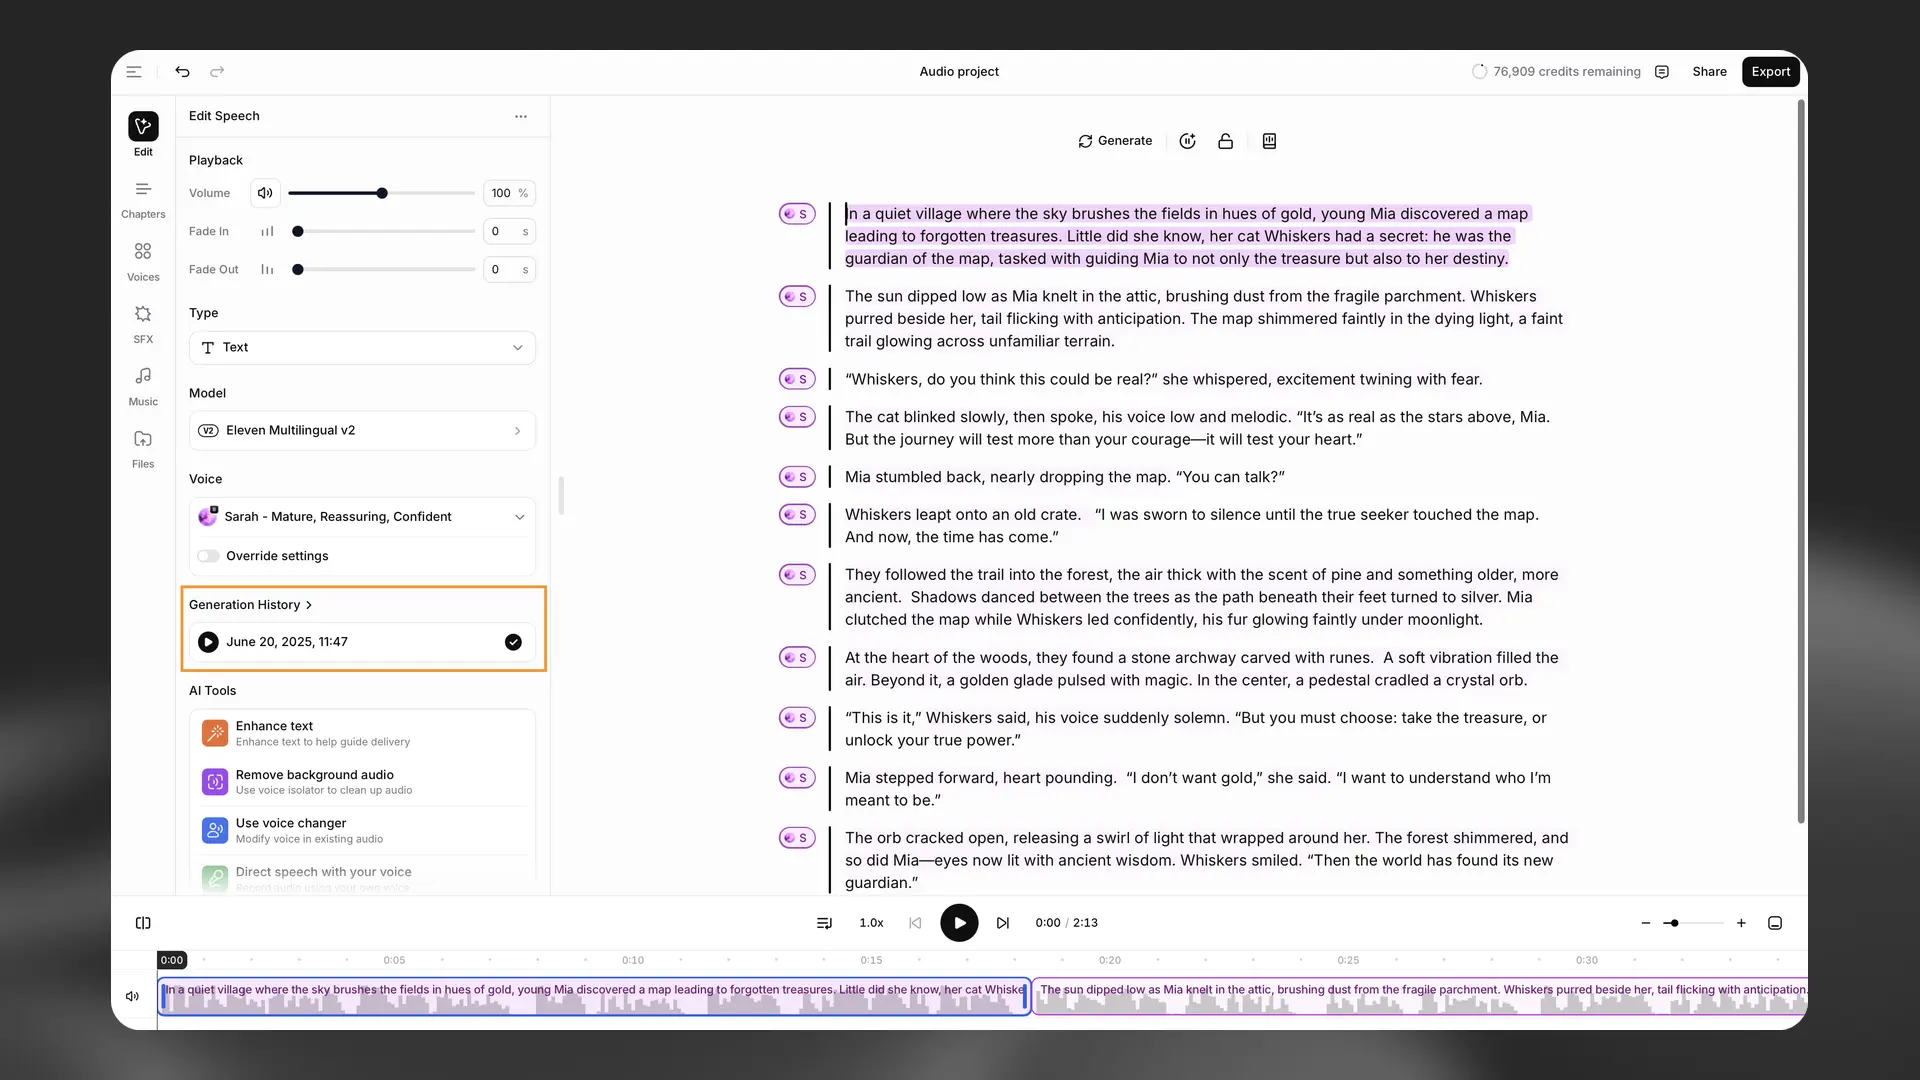
If you prefer an earlier version of a paragraph, you can use the Restore generation button to return to the selected version. You can also remove generations, but be aware that if you remove a version, this is permanent and you can’t restore it.
Generation history applies to narration generations. It doesn’t track imported media (external audio, music, SFX) or video clips.
Undo and Redo
Undo and Redo
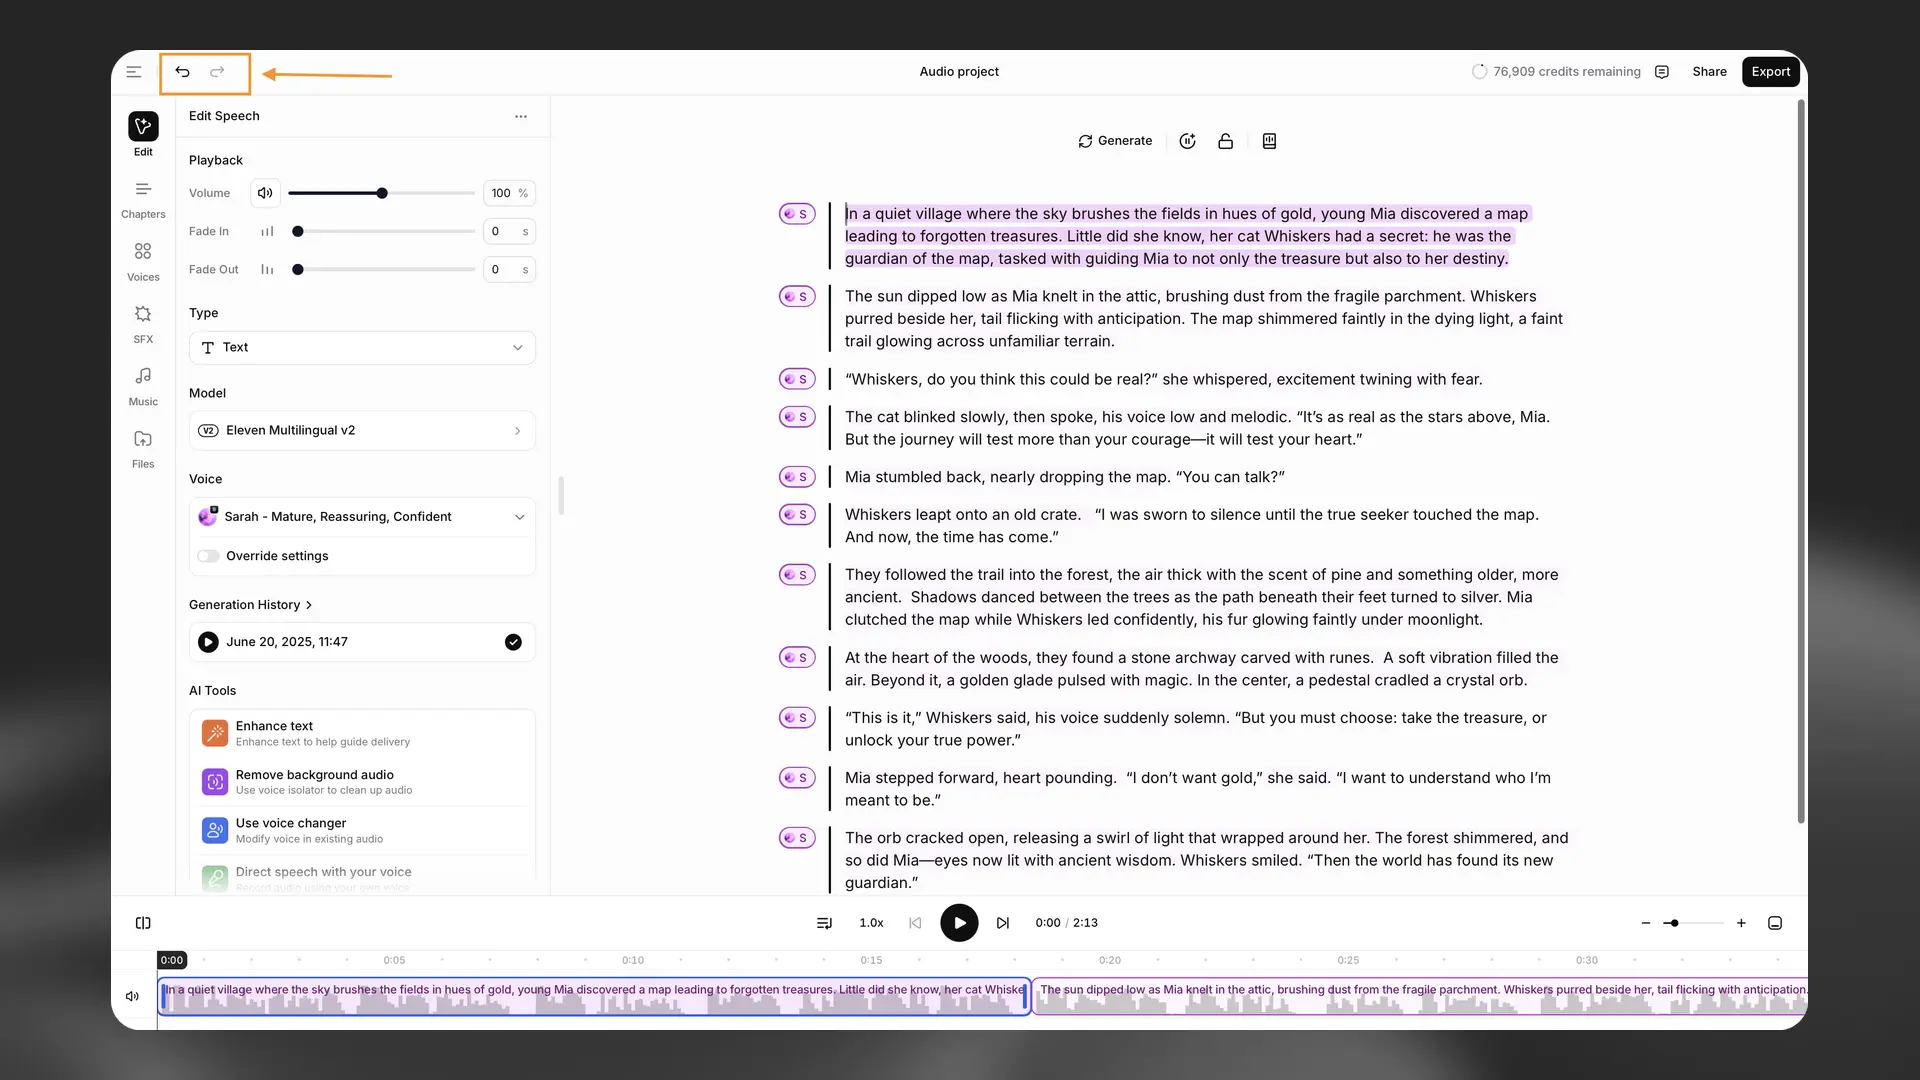
If you accidentally make a change, you can use the Undo button to restore the previous version, and the Redo button to restore the change.
Breaks
Breaks
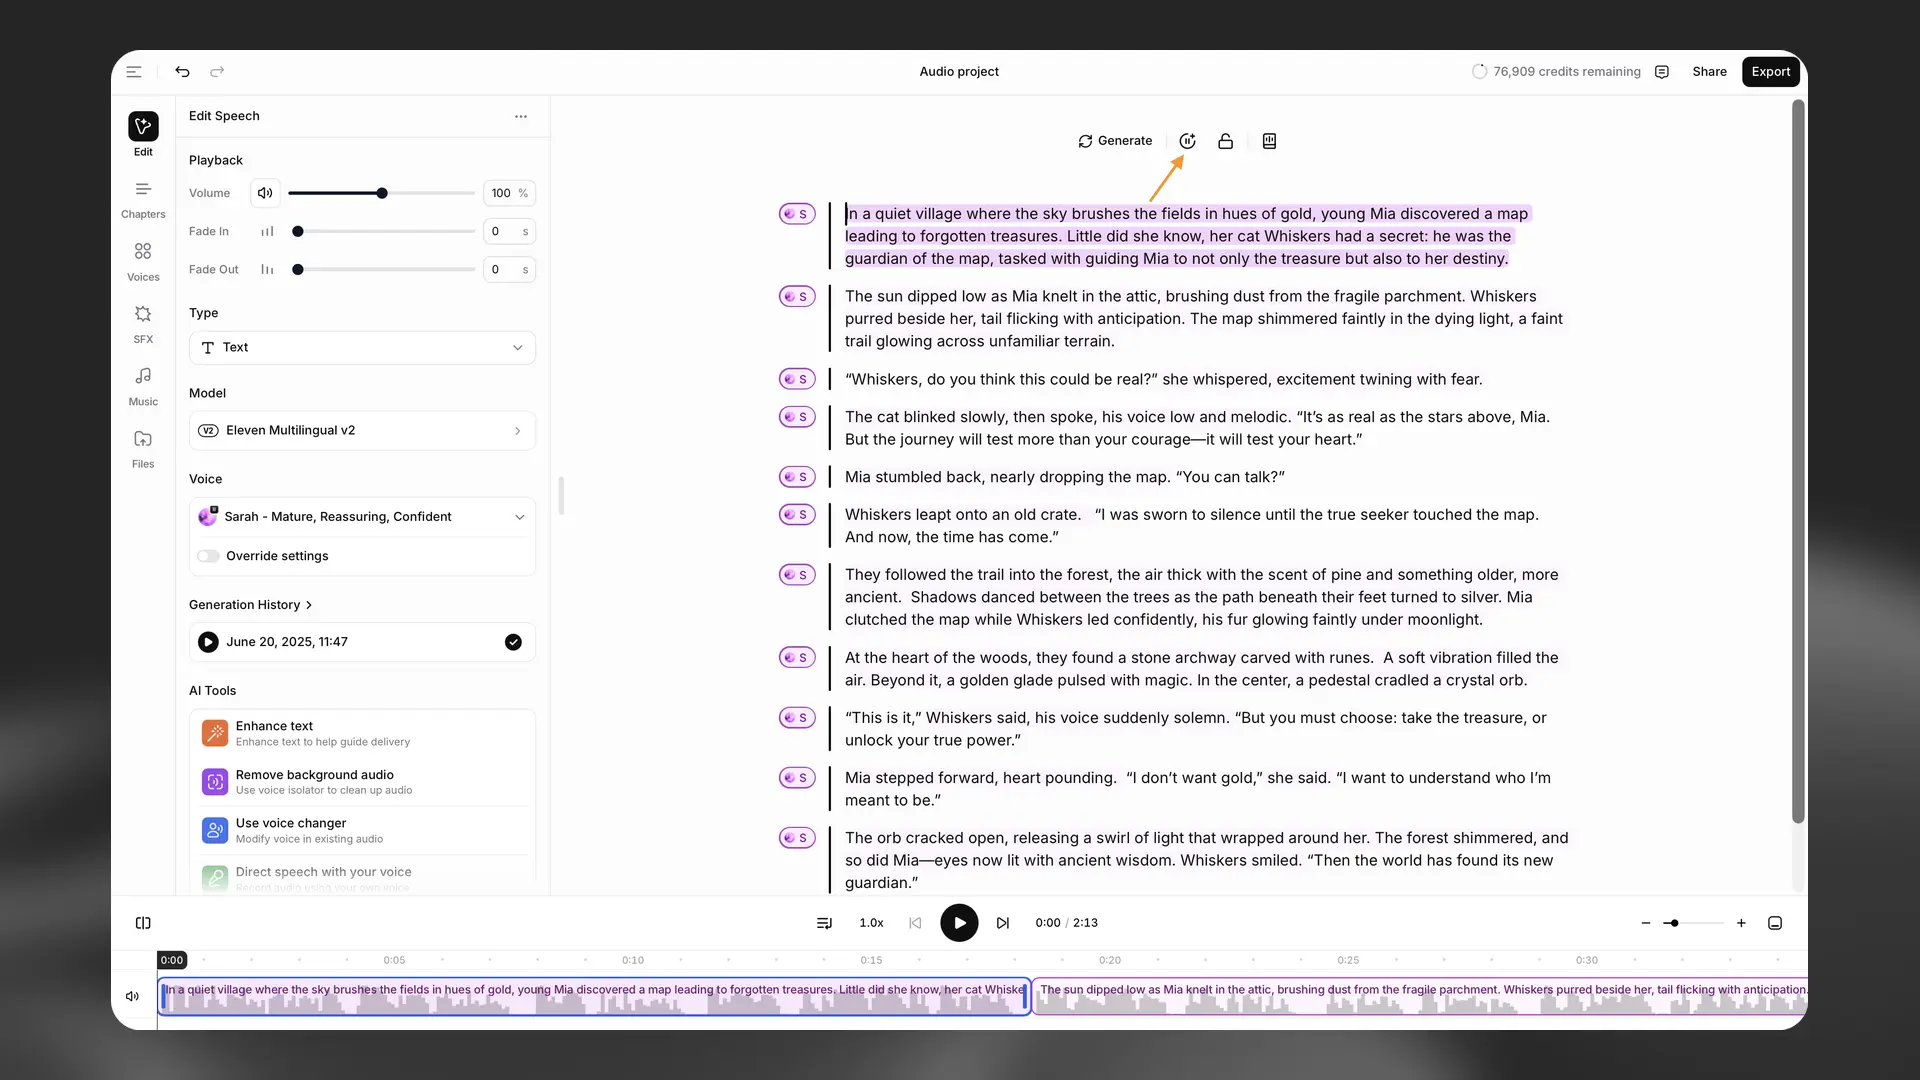
You can add a pause by using the Insert break button. This inserts a break tag. By default, this will be set to 1 second, but you can change the length of the break up to a maximum of 3 seconds.
Breaks affect generated speech delivery only; they don’t move or pause other timeline tracks. Use the timeline to create precise pauses across music, SFX, and video.
Actor Mode
Actor Mode
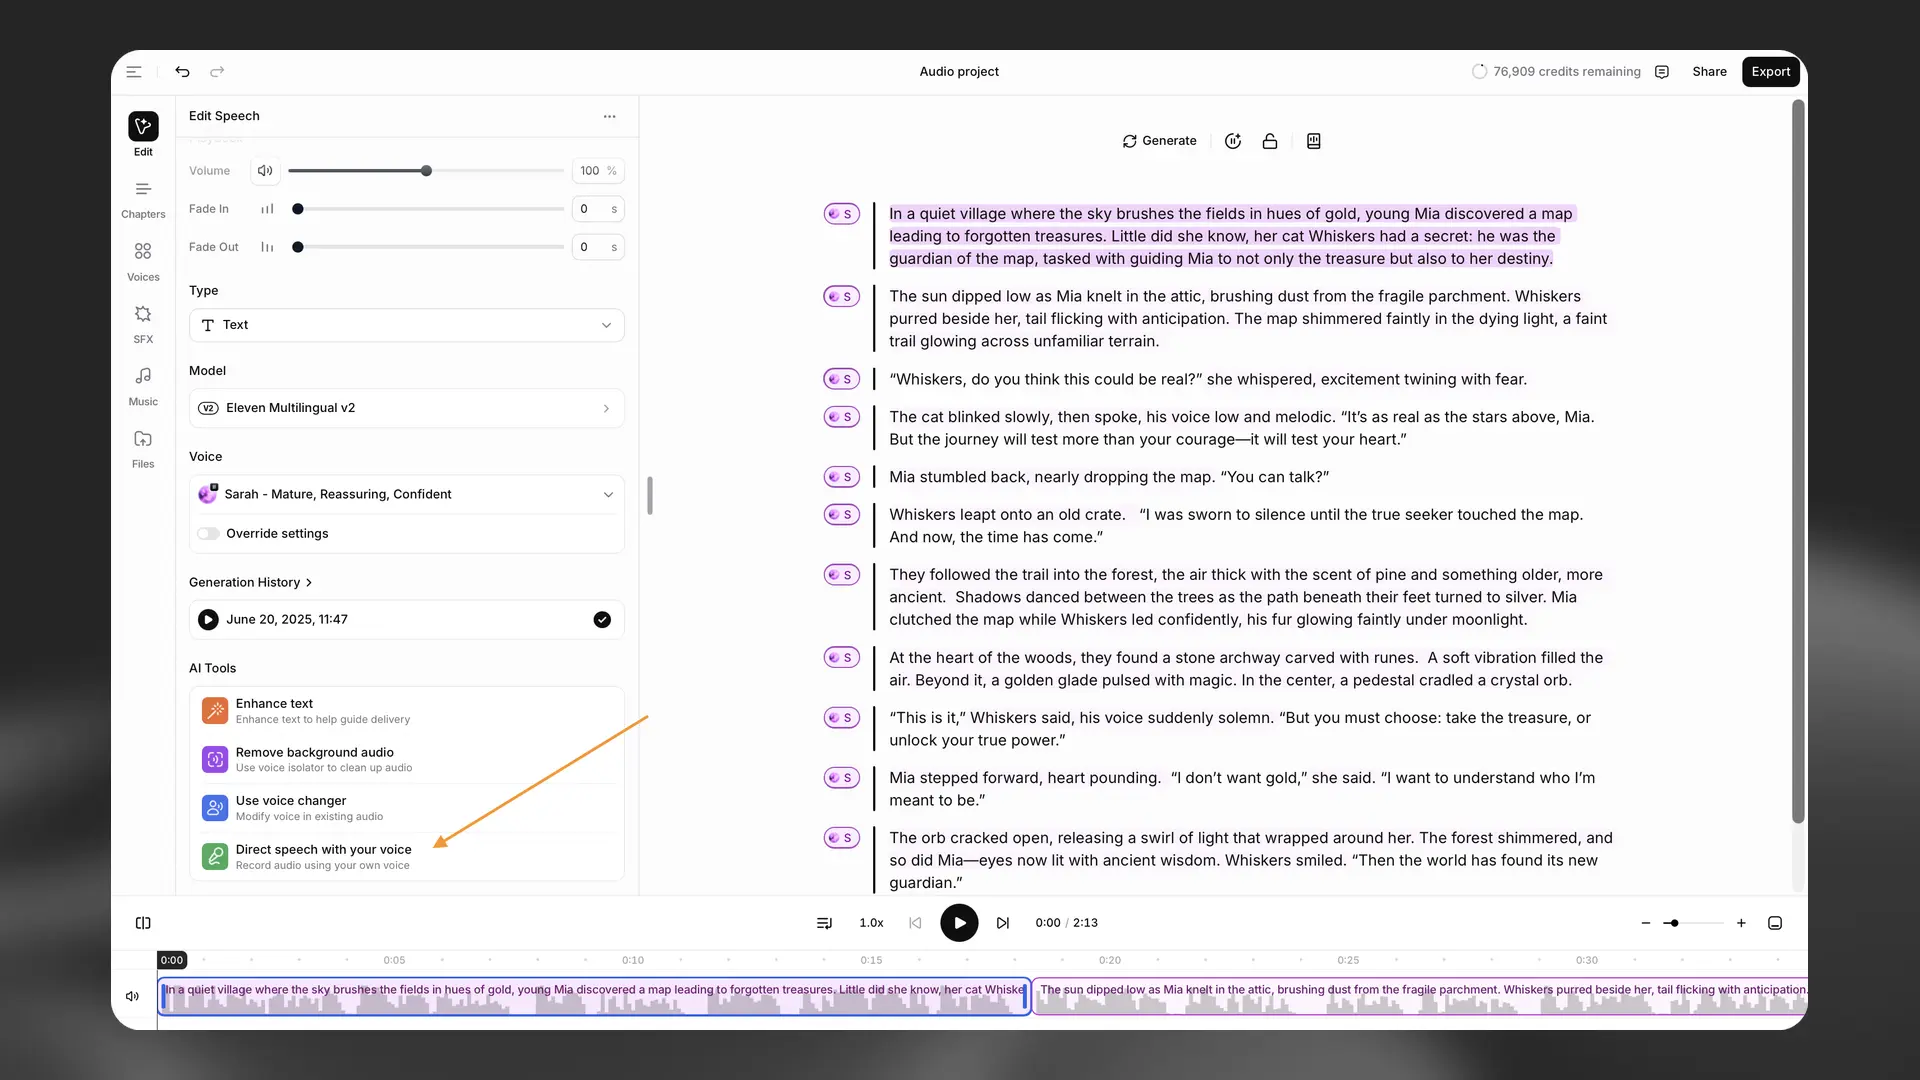
Actor Mode allows you to specify exactly how you would like a section of text to be delivered by uploading a recording, or by recording yourself directly. You can either highlight a selection of text that you want to work on, or select a whole paragraph. Once you have selected the text you want to use Actor Mode with, click Direct speech with your voice from the AI Tools section of the sidebar, and the Actor Mode pop-up will appear.
For an overview of Actor Mode, see this video.
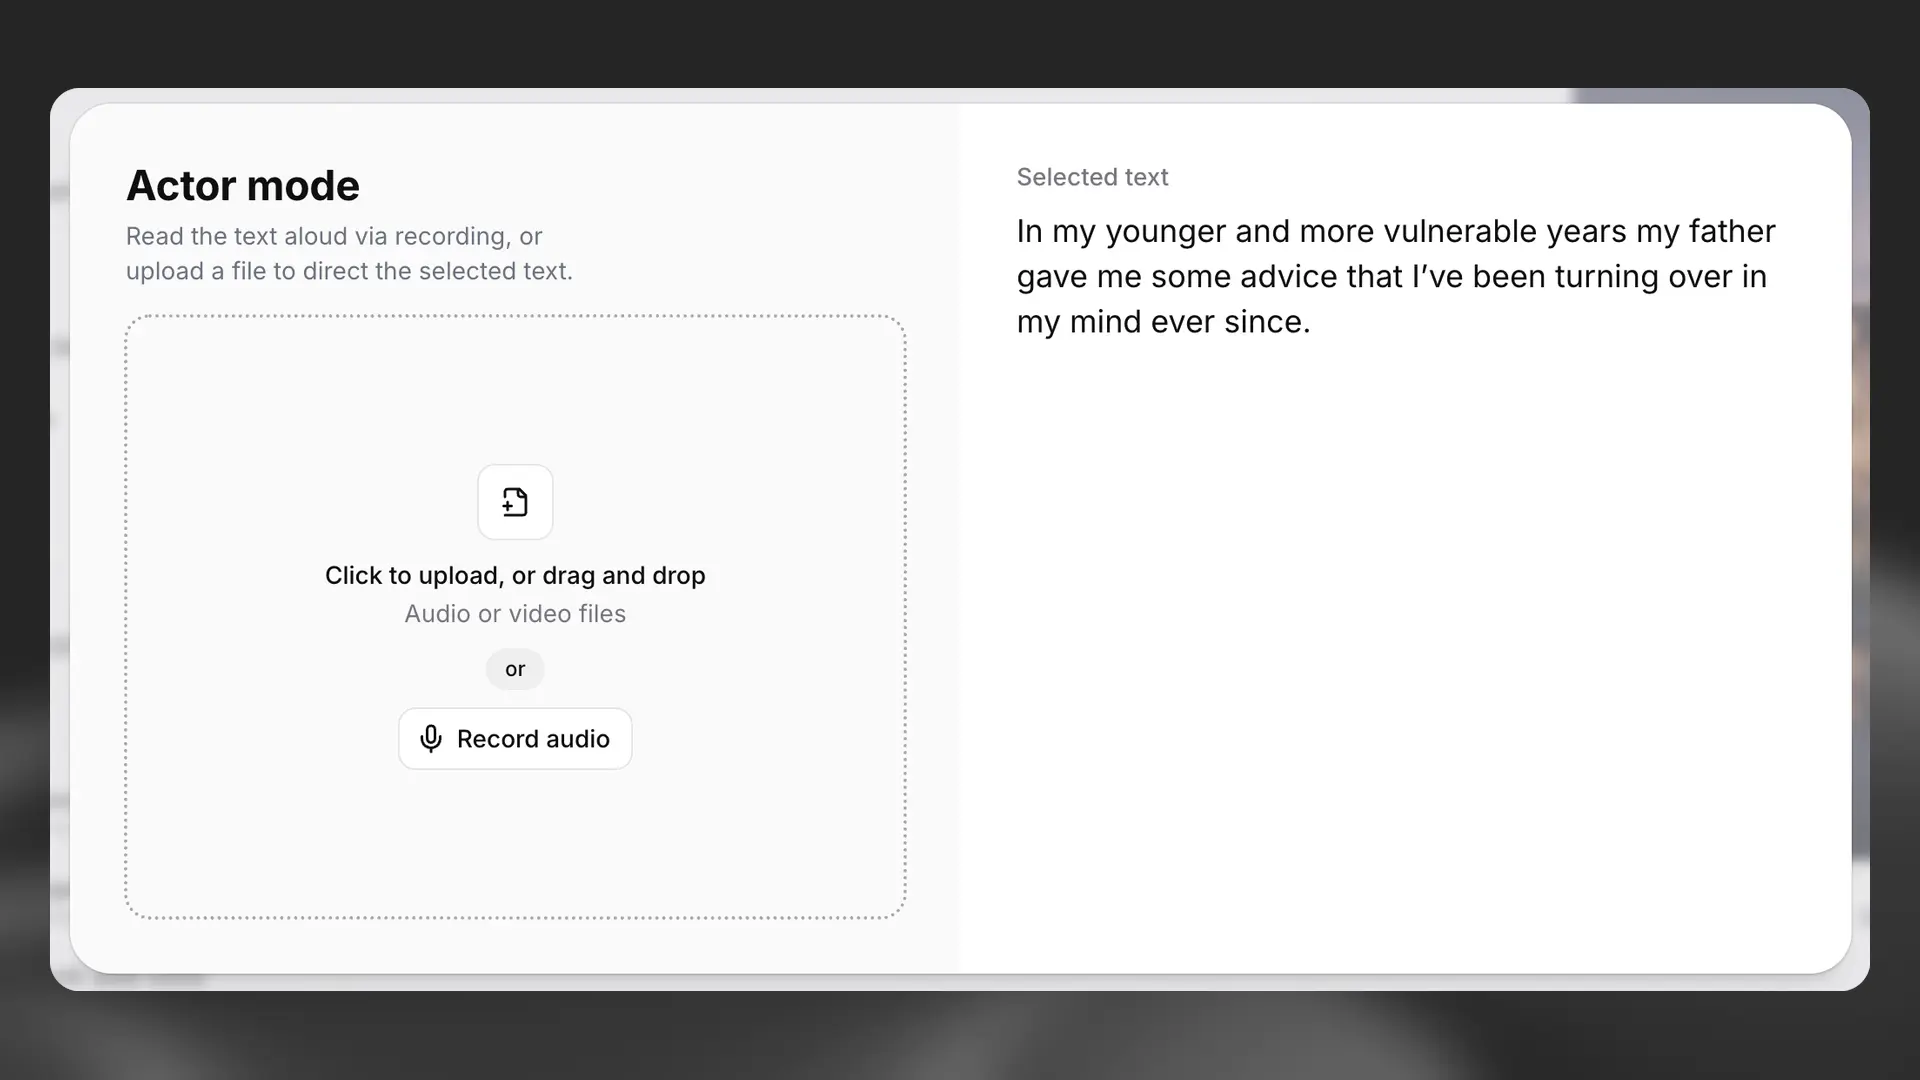
Either upload or record your audio, and you will then see the option to listen back to the audio or remove it. You will also see how many credits it will cost to generate the selected text using the audio you’ve provided.
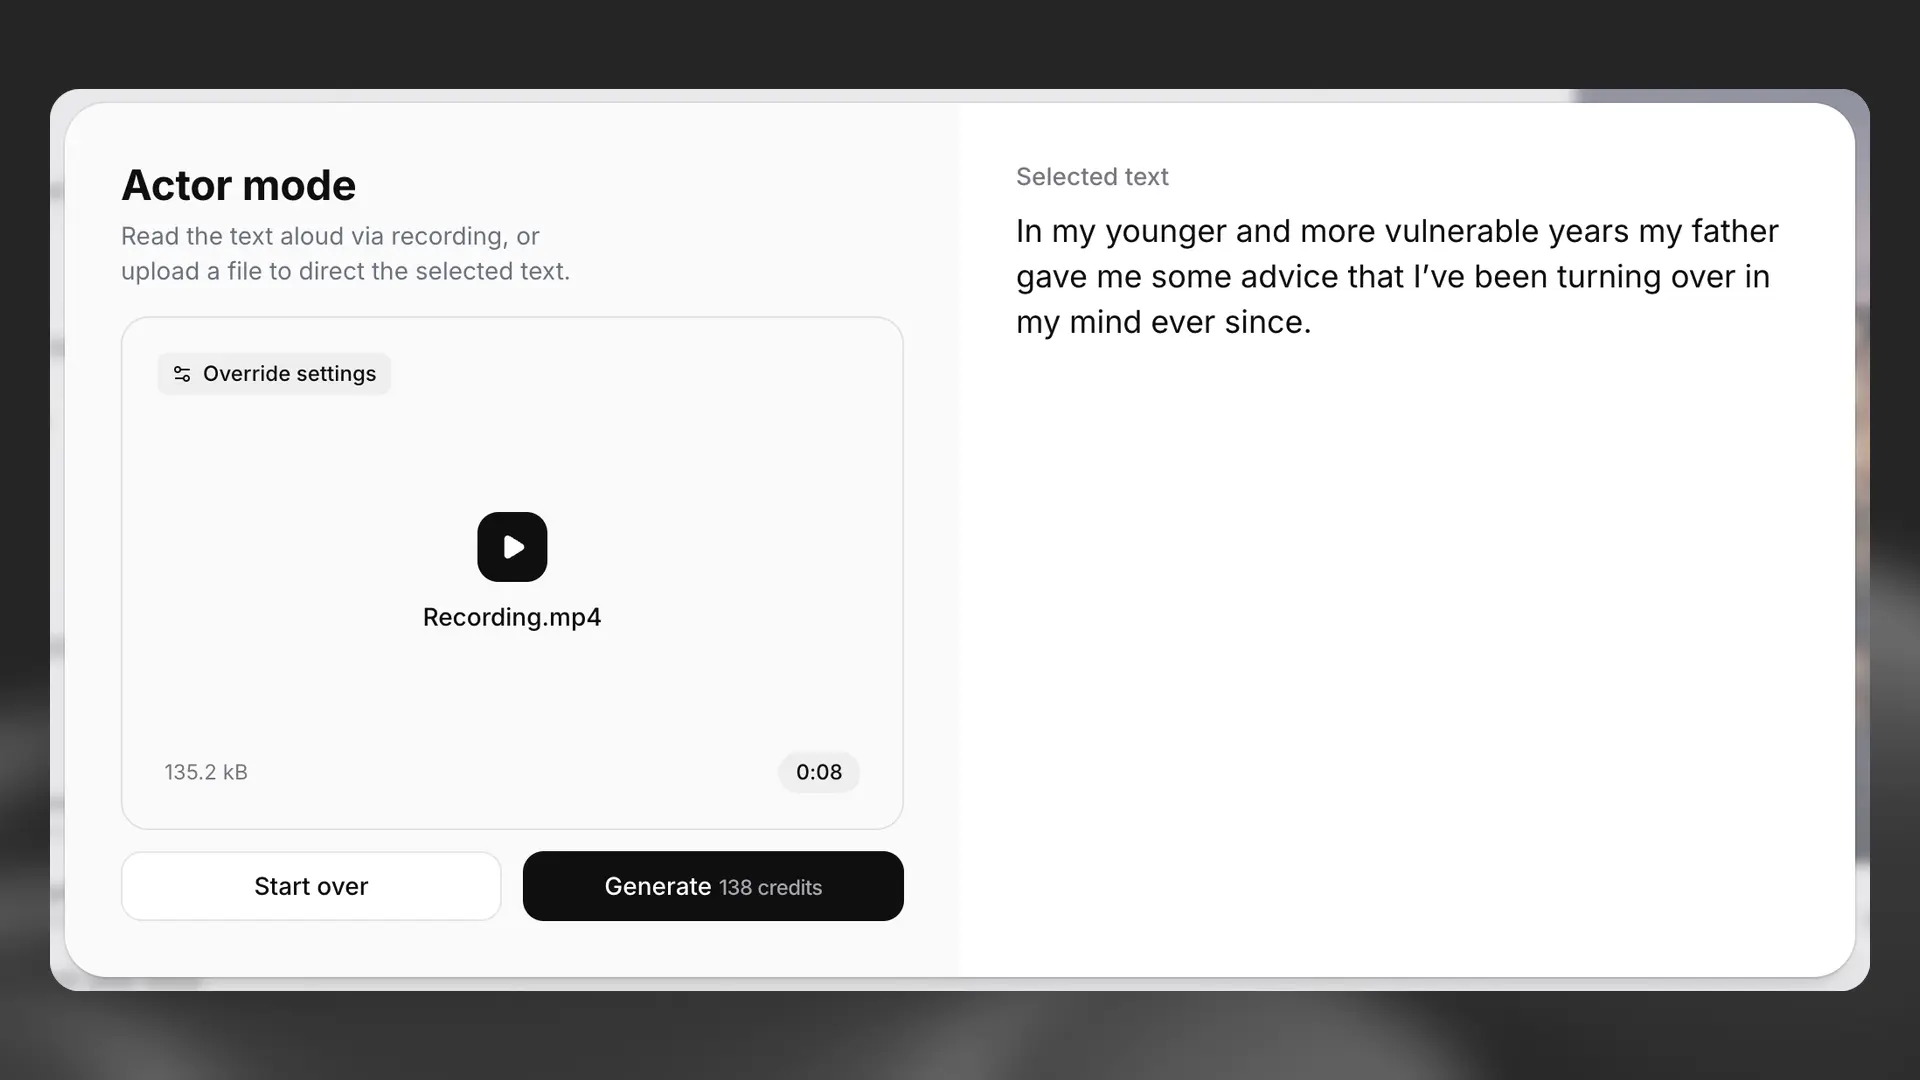
If you’re happy with the audio, click Generate, and your audio will be used to guide the delivery of the selected text.
Files
Files
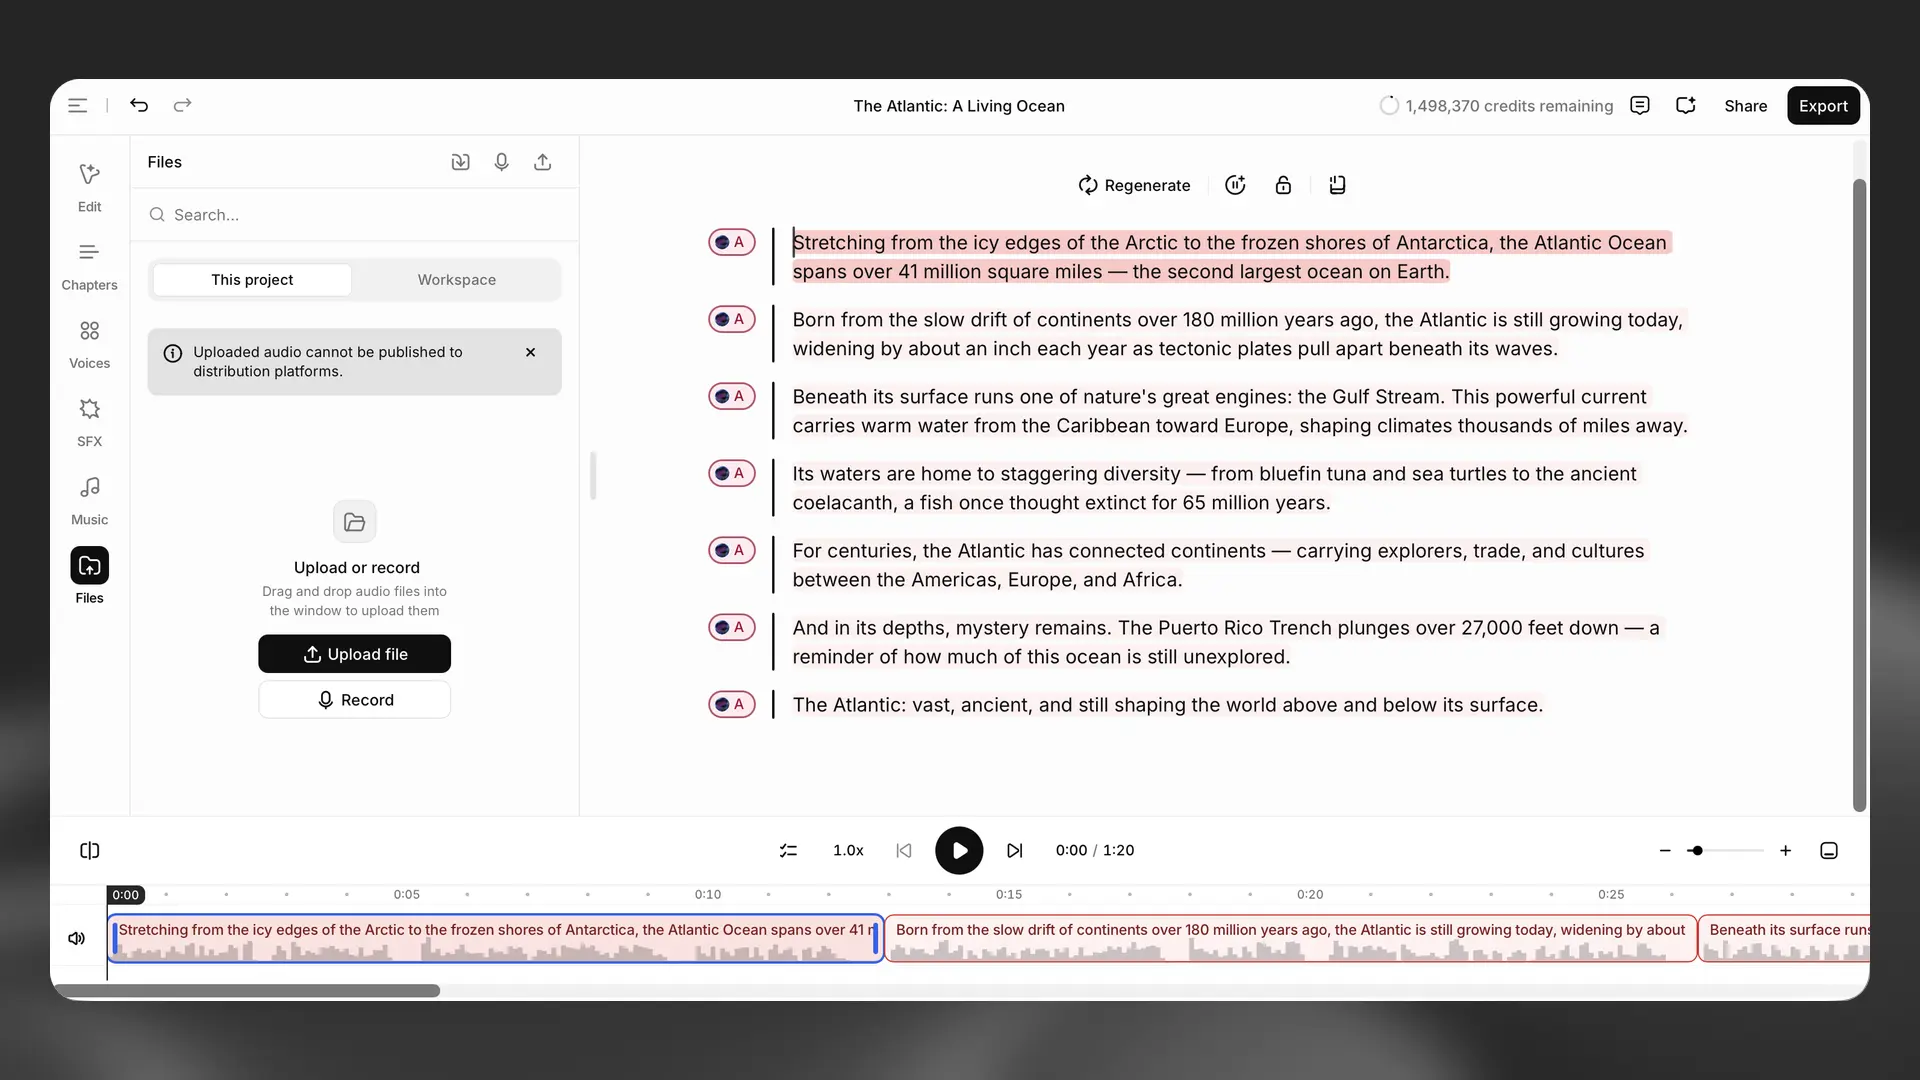
Upload or record audio files for your project. You can drag and drop files into the panel, click Upload file, or use the Record button to capture audio directly. Toggle between This project and Workspace to browse files. Uploaded audio cannot be published to distribution platforms.
Music
Music
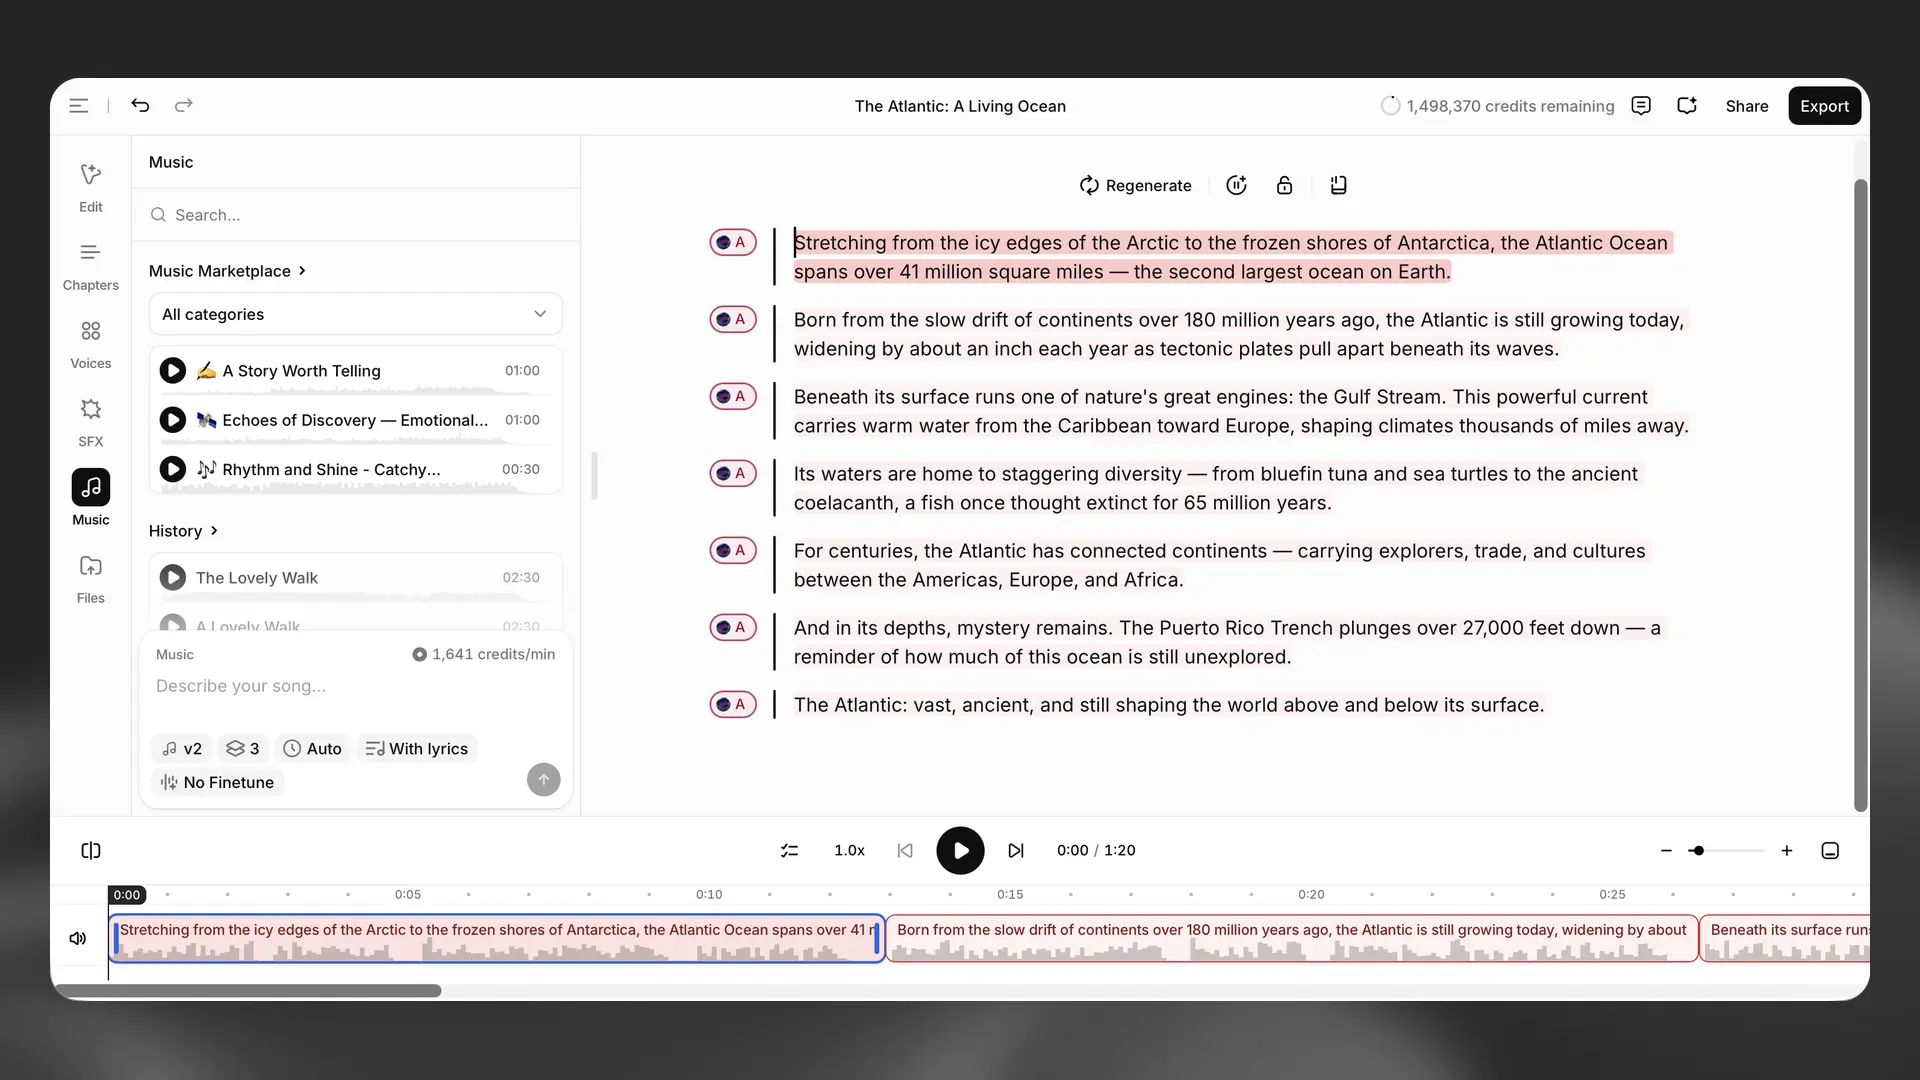
Generate music in ElevenCreative Studio and place it on a separate timeline track. Create music from a prompt or import an existing track. You can trim, duplicate, move, and adjust the volume of each clip. Stereo sources remain stereo.
Sound effects
Sound effects
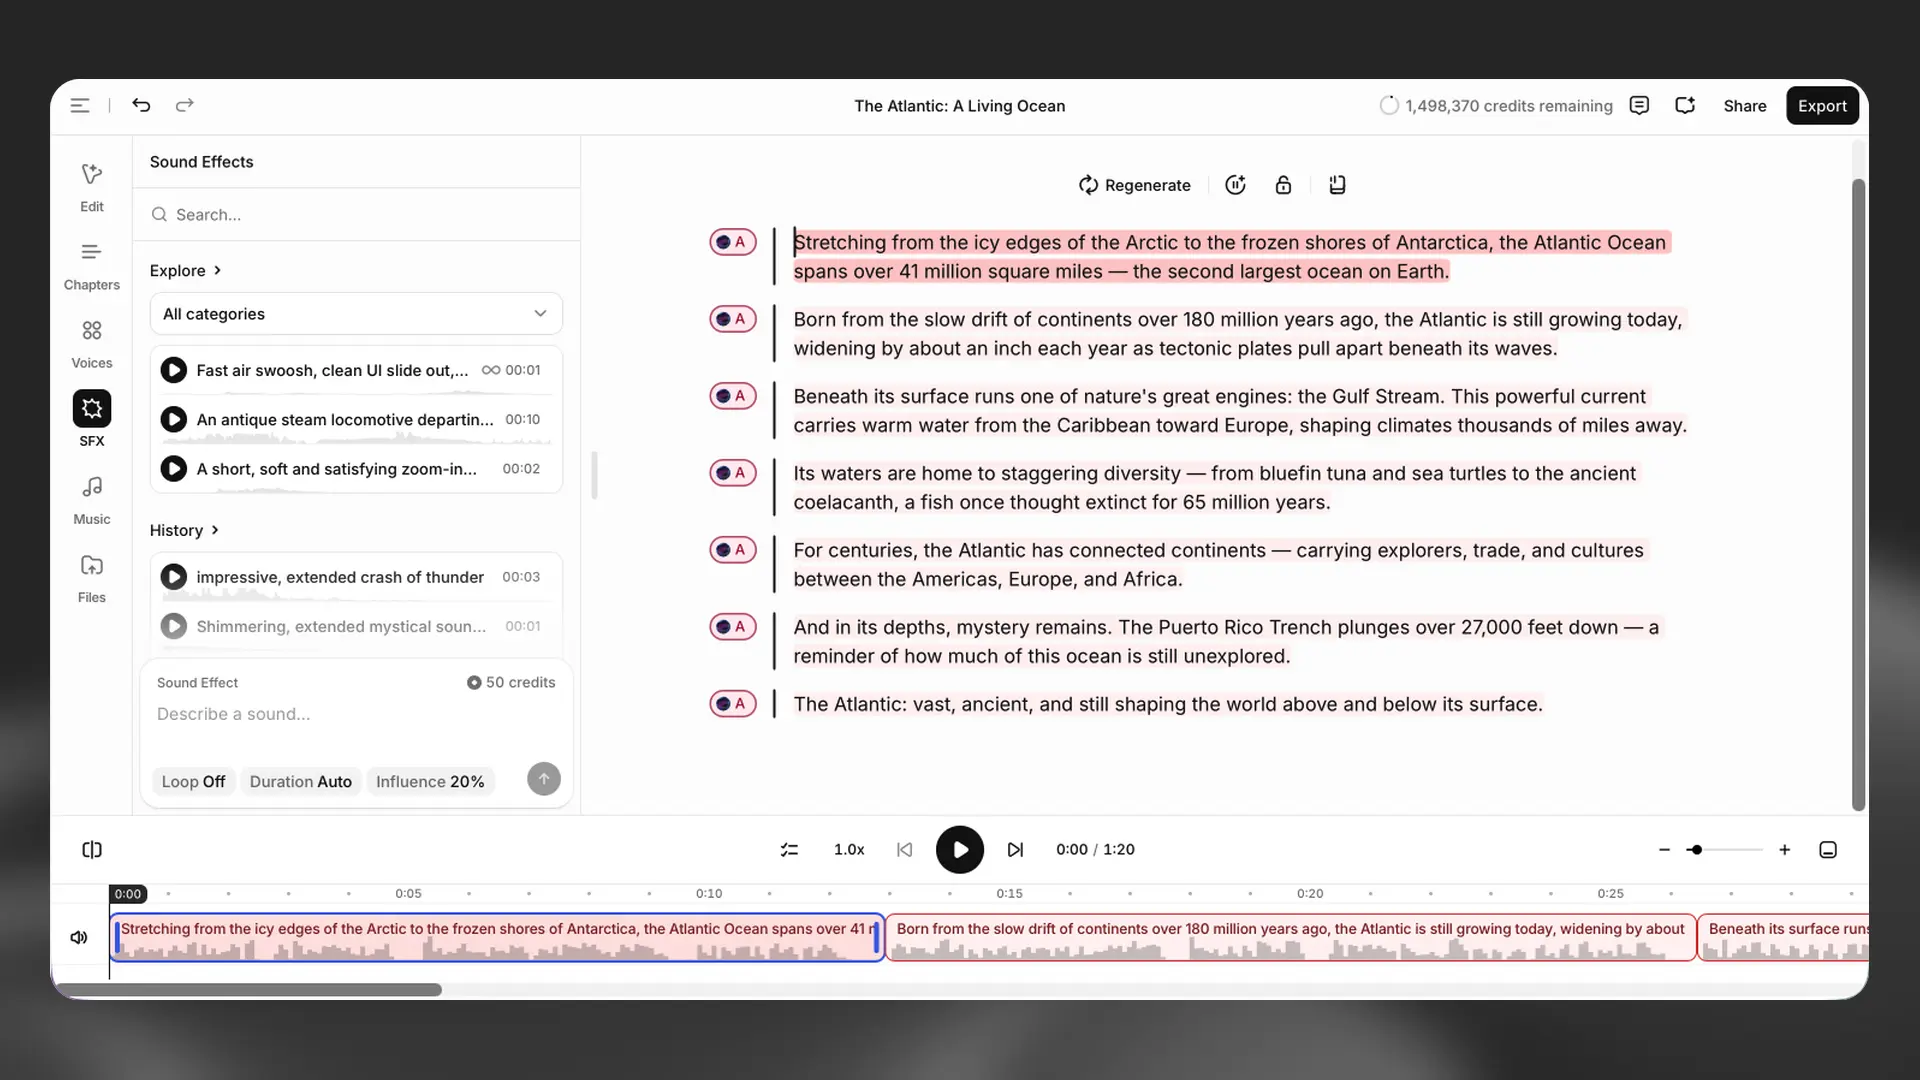
Add sound effects as separate clips on the timeline. You can position them anywhere, layer multiple effects, and adjust their timing precisely with trimming and duplication.
Create effects from a text prompt or select an existing effect from the SFX library.
You can regenerate previews to explore variants and then apply your chosen effect to the timeline. Deleting and duplicating SFX clips works the same as other timeline clips.
Lock paragraph
Lock paragraph
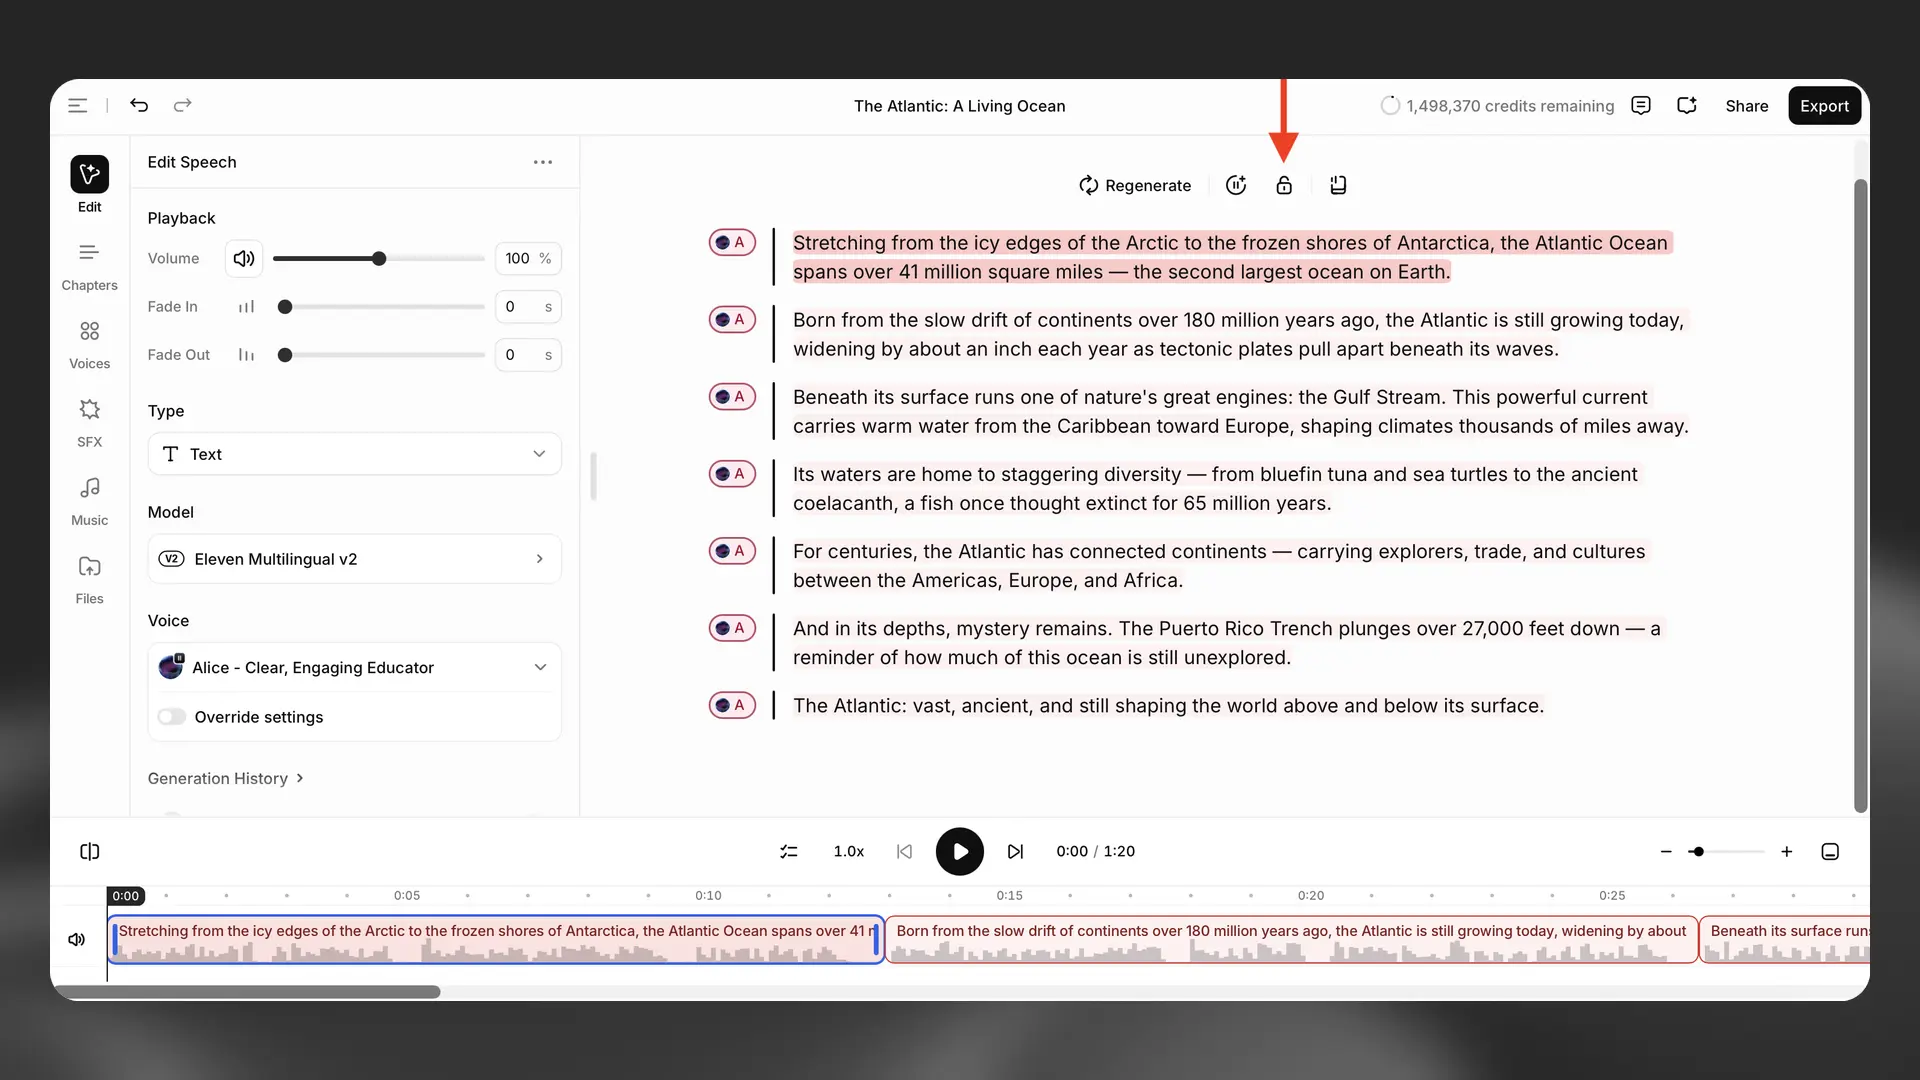
Select Lock paragraph to prevent changes to a paragraph.
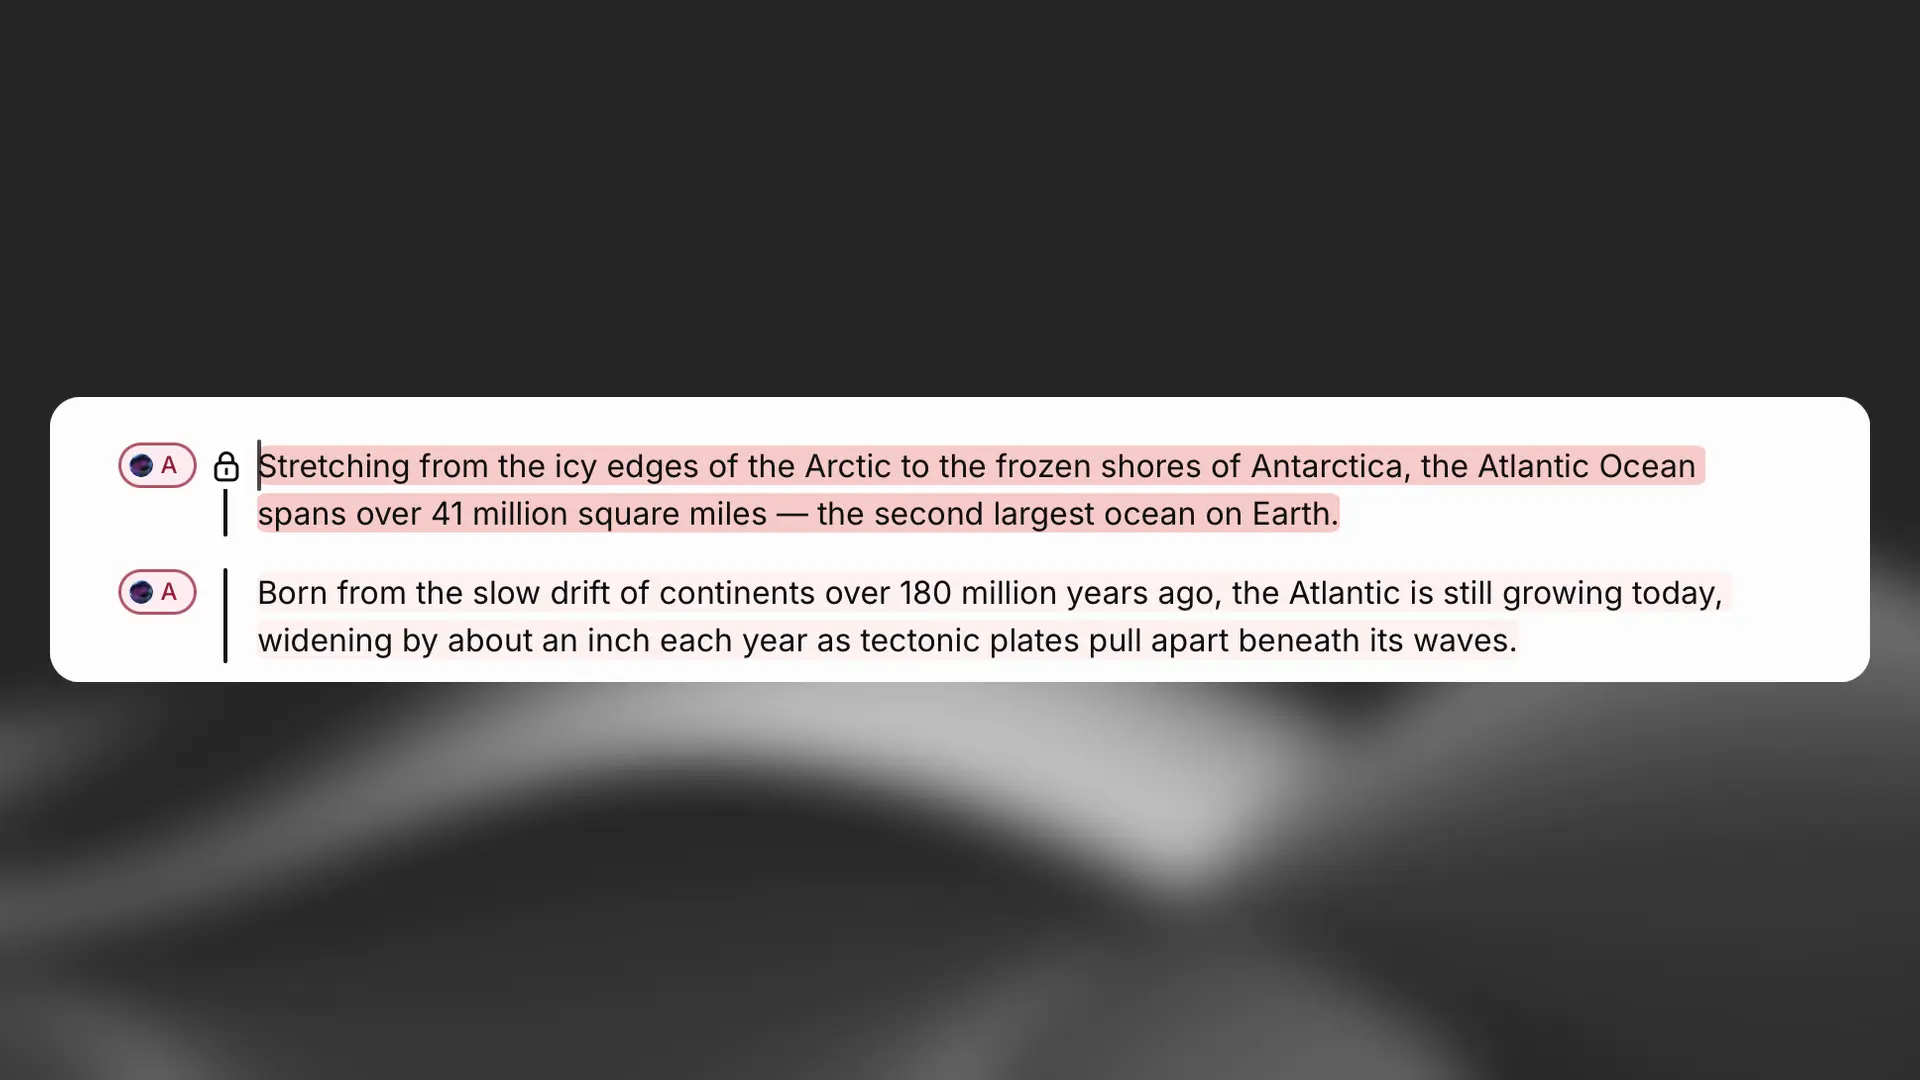
A lock icon appears to the left of locked paragraphs. Select Lock paragraph again to unlock a paragraph. Locking applies only to narration content; you can continue editing video, music, and sound effect clips.
Keyboard shortcuts
Keyboard shortcuts
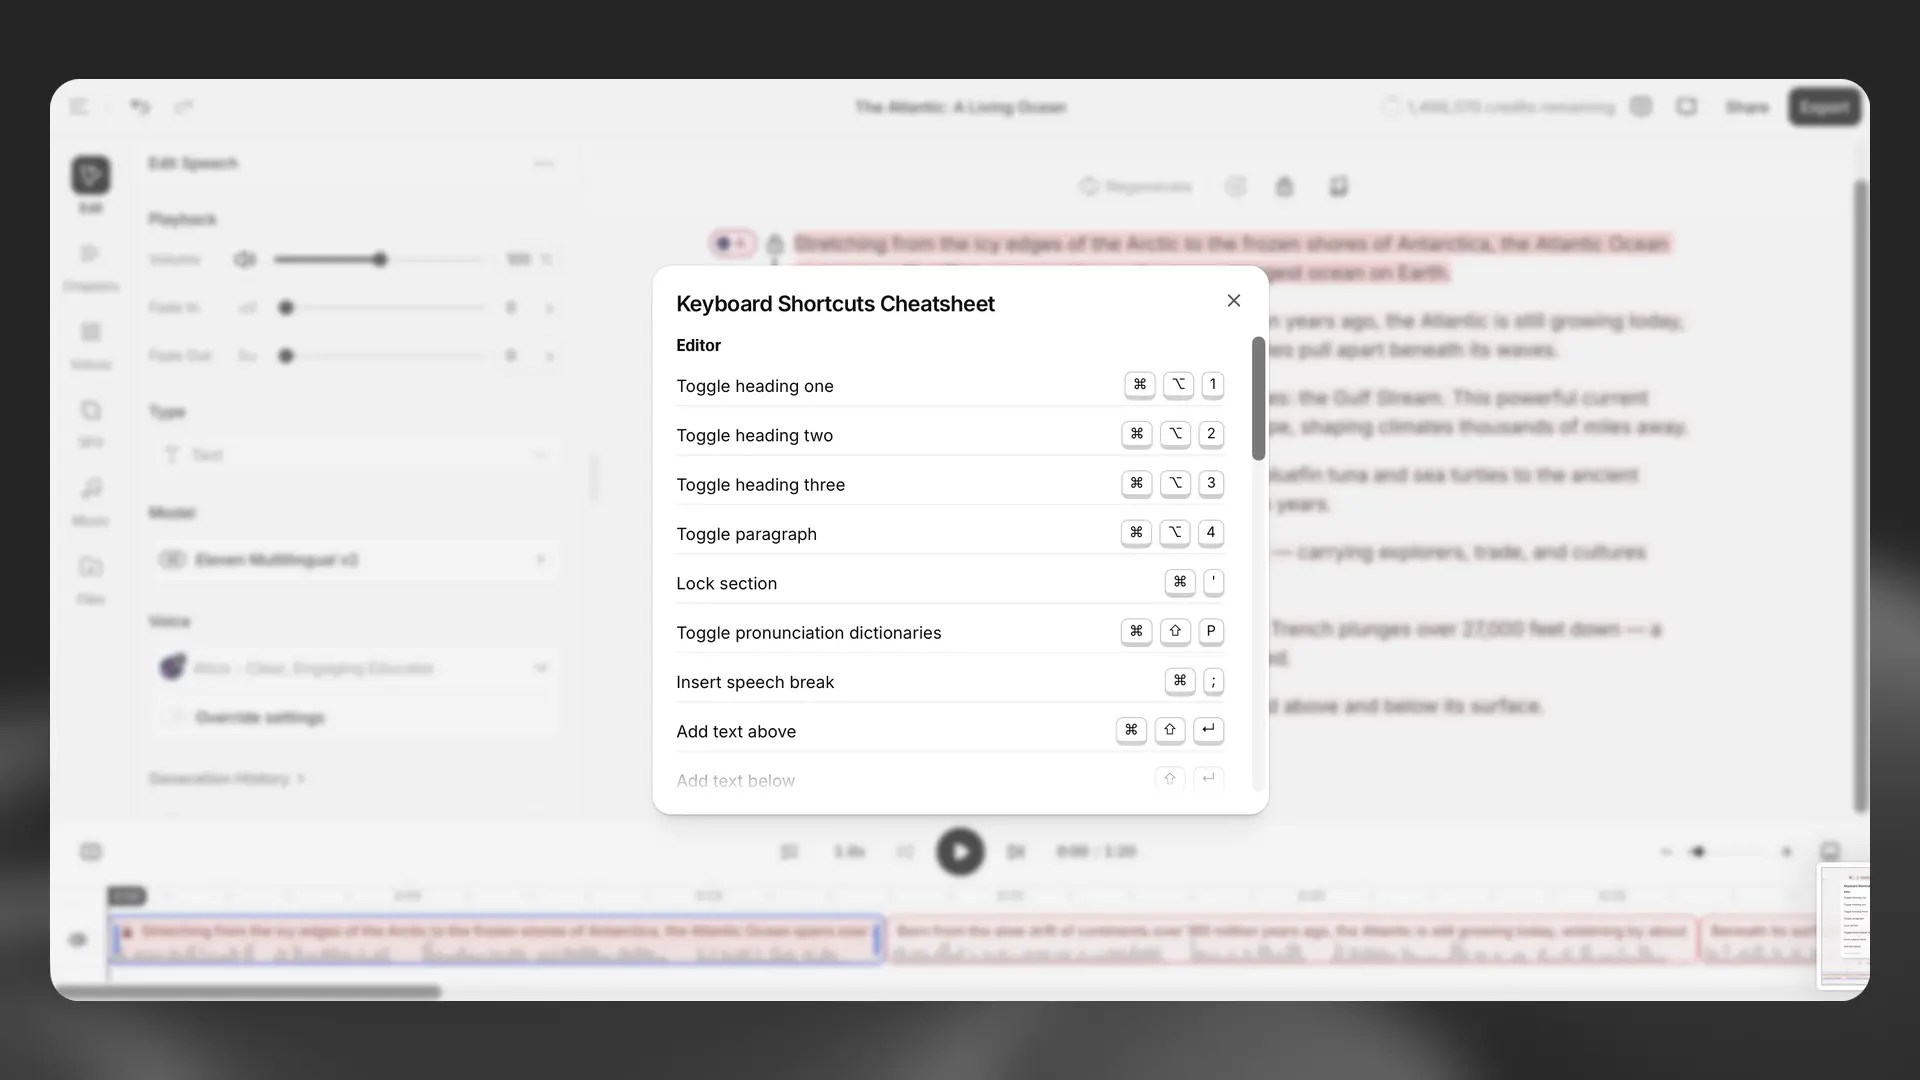
Select Project options > Keyboard shortcuts to view the available keyboard shortcuts.
Video projects
Section titled “Video projects”Contextual sidebar for Video projects
Contextual sidebar for Video projects
The new video project editor includes Library, Script, and Captions panels. For audio projects, see Contextual sidebar for Audio projects.
Library
Library
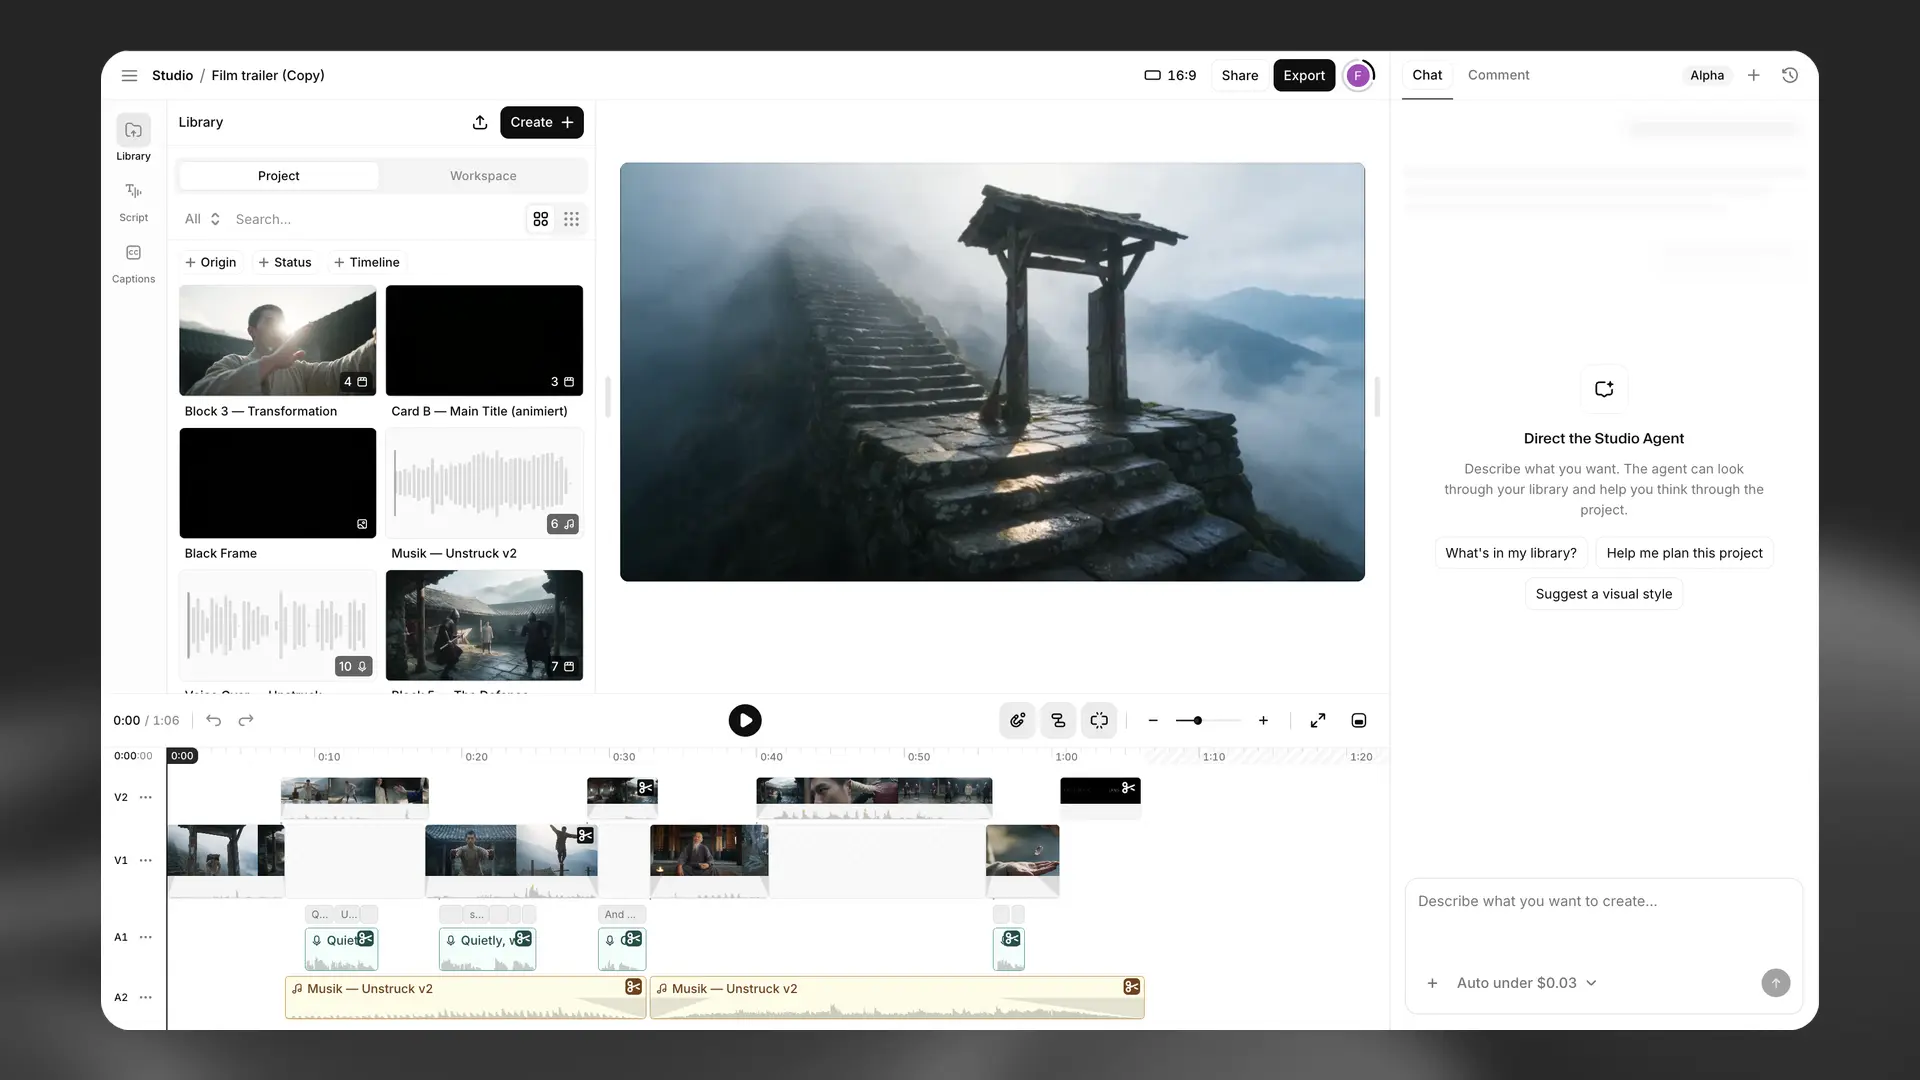
The Library panel stores video clips, images, and speech for reuse on the timeline. Use the Project and Workspace tabs to switch between project assets and assets shared across the workspace. Filter assets by Origin, Status, or Timeline presence.
Select Create + to add content.
Media
- Video generates a video clip.
- Lip sync synchronizes an avatar with a speech clip.
- Image generates a still image.
- Speech generates a voiceover clip.
- SFX generates a sound effect.
- Music generates a music track.
- Upload imports media files from your device.
Elements
- Text adds a text overlay.
Script
Script
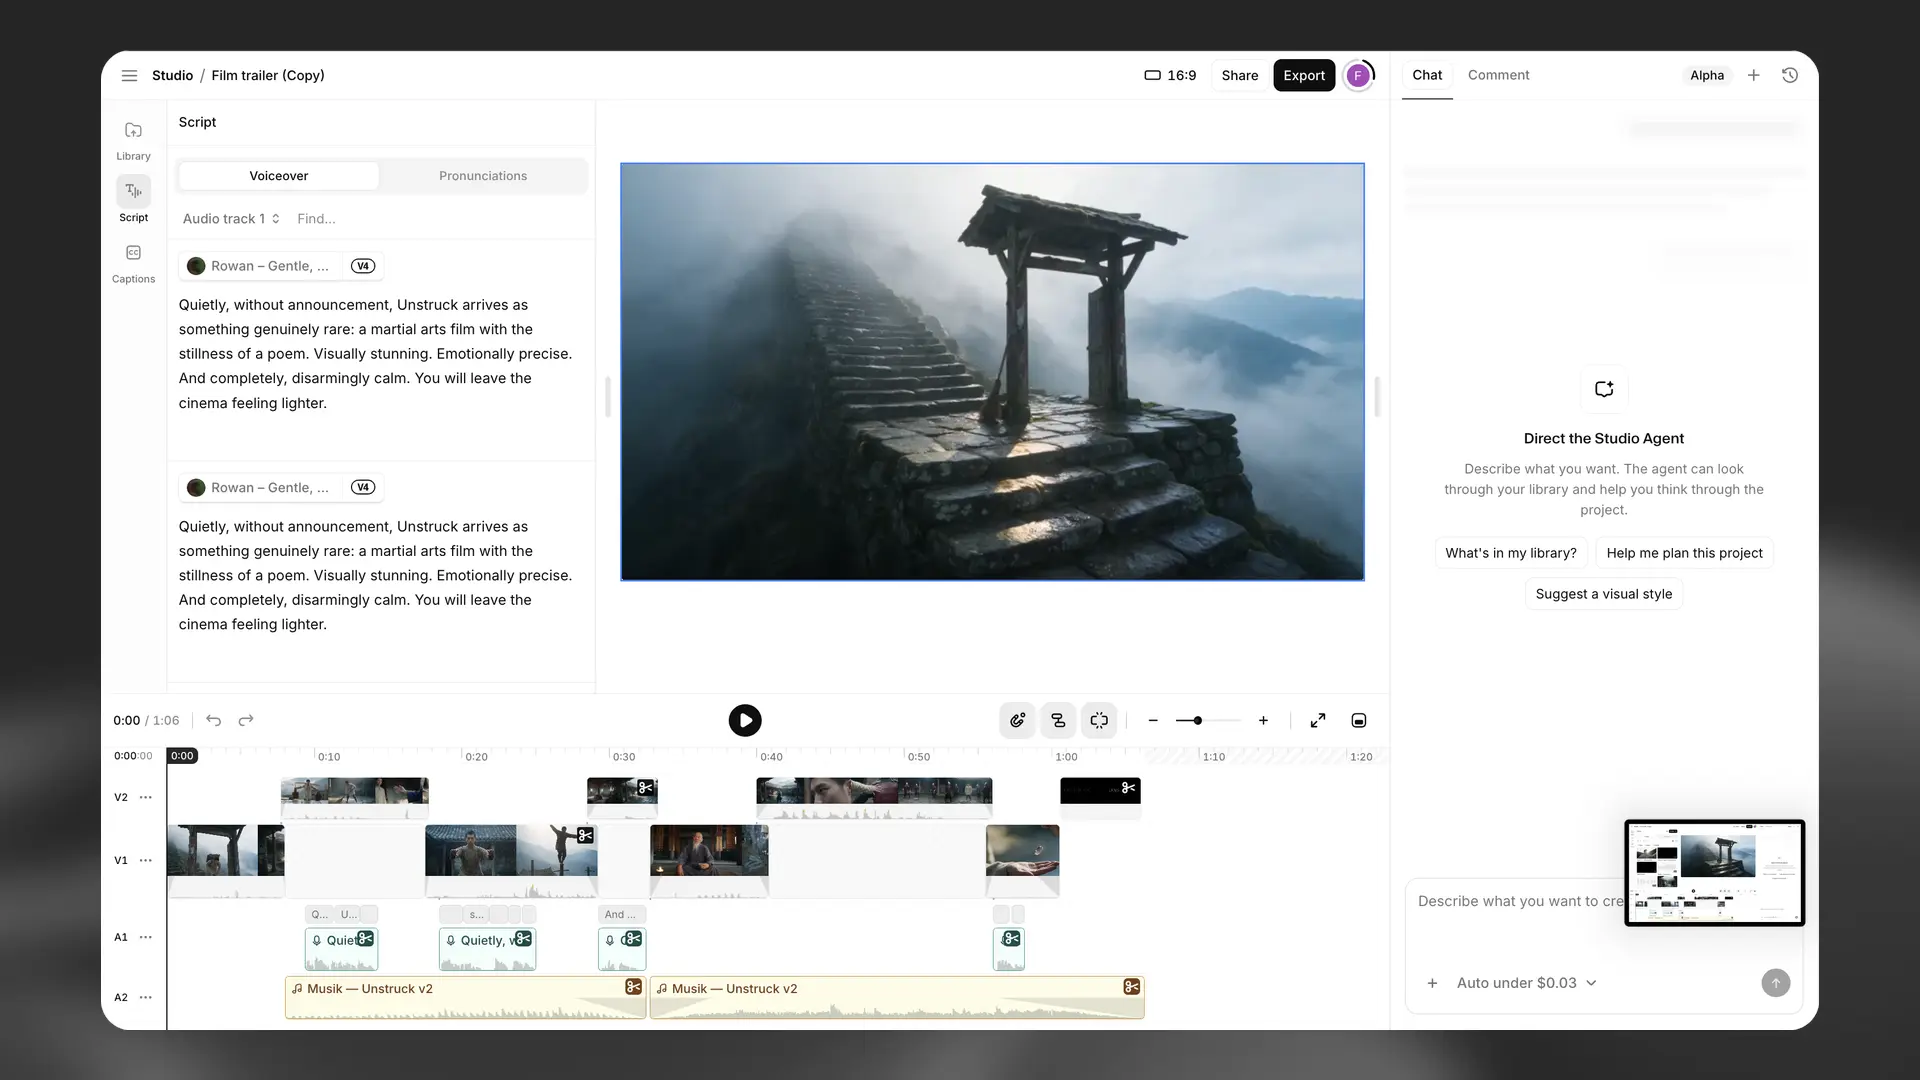
The Script panel organizes narration by audio track:
- Voiceover displays each paragraph with its assigned voice and model. Select a paragraph to edit the text or change the voice. Changes require regeneration.
- Pronunciations opens the Pronunciations Editor, where you can add alias or phoneme rules.
Captions
Captions
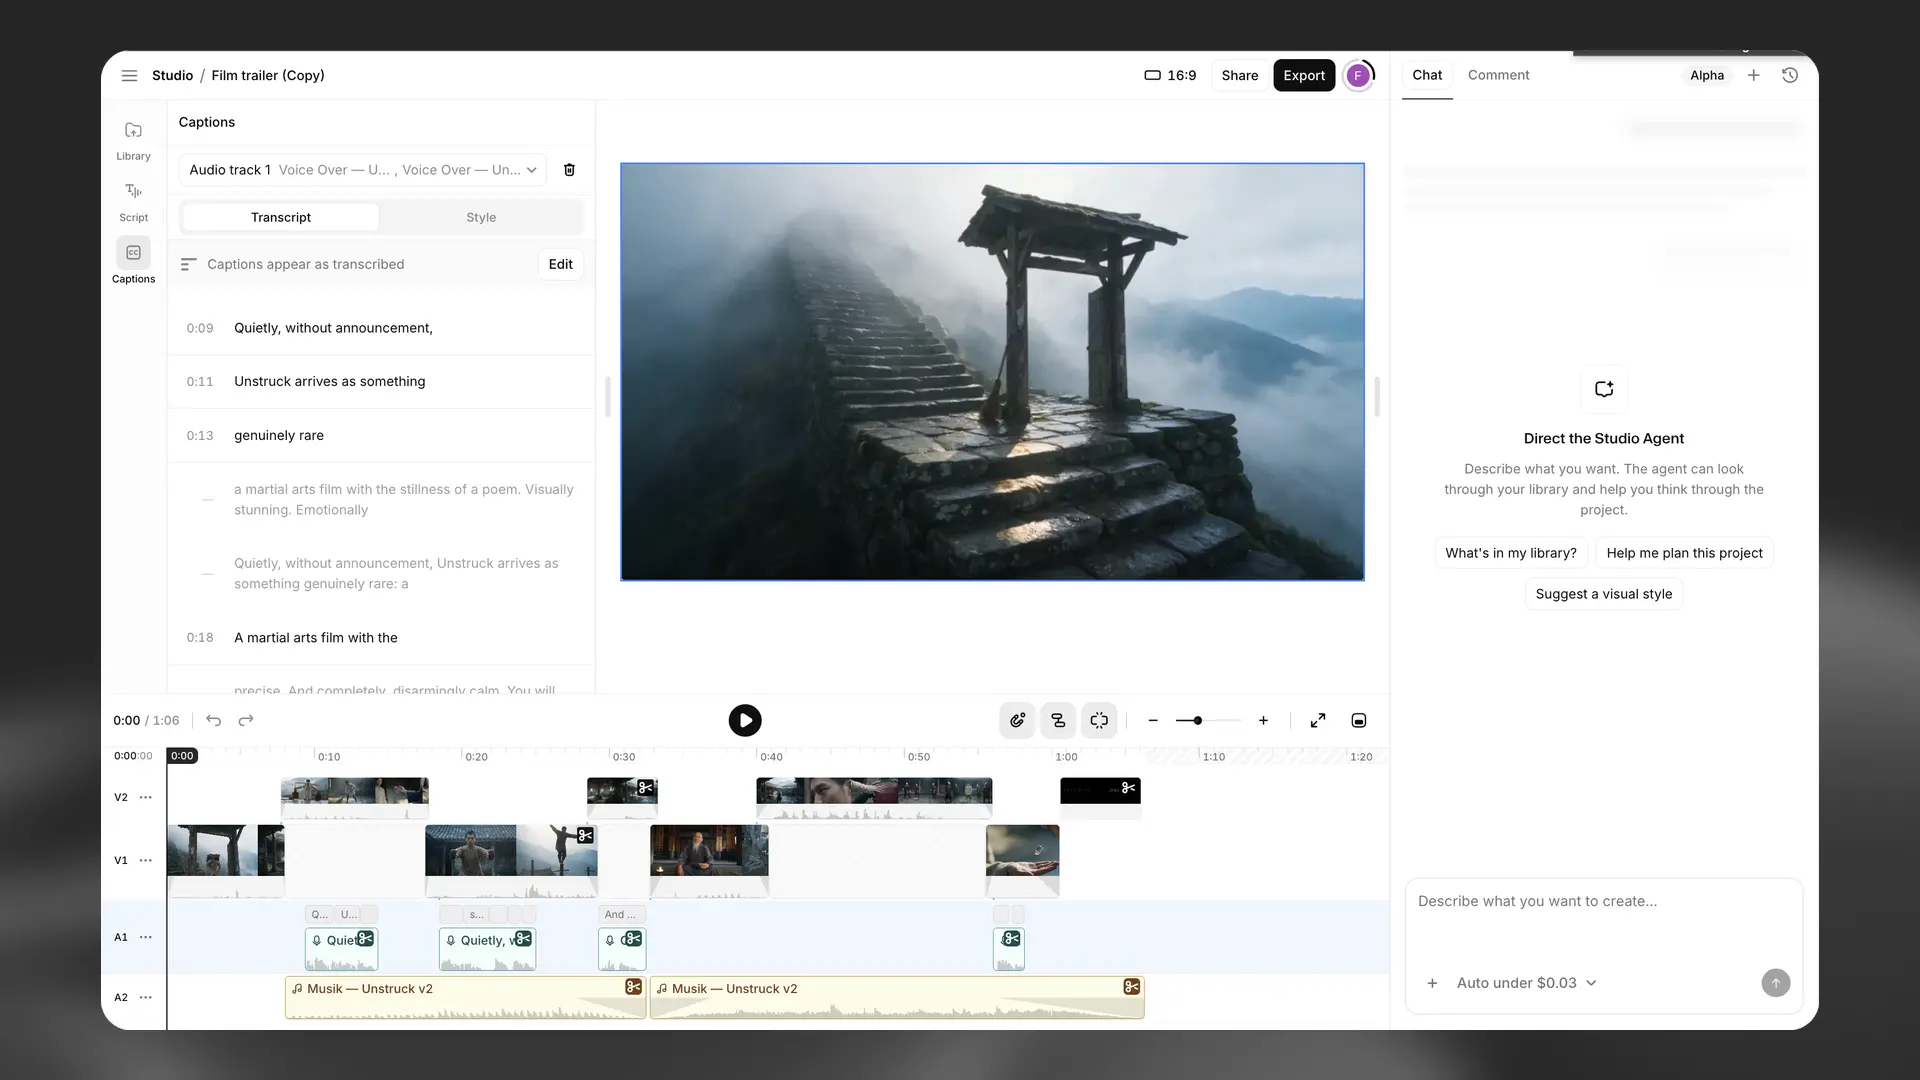
In the Captions panel, select an audio track as the caption source. Use the two tabs to edit the transcript and style:
- Transcript displays timestamped caption text. Select Edit to correct the text or timing.
- Style configures the font, color, size, and placement. Changes appear in the video preview and are burned into the exported video.
Video track and voiceovers
Video track and voiceovers
Create and manage video clips in the Library panel. Generate a clip from a prompt or select Upload to add existing footage. Drag a clip from the Library to place it on the timeline. Use Image refs, Reference videos, Start frame, and End frame to provide visual context for generation.
Add a video track to pair narration with existing footage or B-roll. Import a video file or add a blank track, then align the narration with the video on the timeline. Enable captions and select a template when required.
Aspect ratio for Video projects
Aspect ratio
Use the selector in the top bar to set the output aspect ratio:
- 16:9 for YouTube ads and standard widescreen.
- 9:16 for TikTok, Reels, and Shorts.
- 4:5 for LinkedIn and Facebook ads.
- 1:1 for Instagram posts.
The selected ratio applies to the canvas preview and exported video.
Settings
Section titled “Settings”Voices
Voices
You can use Instant Voice Clones, Professional Voice Clones, voices shared through the Voice Library, and synthetic voices created with Voice Design.
Voice performance depends on the quality of the source audio, the model, and the language. Test several voices to determine which one fits the project.
If you’re unhappy with a voice, but you’re happy with the delivery of the narration, you can use our Voice Changer functionality to change the voice, but preserve the narration
Voice settings
Voice settings
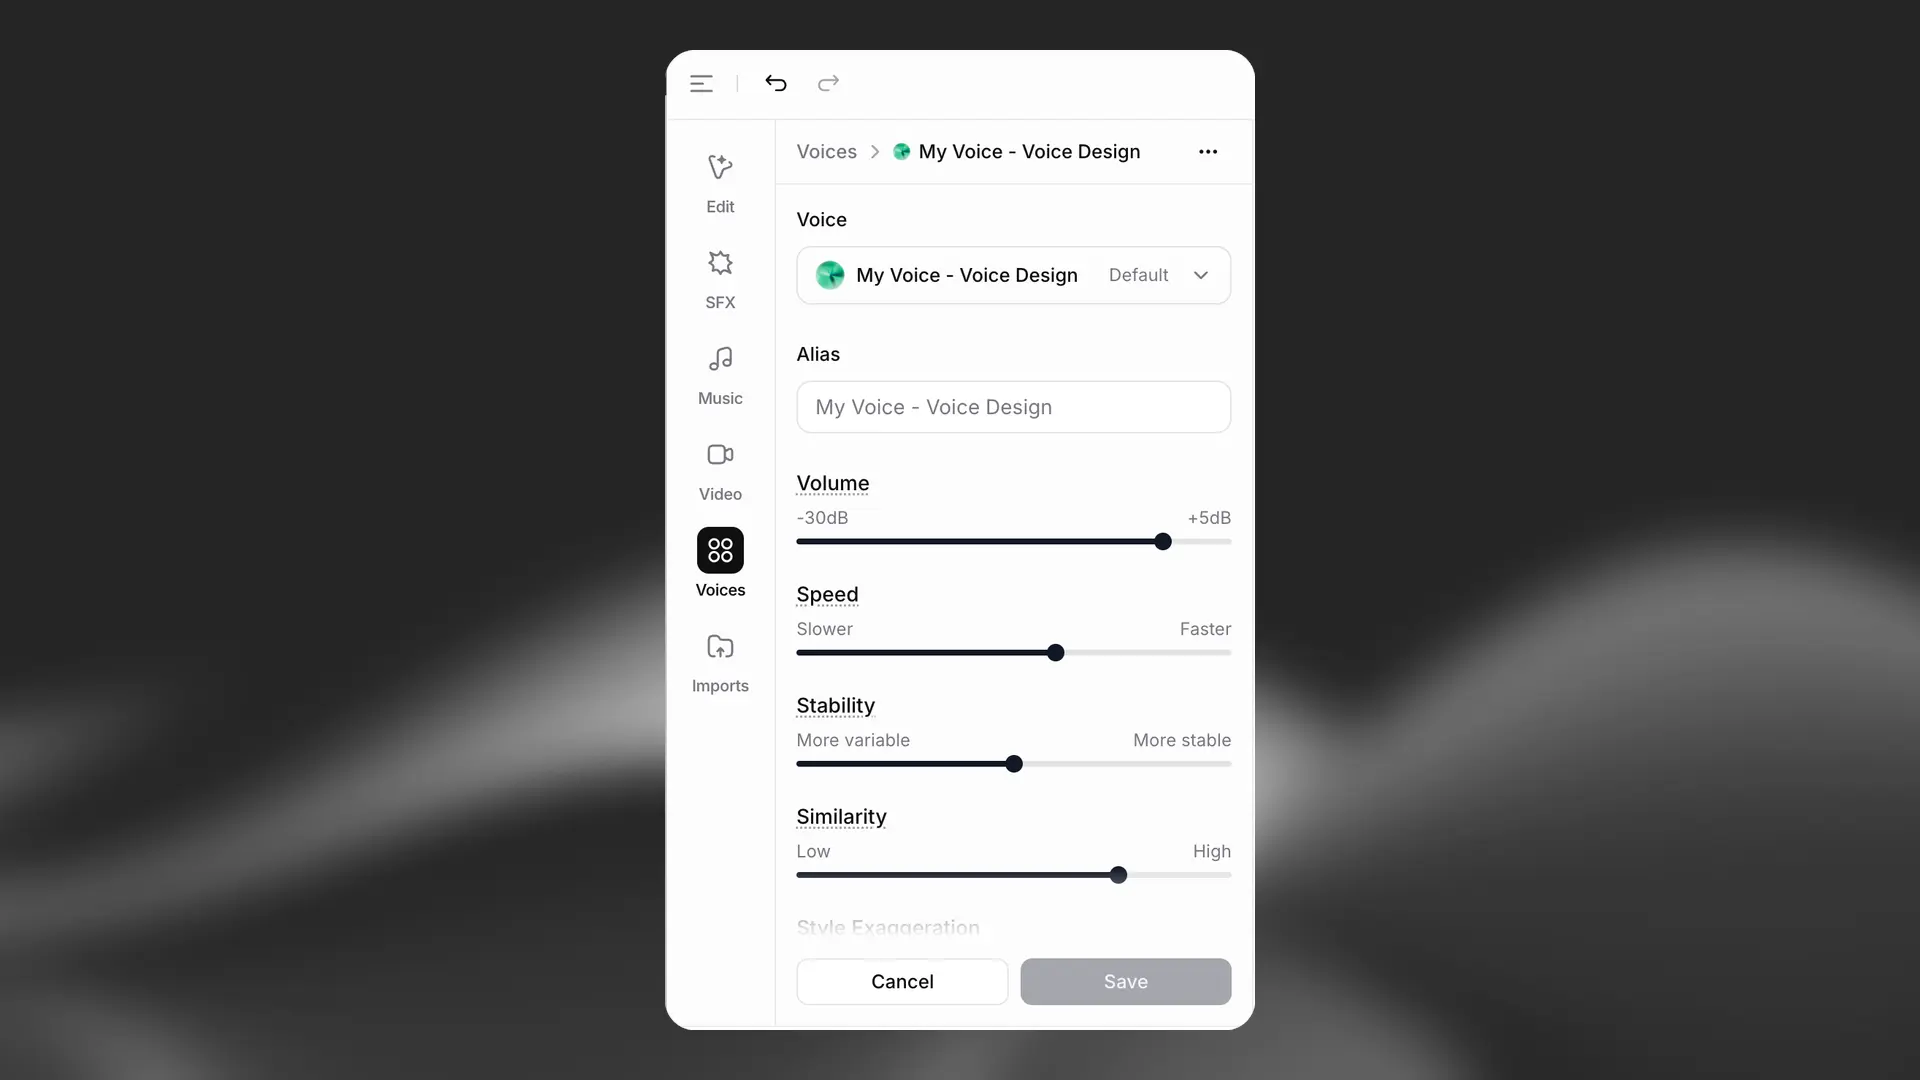
Our users have found different workflows that work for them. The most common setting is stability around 50 and similarity near 75, with minimal changes thereafter. Of course, this all depends on the original voice and the style of performance you’re aiming for.
It’s important to note that the AI is non-deterministic; setting the sliders to specific values won’t guarantee the same results every time. Instead, the sliders function more as a range, determining how wide the randomization can be between each generation.
Enable Override settings to change voice settings for the selected text or paragraph. Without this override, changes apply to every use of the voice in the project and require regeneration. Unlock any affected locked paragraphs before changing the settings.
Alias
You can use this setting to give the voice an alias that applies only for this project. For example, if you’re using a different voice for each character in your audiobook, you could use the character’s name as the alias.
Volume
If you find the generated audio for the voice to be either too quiet or too loud, you can adjust the volume. The default value is 0.00, which means that the audio will be unchanged. The minimum value is -30 dB and the maximum is +5 dB.
Speed
The Speed setting allows you to either speed up or slow down the speed of the generated speech. The default value is 1.0, which means that the speed is not adjusted. Values below 1.0 will slow the voice down, to a minimum of 0.7. Values above 1.0 will speed up the voice, to a maximum of 1.2. Extreme values may affect the quality of the generated speech.
Stability
The Stability slider determines how stable the voice is and the randomness between each generation. Lowering this slider introduces a broader emotional range for the voice. This is influenced heavily by the original voice. Setting the slider too low may result in odd performances that are overly random and cause the character to speak too quickly. On the other hand, setting it too high can lead to a monotonous voice with limited emotion.
For a more lively and dramatic performance, it is recommended to set the stability slider lower and generate a few times until you find a performance you like.
On the other hand, if you want a more serious performance, even bordering on monotone at very high values, it is recommended to set the stability slider higher. Since it is more consistent and stable, you usually don’t need to generate as many samples to achieve the desired result. Experiment to find what works best for you!
Similarity
The Similarity slider dictates how closely the AI should adhere to the original voice when attempting to replicate it. If the original audio is of poor quality and the similarity slider is set too high, the AI may reproduce artifacts or background noise when trying to mimic the voice if those were present in the original recording.
Style exaggeration
Some models include a Style Exaggeration setting. This setting attempts to amplify the style of the original speaker. It does consume additional computational resources and might increase latency if set to anything other than 0. It’s important to note that using this setting has shown to make the model slightly less stable, as it strives to emphasize and imitate the style of the original voice.
In general, we recommend keeping this setting at 0 at all times.
Speaker boost
This setting boosts the similarity to the original speaker. However, using this setting requires a slightly higher computational load, which in turn increases latency. The differences introduced by this setting are generally rather subtle.
Pronunciation dictionaries
Pronunciation dictionaries
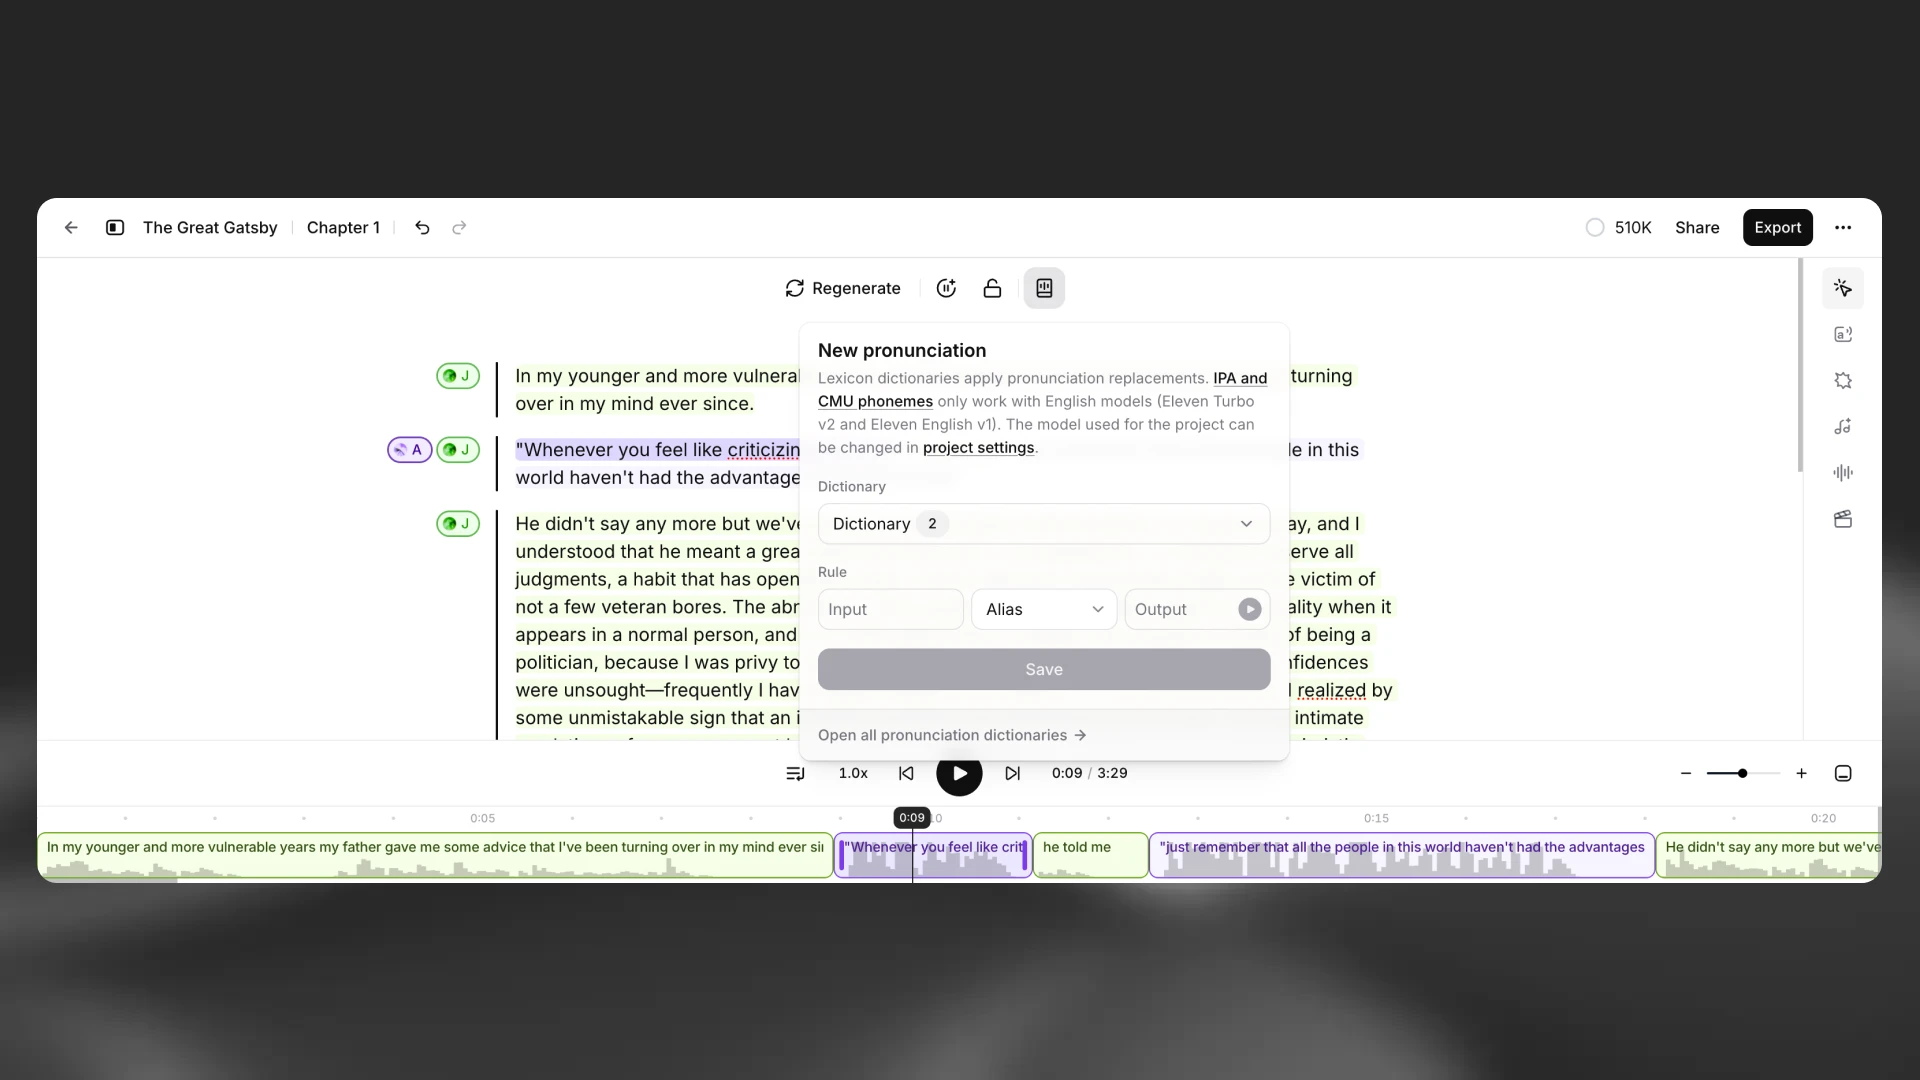
Sometimes you may want to specify the pronunciation of certain words, such as character or brand names, or specify how acronyms should be read. Pronunciation dictionaries allow this functionality by enabling you to upload a lexicon or dictionary file that includes rules about how specified words should be pronounced, either using a phonetic alphabet (phoneme tags) or word substitutions (alias tags).
Whenever one of these words is encountered in a project, the AI will pronounce the word using the specified replacement. When checking for a replacement word in a pronunciation dictionary, the dictionary is checked from start to end and only the first replacement is used.
Existing pronunciation dictionaries can be connected to your project from the Pronunciations Editor. You can open this from the toolbar. Find the dictionary you want to connect in the drop down menu and select Connect.
You can create a new pronunciation dictionary from your project by creating an entry in the Pronunciations Editor, or you can upload or create a pronunciation dictionary from Open all pronunciation dictionaries in the Pronunciations Editor. You can then select Connect to connect the pronunciation dictionary to the current project.
For more information on pronunciation dictionaries, please see our prompting best practices guide.
Export settings
Export settings
Within the Export tab under Project settings you can add additional metadata such as Title, Author, ISBN and a Description to your project. This information will automatically be added to the downloaded audio files. You can also access previous versions of your project, and enable volume normalization. These settings apply to audio exports; video appearance is controlled by your timeline and caption templates.
Exporting and sharing
Section titled “Exporting and sharing”When you’re happy with your chapter or project, use the Export button to generate a downloadable version. If you’ve already generated audio for every paragraph in either your chapter or project, you won’t be charged any additional credits to export. If there are any paragraphs that do need converting as part of the export process, you will see a notification of how many credits it will cost to export.
Export options
Export options
For a single-chapter project, export the project as MP3 or WAV. If the project contains a video track or captions, you can also export it as video.
If your project has multiple chapters, you will have the option to export each chapter individually, or export the full project. If you’re exporting the full project, you can either export as a single file, or as a ZIP file containing individual files for each chapter. You can also choose whether to download as MP3 or WAV for audio‑only exports.
For video exports, enable captions and add a video track (or shareable TTS video) before exporting. Video is rendered with your selected caption template.
Quality setting
Quality setting
The quality of the export depends on your subscription plan. For newly created projects, the quality will be:
- Free, Starter and Creator: 128 kbps MP3, or WAV converted from 128 kbps source.
- Pro, Scale, Business and Enterprise plans: 16-bit, 44.1 kHz WAV, or 192 kbps MP3 (Ultra Lossless).
Downloading
Downloading
Once your export is ready, it will be automatically downloaded. For shareable TTS videos, you can also copy a link for quick sharing.
You can access and download all previous exports, of both chapters and projects, by clicking the Project options button and selecting Exports.
Sharing
Sharing
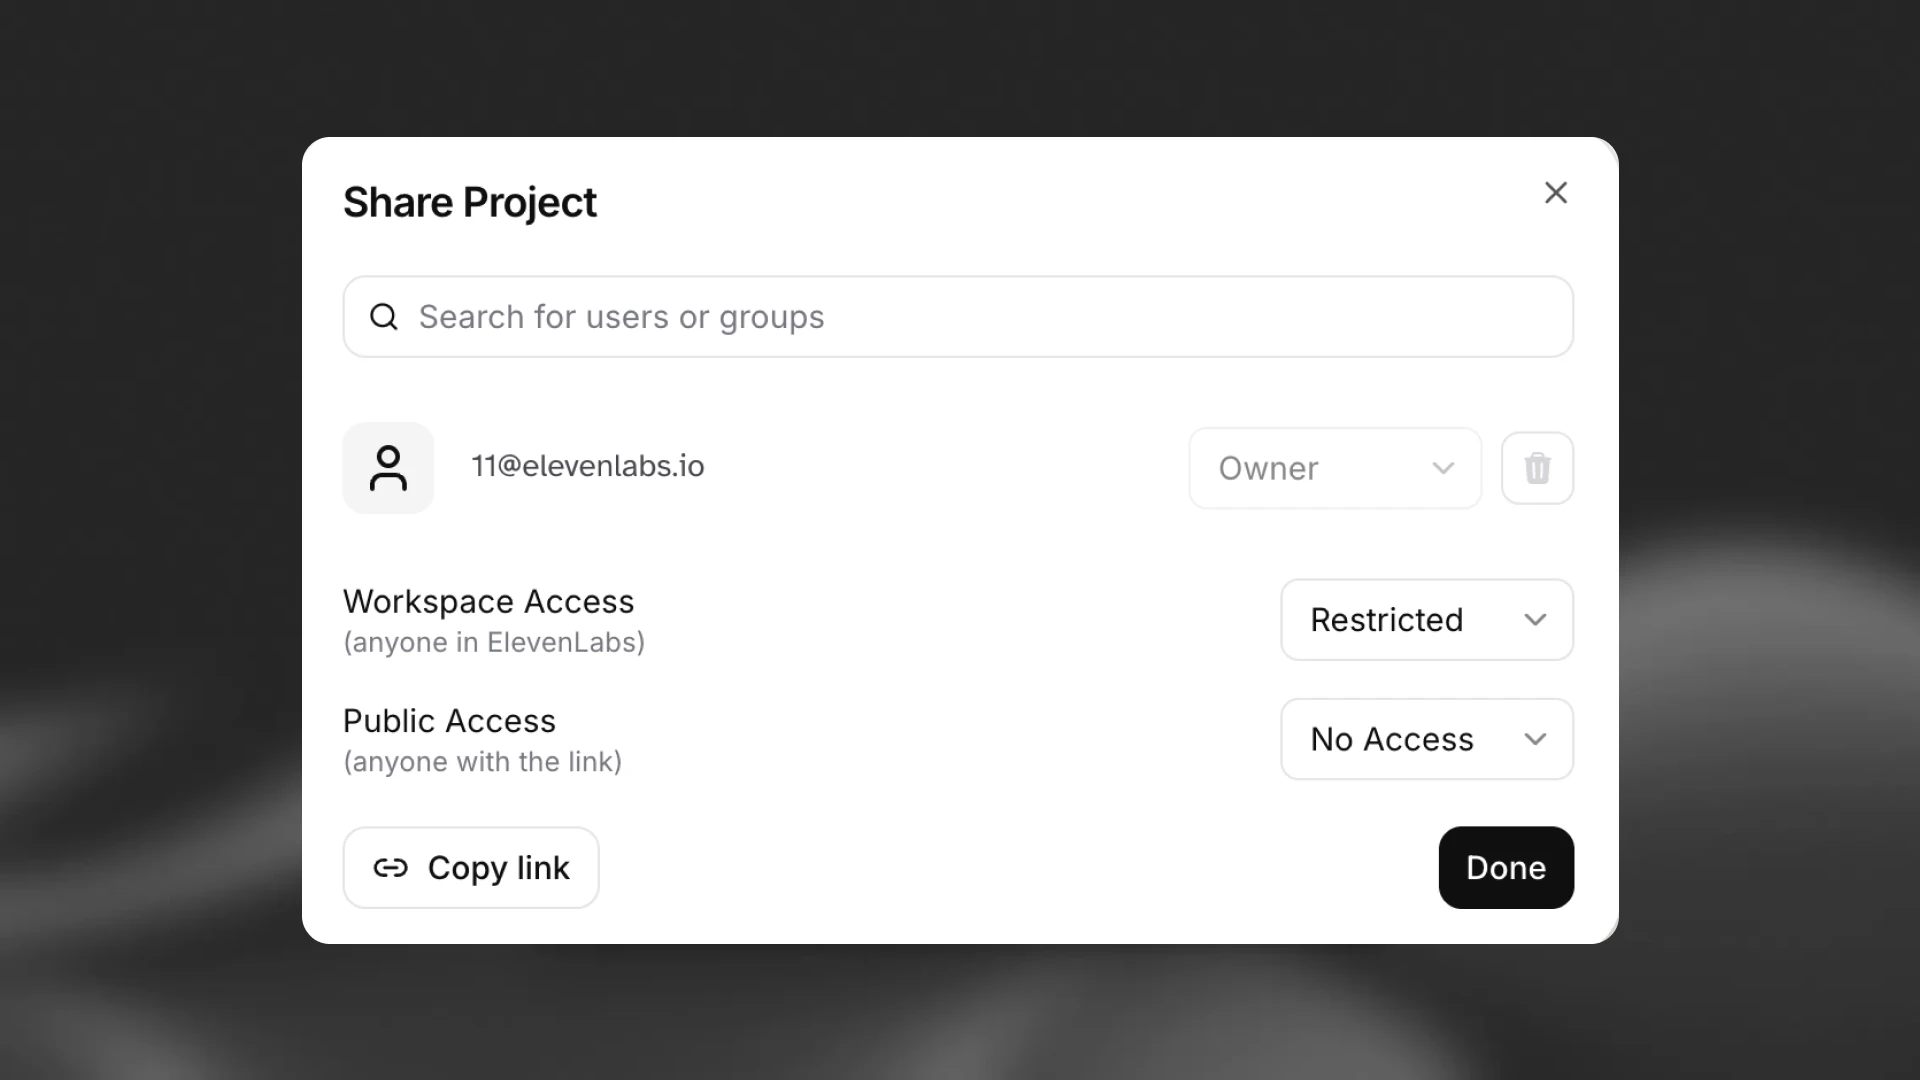
From the editor, create a read‑only link so others can play your timeline and review your mix without downloading files. You can revoke access at any time. Commenting is also available, including anonymous comments.
Commenting
Commenting
Invite collaborators or your audience to leave feedback directly on the timeline. Comments are timestamped to the playhead so feedback appears exactly where it’s relevant. Commenters don’t need an ElevenLabs account and can leave a name or post anonymously. Discussions stay organized with threaded replies and optional mentions of collaborators.
To add a comment, open a shared project link (or the editor with sharing enabled), move the playhead to the right moment, and click Add comment. Type your message and post; use Reply to continue the thread. You’ll receive email notifications when there’s a new comment or reply in a thread you started or participated in.
When feedback is addressed, mark the thread as Resolved; it will collapse in the list and can be reopened later. Resolving a thread pauses further notifications until it is reopened.
Free regenerations 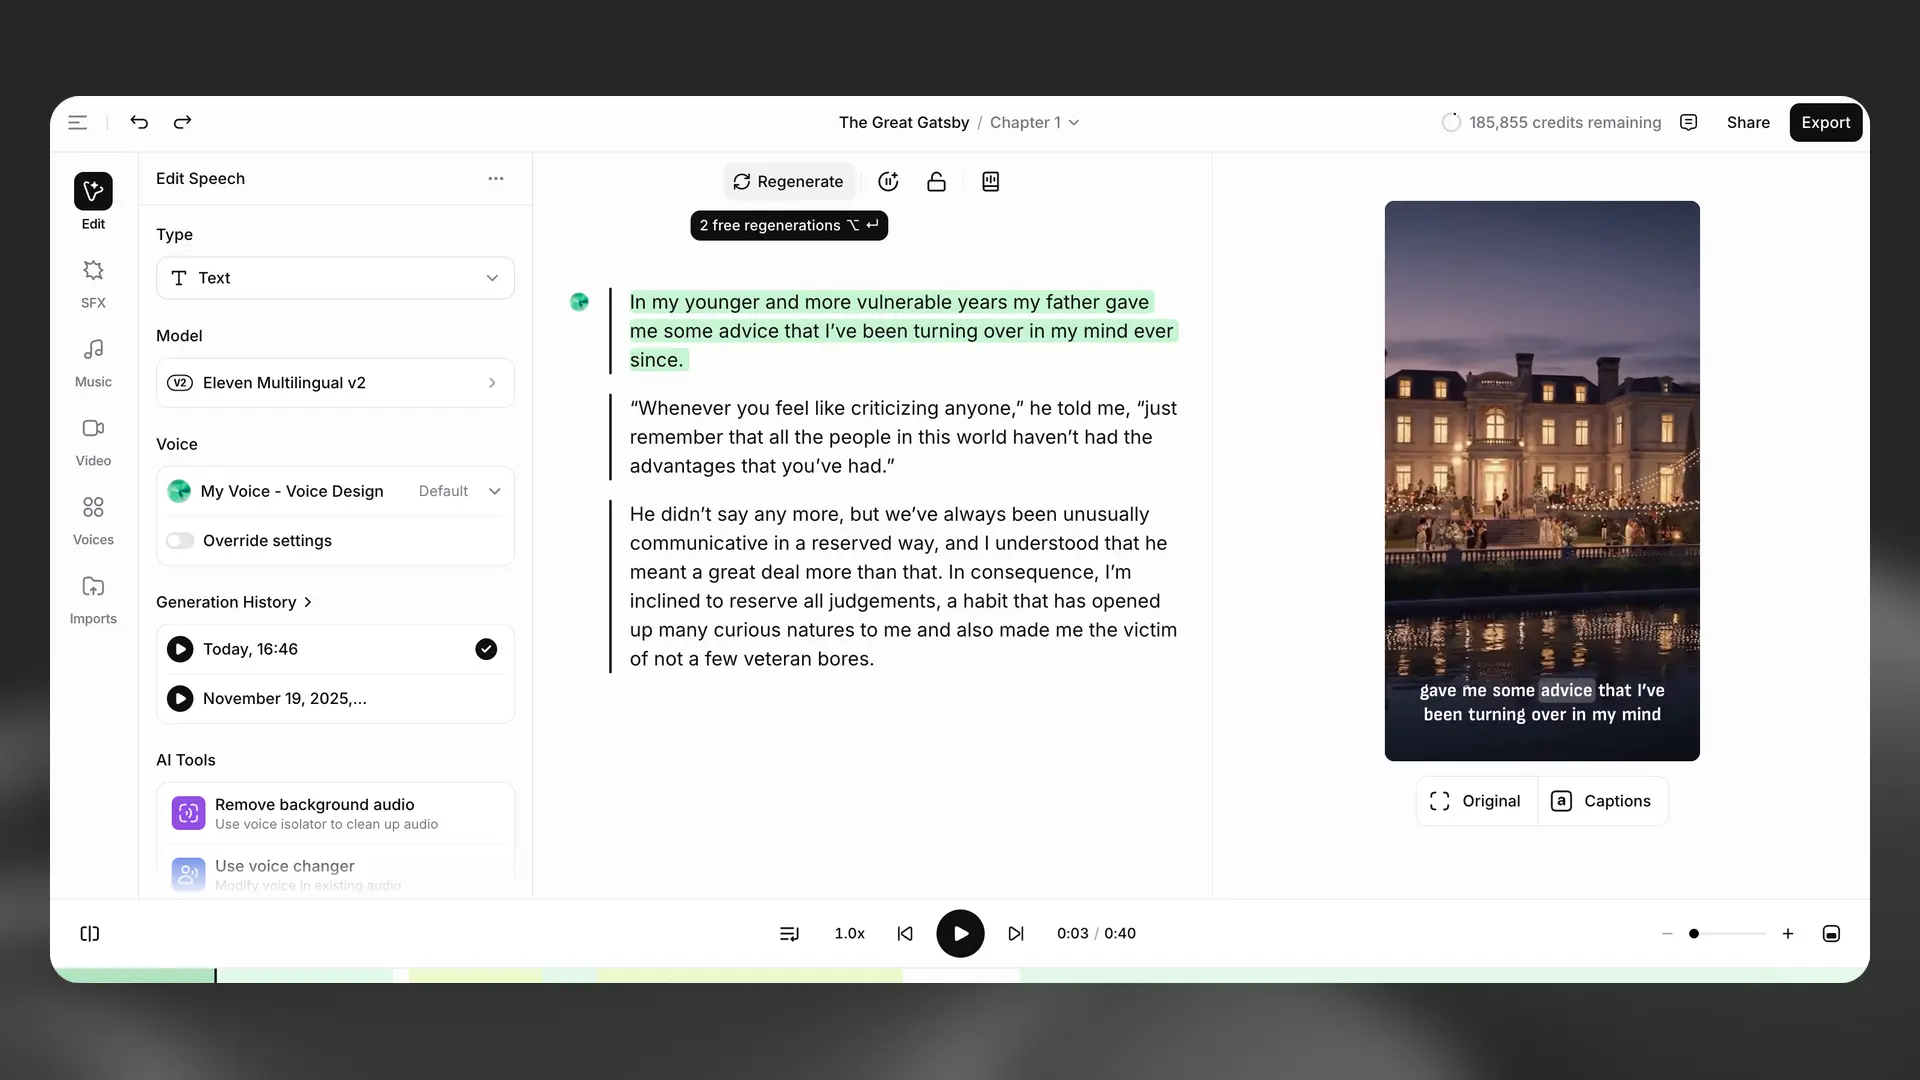 In ElevenCreative Studio, provided you don’t change the text or voice, you can regenerate a selected paragraph or section of text twice for free. If free regenerations are available for the selected paragraph or text, you will see Regenerate. If you hover over the Regenerate button, the number of free regenerations remaining will be displayed. Once your free regenerations have been used, the button will display Generate, and you will be charged for subsequent generations. In ElevenCreative Studio, provided you don’t change the text or voice, you can regenerate a selected paragraph or section of text twice for free. If free regenerations are available for the selected paragraph or text, you will see Regenerate. If you hover over the Regenerate button, the number of free regenerations remaining will be displayed. Once your free regenerations have been used, the button will display Generate, and you will be charged for subsequent generations. |
|---|
| Auto-regeneration for bulk conversions When using Export to generate audio for a full chapter or project, auto-regeneration automatically checks the output for a range of issues including: volume distortions voice similarity mispronunciations missing or additional words If any issues are detected, the tool will automatically regenerate the audio up to twice, at no extra cost. This feature may increase the processing time but helps ensure higher quality output for your bulk conversions. |
| What is Studio? ElevenCreative Studio is a workspace for creating audio and video projects. Studio 4.0 combines a prompt-first workflow with timeline editing, generated media, sharing, and comments. Audio projects Use Audio projects to create long-form narration, podcasts, and audiobooks. Upload a script or document, assign voices, and arrange narration, music, and sound effects on the timeline. The Audio project editor includes: A contextual sidebar for voice, model, playback, and generation settings. A Chapters sidebar for organizing long-form content. Generation history and paragraph locking. Actor Mode for guiding speech delivery with a recording. MP3 and WAV export options. Video projects Use Video projects to combine video, images, speech, music, sound effects, text, and captions. Start with a prompt, an Inspiration, an upload, or a blank project. The Video project editor includes: A Library for project and workspace assets. A Script panel for narration and pronunciation rules. A Captions panel for transcript and style controls. A multi-track timeline for arranging media. Aspect ratios for widescreen, vertical, portrait, and square video. Studio Agent for planning and editing video projects. Sharing and export Share a project to collect comments from teammates. Select Export to render the current chapter or project as audio or video. For detailed instructions, see the ElevenCreative Studio guide. |
| On what plans can I use Studio? Our professional end-to-end solution for long-form content, called Studio, is available on all our plans, including our free plan. The exception being the Create a podcast (GenFM) feature, which requires a paid subscription to access. You can find more information about all our subscription plans on our Pricing page. |
| How do I add chapters to a Studio project? The Chapters sidebar is available in Audio projects. When you import a document that contains chapters, Studio detects them automatically. Select the Chapters tab to open the sidebar. Select + to add a chapter. Use Chapter actions to rename or remove a chapter. Drag chapters to reorder them. |
| Does it cost credits to regenerate in Studio? We offer up to two free regenerations in Studio, provided you haven’t changed the text that you’re regenerating, or assigned a different voice, or changed the voice settings. To regenerate, either click on the paragraph to regenerate the whole paragraph, or select one or more words that you want to regenerate. For the best results, we recommend regenerating a complete phrase or sentence. If the selection is eligible for a free regeneration, you will see that the Generate/Regenerate button in the toolbar says Regenerate, and if you hover over it, you will see a notification letting you know how many free regenerations are remaining. If your selection isn’t eligible for a free regeneration, the button will say Generate, and you will be charged for the generation. |
| How can I create a voiceover for my video using Studio? Create a new video project from the Studio home page. Enter a prompt, select an Inspiration, or select + New blank project > Video project (New). Use the Library panel to add the video and voiceover: Select Create +. Select Upload to add an existing video, or select Video to generate one. Select Speech to generate the voiceover. Drag the video and speech clips from the Library to the timeline. Adjust the clips on the timeline to align the voiceover with the video. Use the Script panel to edit the narration or change its voice and model. Changes to the text or voice require regeneration. To add captions, open the Captions panel and select the voiceover track as the caption source. Edit the transcript and caption style as required. Select Export to render and download the finished video. |
| Are there any limitations to the size of a project in Studio? In general, most people won’t reach these limits, but there are a few limitations that are good to keep in mind. Up to 500 chapters per project Each chapter can have up to 400 paragraphs Each paragraph can have a maximum of 5000 characters Additionally, each subscription plan includes a limit on the total number of projects you can have. If you exceed this limit prior to downgrading or canceling your plan, you will retain access to your existing projects. However, you will not be able to create new projects until the total number falls within the limits of your current plan. Project Limits by Plan: Free: 5 projects Starter: 20 projects Creator: 1,000 projects Pro: 3,000 projects Scale: 20,000 projects Business: 20,000 projects |
Can I assign more than one voice to a paragraph in Studio? You can assign multiple voices to a single paragraph in Studio. To do this, you just need to select the text you want to assign to each voice, and change the voice using the voice selection drop-down in the Voices sidebar, on the left of the screen. Each voice will be designated with a different color icon to the left of the paragraph, and the text associated with each voice will be highlighted in a corresponding color. 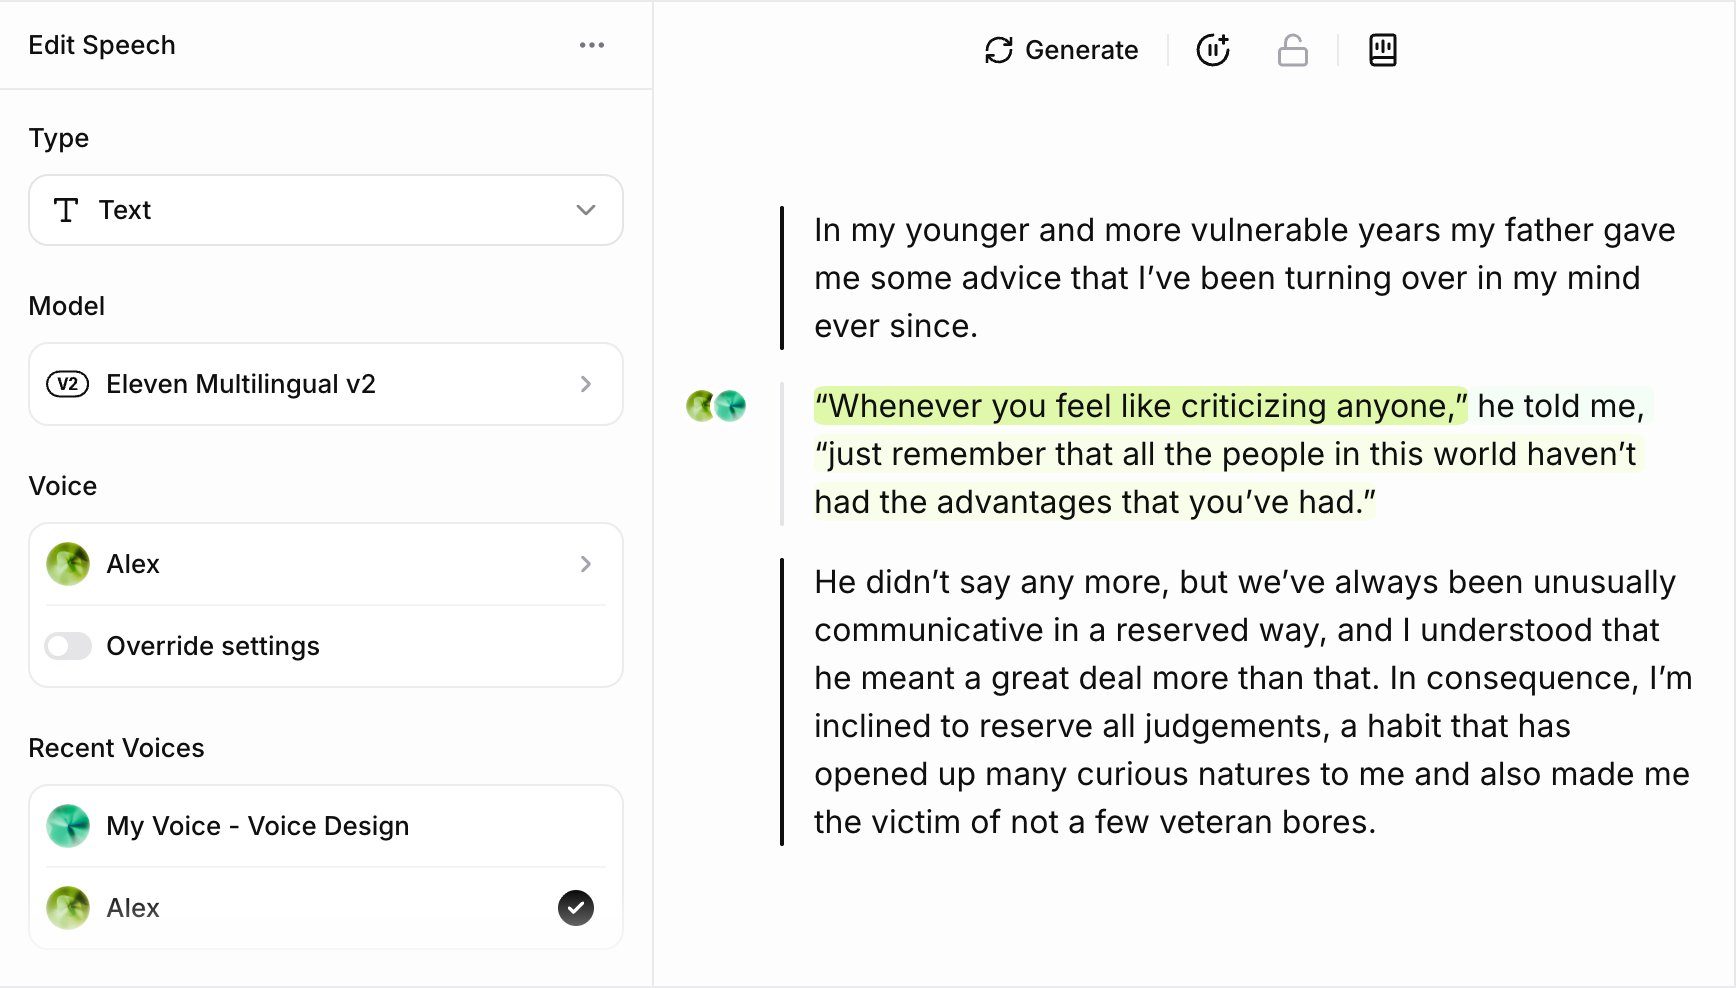 |
Can I regenerate individual words in Studio? In Studio, you can either regenerate the whole of the selected paragraph, or if you select one or more words, you can regenerate only those words. For the best results, we recommend you regenerate a complete phrase or sentence at a time. You need to have generated audio for the whole paragraph before you will see the option to regenerate selection. 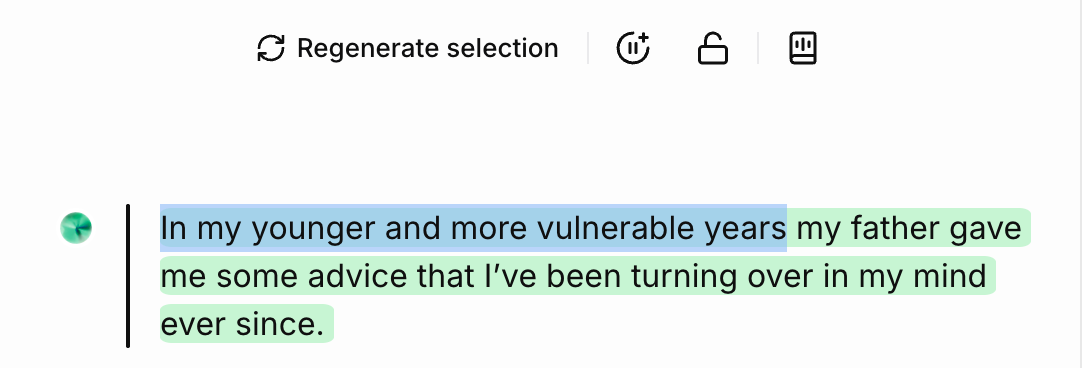 |
How can I change the voice and settings across multiple paragraphs in Studio? To change the voice for specific sections or paragraphs Simply highlight the section, sentence, or paragraph where you wish to change the voice, then select a voice that fits your character or narration using the voice selection drop-down in the Edit Speech sidebar to the left. When you change the voice, you’ll need to generate new audio. 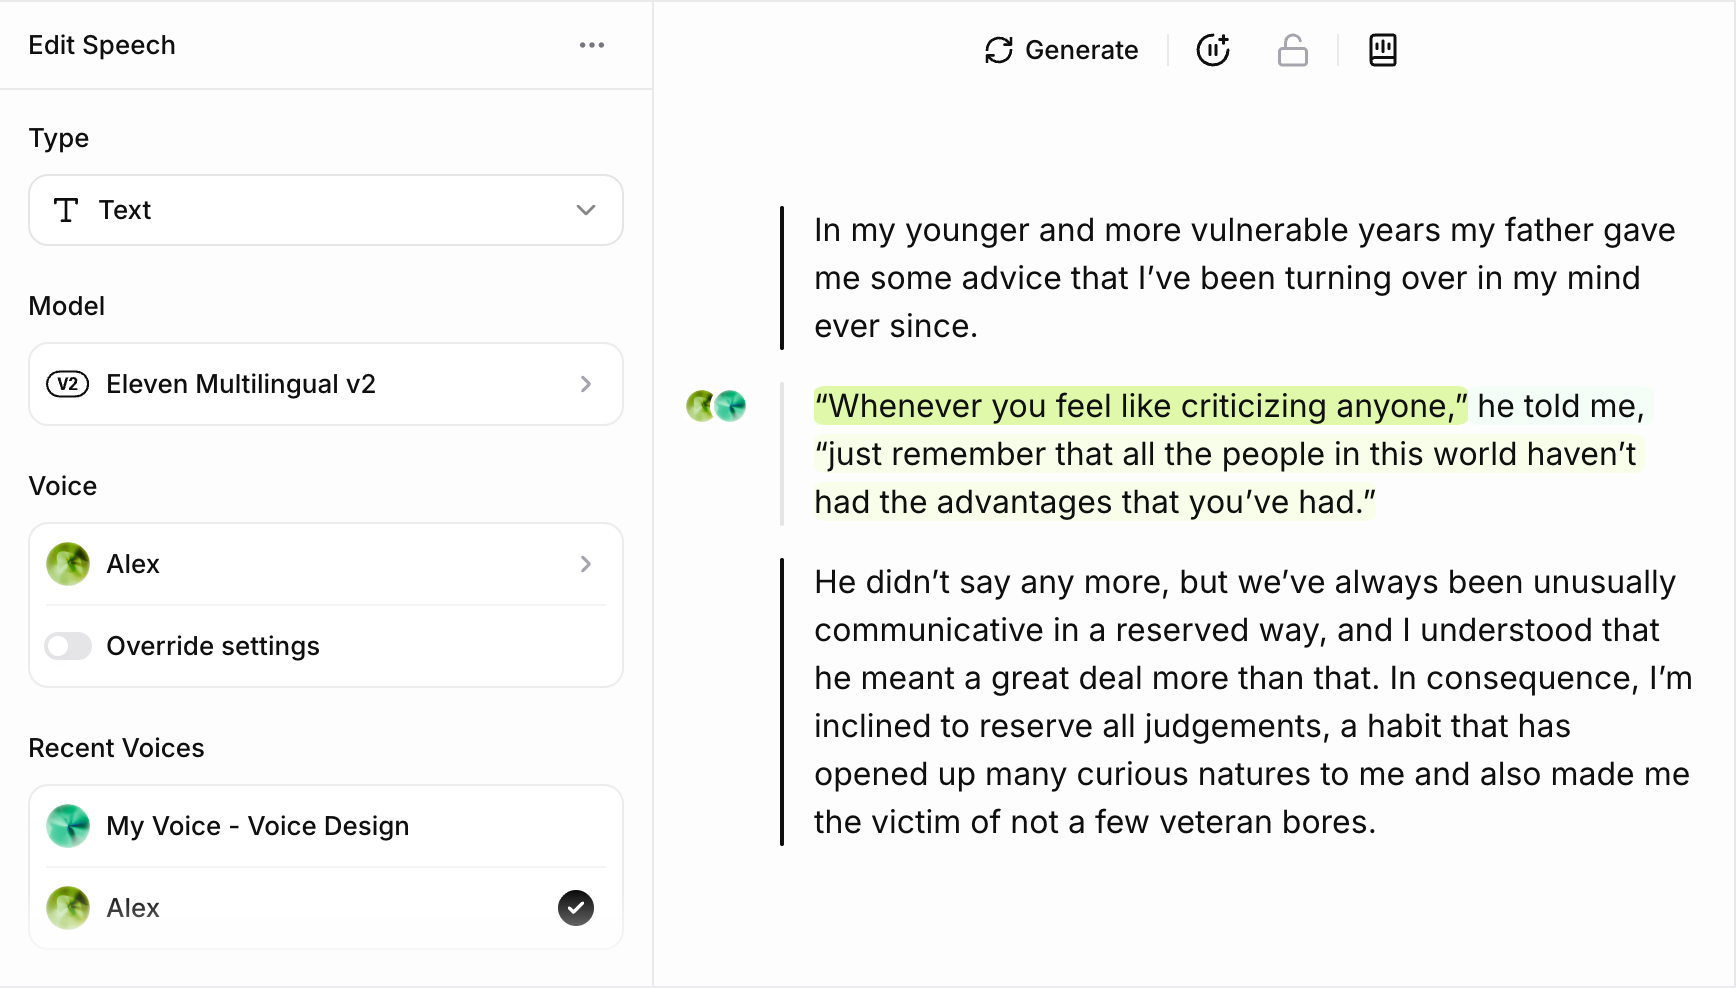 When finished, you’ll see the voice orb to the left of your paragraph change, and your text will be highlighted in the same color – a simple way to see which sentences have which voice. For a quick keyboard shortcut to show all voices and their color orbs per paragraph, press When finished, you’ll see the voice orb to the left of your paragraph change, and your text will be highlighted in the same color – a simple way to see which sentences have which voice. For a quick keyboard shortcut to show all voices and their color orbs per paragraph, press Cmd+Opt+A or Ctrl+Alt+A You can also adjust the voice settings including stability, similarity, speaker boost, and more, to exaggerate and customize your output. You can use Override settings to change the settings for just the selected text or paragraph, or adjust the settings for all paragraphs using the Voice settings button in the Edit Speech sidebar. 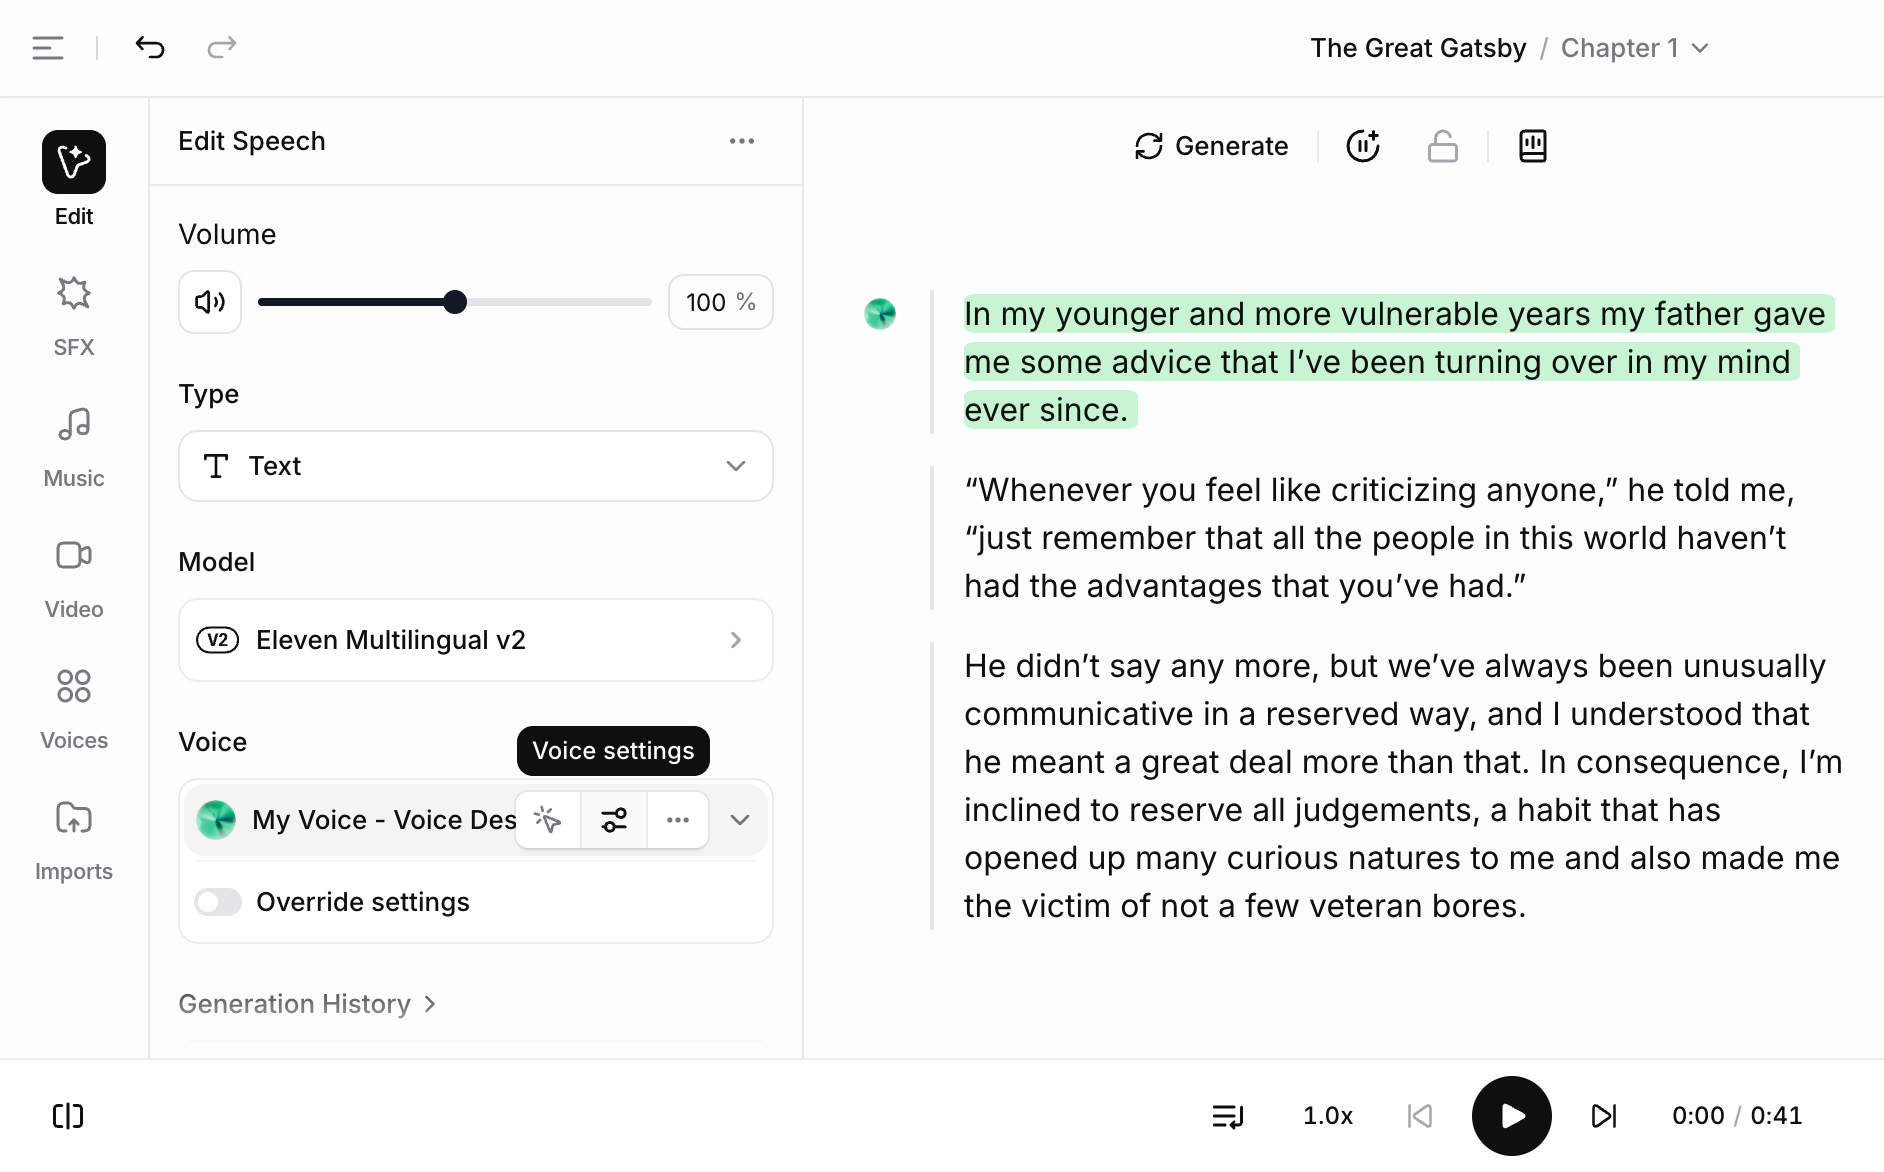 To change the voice for all paragraphs If you want to change the voice for every paragraph currently associated with a specific voice, you can do this from Voice settings for the voice you want to change. In Voice settings, you’ll see a button to Replace voice across project. To change the voice for all paragraphs If you want to change the voice for every paragraph currently associated with a specific voice, you can do this from Voice settings for the voice you want to change. In Voice settings, you’ll see a button to Replace voice across project. 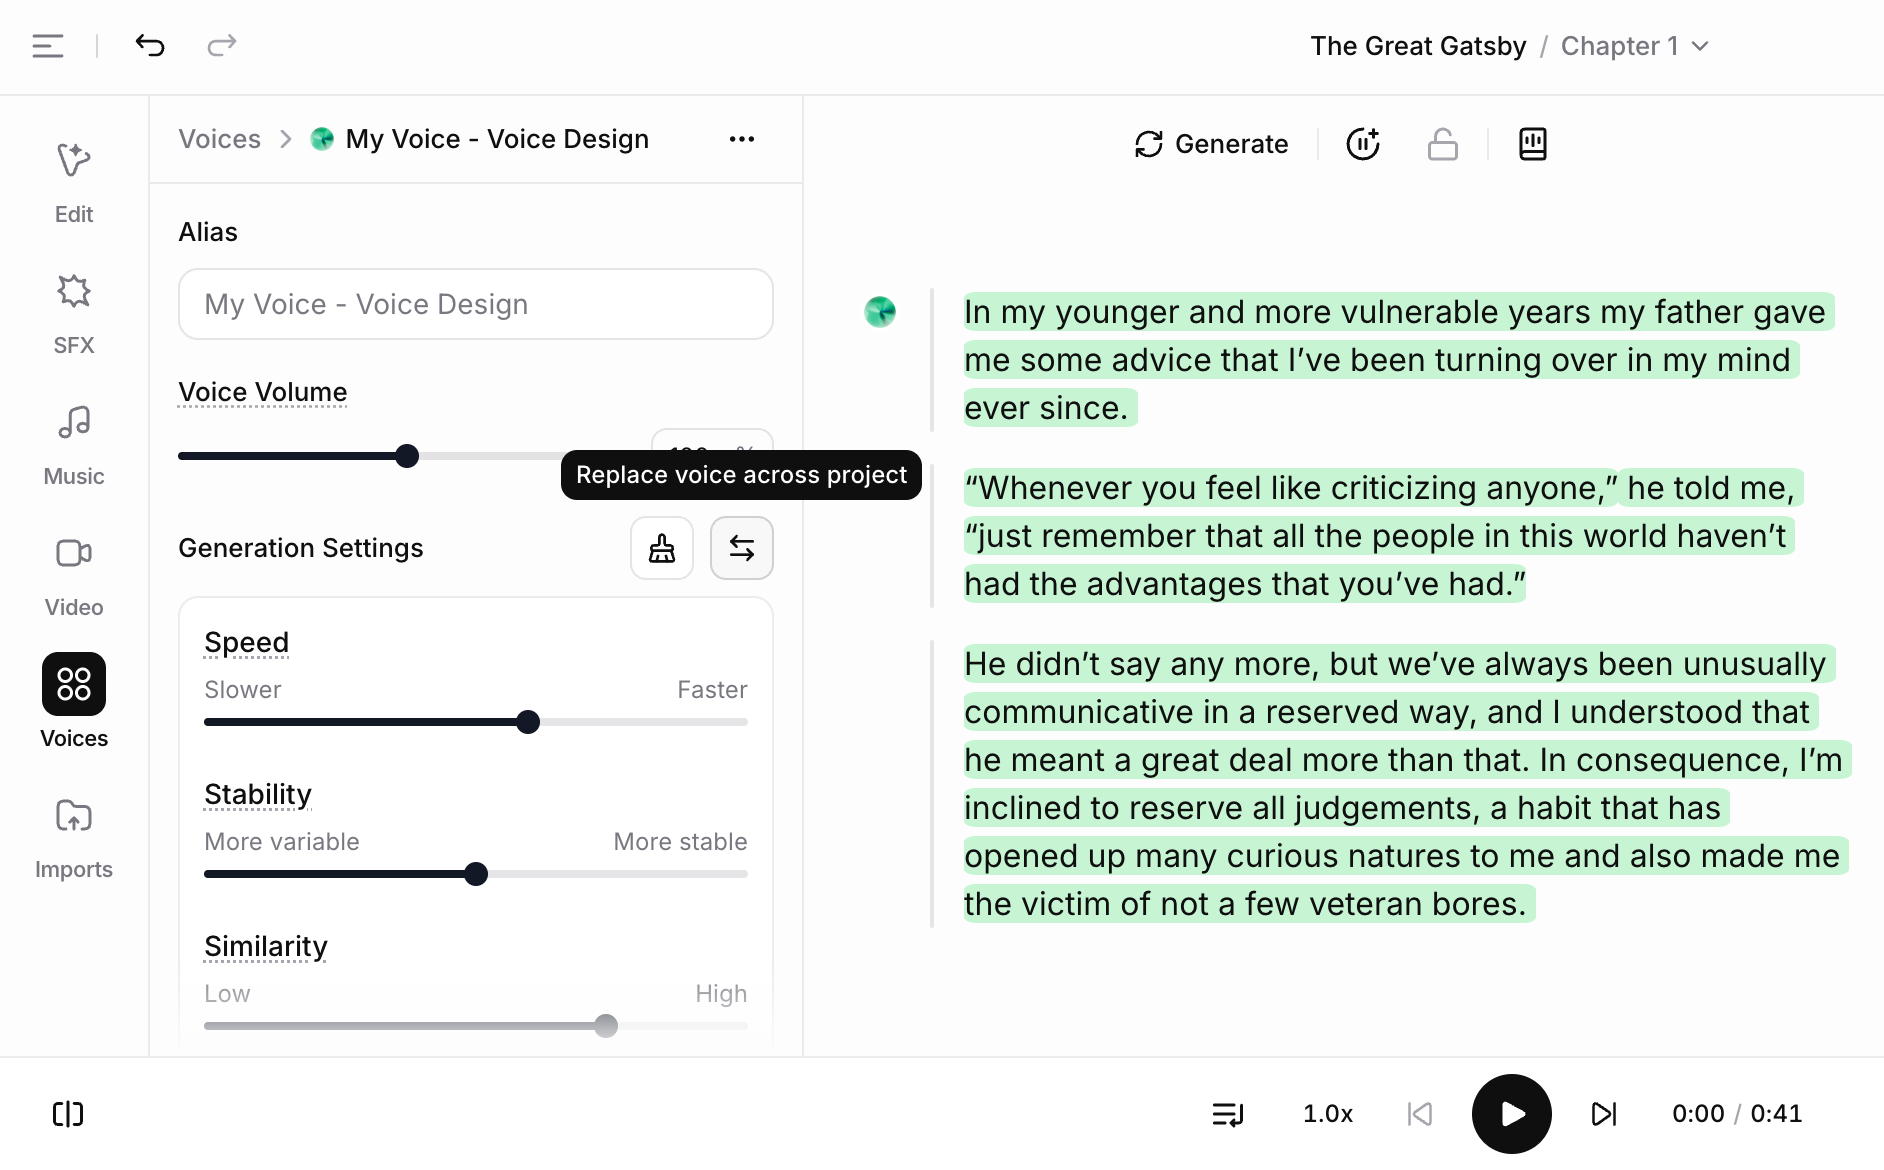 Click this, and you’ll then see the Replace voice pop-up, which shows you how many paragraphs will need regenerating when you make this change. Click this, and you’ll then see the Replace voice pop-up, which shows you how many paragraphs will need regenerating when you make this change. 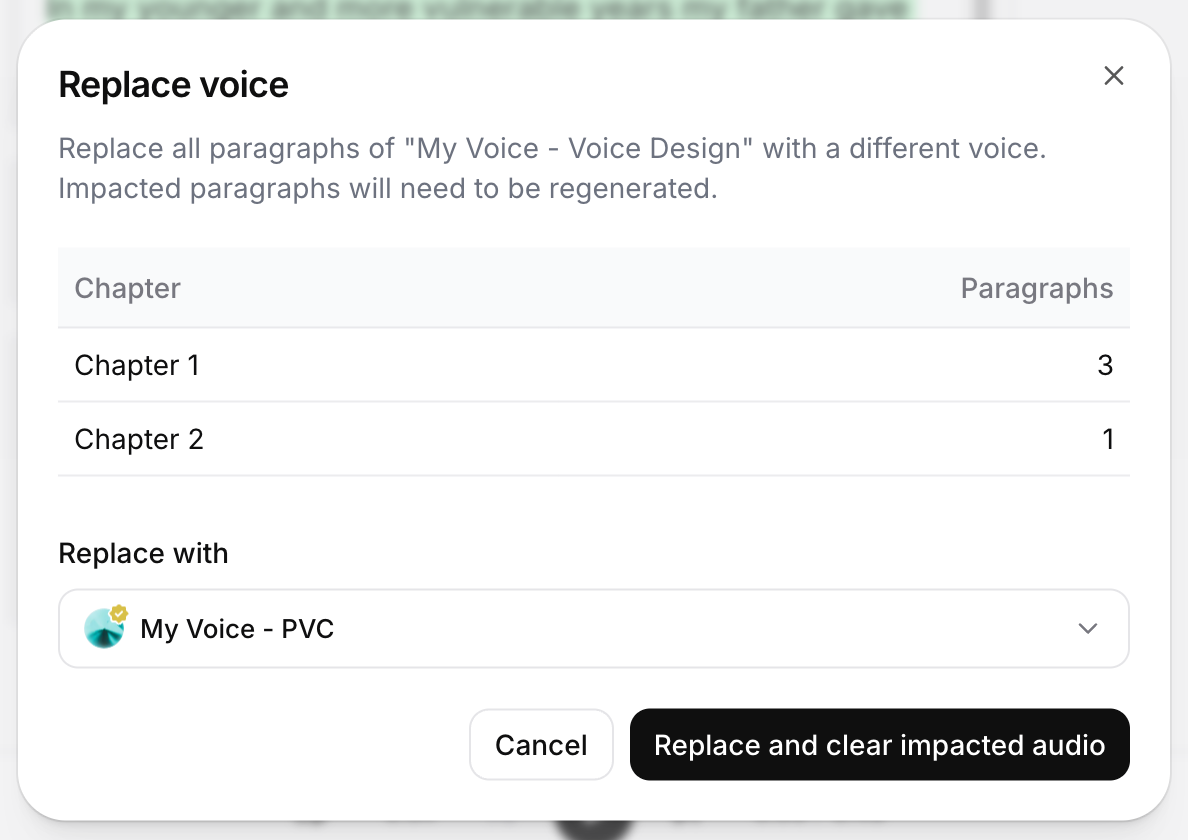 Choose your new voice in the Replace with drop-down, then click Replace and clear impacted audio to confirm the change. The voice will be updated, and you’ll need to generate new audio for all affected paragraphs. Choose your new voice in the Replace with drop-down, then click Replace and clear impacted audio to confirm the change. The voice will be updated, and you’ll need to generate new audio for all affected paragraphs. |
| How do I export a Studio project to InAudio? Before exporting your audiobook to InAudio, you need to create your audiobook in Studio. This includes selecting the voices you want to use, arranging the content, and reviewing the audio to ensure everything sounds as expected. Once your project is finalized, you can export it for distribution. Here are the steps you need to follow to export your Studio project to InAudio: Open your Studio project and go to Export > Publish > InAudio. A modal will appear explaining the process. Click Continue to proceed. On the Audio Preview screen, select which chapter you want to use for the free audio preview (the first 5 minutes of that chapter will be used). Please note that you won’t be able to listen to the preview in this modal, but you can change which chapter is used. Adjust the narrator names that will appear in the audiobook credits. By default, voices will be labeled as “Digital Voice” followed by the name of the voice used. Once everything is set, click Export to generate your audiobook in LPF format. Log in to InAudio, or create an account. In InAudio, select Start New Project. Upload your LPF file and follow the platform’s steps to distribute your audiobook. Please note that if your project includes an Instant Voice Clone, you must verify the voice before exporting. When prompted, click Verify, then go to Voices > My Voices, select the voice, and click Click to verify. Once verification is complete, you can continue with the export process. All digitally narrated titles will be clearly marked in the metadata, and the book description will inform the listener that the title was created using digital voice narration. InAudio allows you to distribute your audiobook to Barnes and Noble, Rakuten, Everand, Scribd and many other more. |
| How do I export a Studio project to Spotify? Before exporting your audiobook to Spotify, you need to create your audiobook in Studio. This includes selecting the voices you want to use, arranging the content, and reviewing the audio to ensure everything sounds as expected. Once your project is finalized, you can export it for distribution. Here are the steps you need to follow to export your Studio project to Spotify: Open your Studio project and go to Export > Publish > Spotify. A modal will appear explaining the process. Click Continue to proceed. On the Audio Preview screen, select which chapter you want to use for the free audio preview (the first 5 minutes of that chapter will be used). Please note that you won’t be able to listen to the preview in this modal, but you can change which chapter is used. Adjust the narrator names that will appear in the audiobook credits. By default, voices will be labeled as “Digital Voice” followed by the name of the voice used. Once everything is set, click Export to generate your audiobook in MP3 format. Log in to Spotify for Authors, or create an account. In Spotify for Authors, select New Audiobook. Upload your MP3 files and follow the platform’s steps to distribute your audiobook. Please note that if your project includes an Instant Voice Clone, you must verify the voice before exporting. When prompted, click Verify, then go to Voices > My Voices, select the voice, and click Click to verify. Once verification is complete, you can continue with the export process. All digitally narrated titles will be clearly marked in the metadata on Spotify. The statement, “This audiobook is narrated by a digital voice.” will be added to the beginning of the audiobook description. |
| How do I use the Pronunciations Editor in Studio? Sometimes you may want to specify the pronunciation of certain words, such as character or brand names, or specify how acronyms should be read. You can use the Pronunciations editor to add rules about how specified words should be pronounced, either using a phonetic alphabet (phoneme tags) or word substitutions (alias tags). Phoneme tags are only compatible with Eleven Flash v2. These rules will be saved to a Pronunciation Dictionary which will be connected to your project. Whenever one of these words is encountered in a project, the AI will pronounce the word using the specified replacement. You can add aliases and phonemes from directly within Studio by clicking the Open pronunciations editor button. If you do this while you have a word selected, this word will automatically populate the input field. Otherwise, you can enter the word yourself. You can use the Play button in the Output to preview how it will sound. When you add a new rule, you can either select an existing dictionary to add the rule to, or create a new dictionary. If you add the rule to an existing dictionary, this will automatically connect it to your project. |
What does the grey line mean in Studio? In Studio, the grey line to the left of a paragraph indicates the audio generation status. A light grey line signifies that audio has not yet been generated, while a dark grey line indicates that audio has been successfully generated. In the image below, the highlighted paragraph has audio generated, whereas the second one does not. 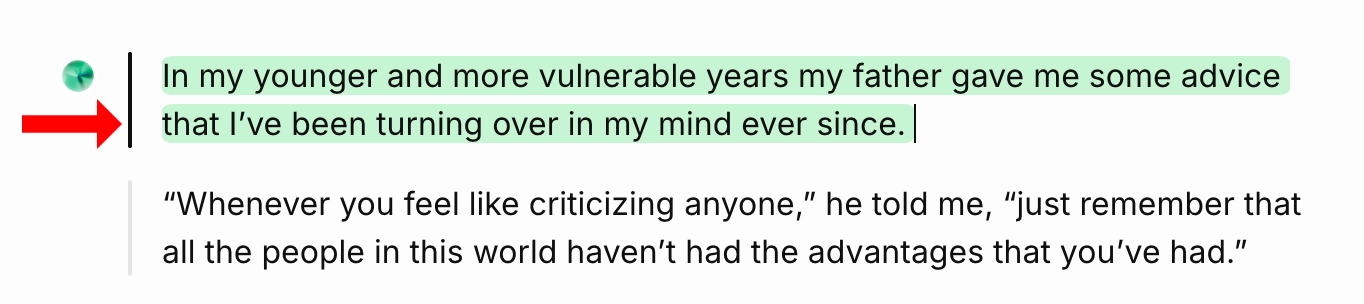 In Dark Mode, this color scheme adjusts slightly: a light grey line still represents ungenerated audio, while a white line indicates that the paragraph has been converted to audio. The image below demonstrates this: audio has been generated for the highlighted paragraph, but not for the second one. In Dark Mode, this color scheme adjusts slightly: a light grey line still represents ungenerated audio, while a white line indicates that the paragraph has been converted to audio. The image below demonstrates this: audio has been generated for the highlighted paragraph, but not for the second one. 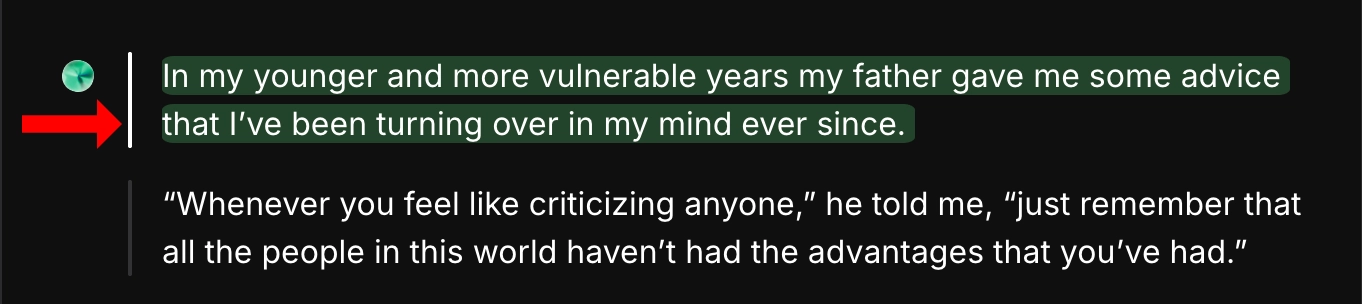 |
| What does the lock icon mean in Studio? In Studio, you can lock a paragraph once you’re happy with it, and this will prevent any accidental changes. Locked paragraphs are indicated by a lock icon to the left of the paragraph. The lock button locks the current version of the selected paragraph. This means that you no longer have the option to regenerate the paragraph, change the voice or settings, or access the generation history for the paragraph. You can unlock a paragraph at any time by clicking the lock button. This feature is only available after you have generated audio for the selected paragraph. |
| What happens to my Studio projects if I downgrade my subscription? Studio is included in all subscription plans, including the Free plan. If you choose to downgrade your subscription, you will retain access to Studio. However, canceling your subscription will result in the loss of certain paid features. This includes the ability to generate audio using your Instant and Professional Voice Clones, as well as access to some voices from the Voice Library, including those with custom rates. Additionally, your ability to create new projects will be limited based on your current plan. If you exceed the project limit before downgrading, you will still have access to your existing projects, but you won’t be able to create new ones until you’re within the allowed limit. Project Limits by Plan: Free: 5 projects Starter: 20 projects Creator: 1,000 projects Pro: 3,000 projects Scale: 20,000 projects Business: 20,000 projects Please note that at the time of writing, we do not delete your data. All your content will remain intact and accessible should you choose to upgrade again in the future. |
| What is Auto-Regenerate? Auto-Regenerate is a feature in Studio that automatically checks your generated audio for any mispronunciations or unwanted audio artefacts. If we detect any, we will automatically regenerate the audio up to two times, at no extra cost. This feature is enabled automatically, and it is done in the backend when you convert your whole chapter or project in one step from the Export dialog. |
| What is Generation History in Studio? Generation History allows you to listen to, download and restore previous audio generations for each paragraph. The Generation History for each paragraph appears in the left sidebar when you select it. You can see and listen to all the previous generations for the selected paragraph. If you prefer an earlier generation, you can restore this by clicking Restore previous generation. This audio will then appear as the current version of the paragraph in your project. You can use the lock button to lock the paragraph to prevent further changes. For each generation, you can download the individual audio file. To download, click More actions (three dots) > Download. You can also remove generations, but please bear in mind that removing a generation is permanent, and it cannot be recovered. To remove a generation, click More actions (three dots) > Remove. |
| What is the timeline in Studio? The timeline is a visual representation of the audio in your Studio project, displayed as a horizontal track at the bottom of the interface. It’s enabled by default in all Studio projects. The timeline gives you a clearer way to view and control the structure of your content. Clips appear automatically as you enter text, and you can rearrange them by dragging and dropping to adjust the flow of your audio. Click the Expand/Collapse button in the top-right of the timeline to adjust the view: Use the Zoom In and Zoom Out buttons to change how much of the timeline is visible: |
| Which file formats can I import with Studio? EPUB is the best file format to use to create your project. If the EPUB is well-structured and correctly formatted, it will automatically split each chapter into its own chapter in Studio, making it very easy to navigate. To format your EPUB so that Studio can recognize your chapters, you need to make sure that each chapter heading is formatted as ‘Heading 1’. Other supported file formats are: PDF DOCX TXT HTML URL For more details, please see our full overview. |
Why aren't my changes reflected in my download from Studio? If you make changes to your project, you need to export a new version of your chapter or project. This will save the updated audio to a new version so that it is reflected in your download. To do this, click Export, and choose your preferred options. If you choose to export your full project, Studio will automatically convert any paragraphs that are not yet converted throughout all chapters in your project, which will cost credits. If this is the case, you will be notified of how many credits it will cost before you confirm the export.  If you have already generated audio for all paragraphs, there will be no cost, but the audio still needs to be exported to a new version before it is reflected in your download. You will be notified when the conversion is complete and your download is ready. You can access and download previous exports by clicking the Export button, and selecting the History tab. If you have already generated audio for all paragraphs, there will be no cost, but the audio still needs to be exported to a new version before it is reflected in your download. You will be notified when the conversion is complete and your download is ready. You can access and download previous exports by clicking the Export button, and selecting the History tab. |
Why can't I download from Studio? Try using a different browser and turning off ad blockers and pop-up blockers. Under certain circumstances, some people might experience problems downloading their projects. The common denominator for this seems to be the browser. Most people who are experiencing issues are using a browser called Brave, however, we’ve also heard of some users experiencing issues with other browsers. In most cases, the issue seems to be resolved when they switch or test a different browser to download the files. We also recommend turning off any ad-blockers or pop-up blockers. If you’re having issues downloading from Studio, make sure you are following the correct flow as you don’t download audio in Studio the same way you do in Speech Synthesis. To create a new version of your chapter or project, which will then be downloaded, you need to use the Export button. You have the option to create a new export of either the current chapter, or your entire project. If you’ve made any changes since your last export, you will see a confirmation of how many credits it will take to create the new export. You’ll only be charged credits for paragraphs that have not already been converted, or that have been edited since your last export and therefore need to be converted again.  You can also access all your previous exports. To do this, click the Export button, then select the History tab. You can also access all your previous exports. To do this, click the Export button, then select the History tab. |