Client tools
Client tools enable your assistant to execute client-side functions. Unlike webhook tools, client tools allow the assistant to perform actions such as triggering browser events, running client-side functions, or sending notifications to a UI.
Overview
Section titled “Overview”Applications may require assistants to interact directly with the user's environment. Client-side tools give your assistant the ability to perform client-side operations.
Here are a few examples where client tools can be useful:
- Triggering UI events: Allow an assistant to trigger browser events, such as alerts, modals or notifications.
- Interacting with the DOM: Enable an assistant to manipulate the Document Object Model (DOM) for dynamic content updates or to guide users through complex interfaces.
Prerequisites
Section titled “Prerequisites”- An ElevenLabs account
- A configured ElevenLabs Conversational Agent (create one here)
Create a new client-side tool
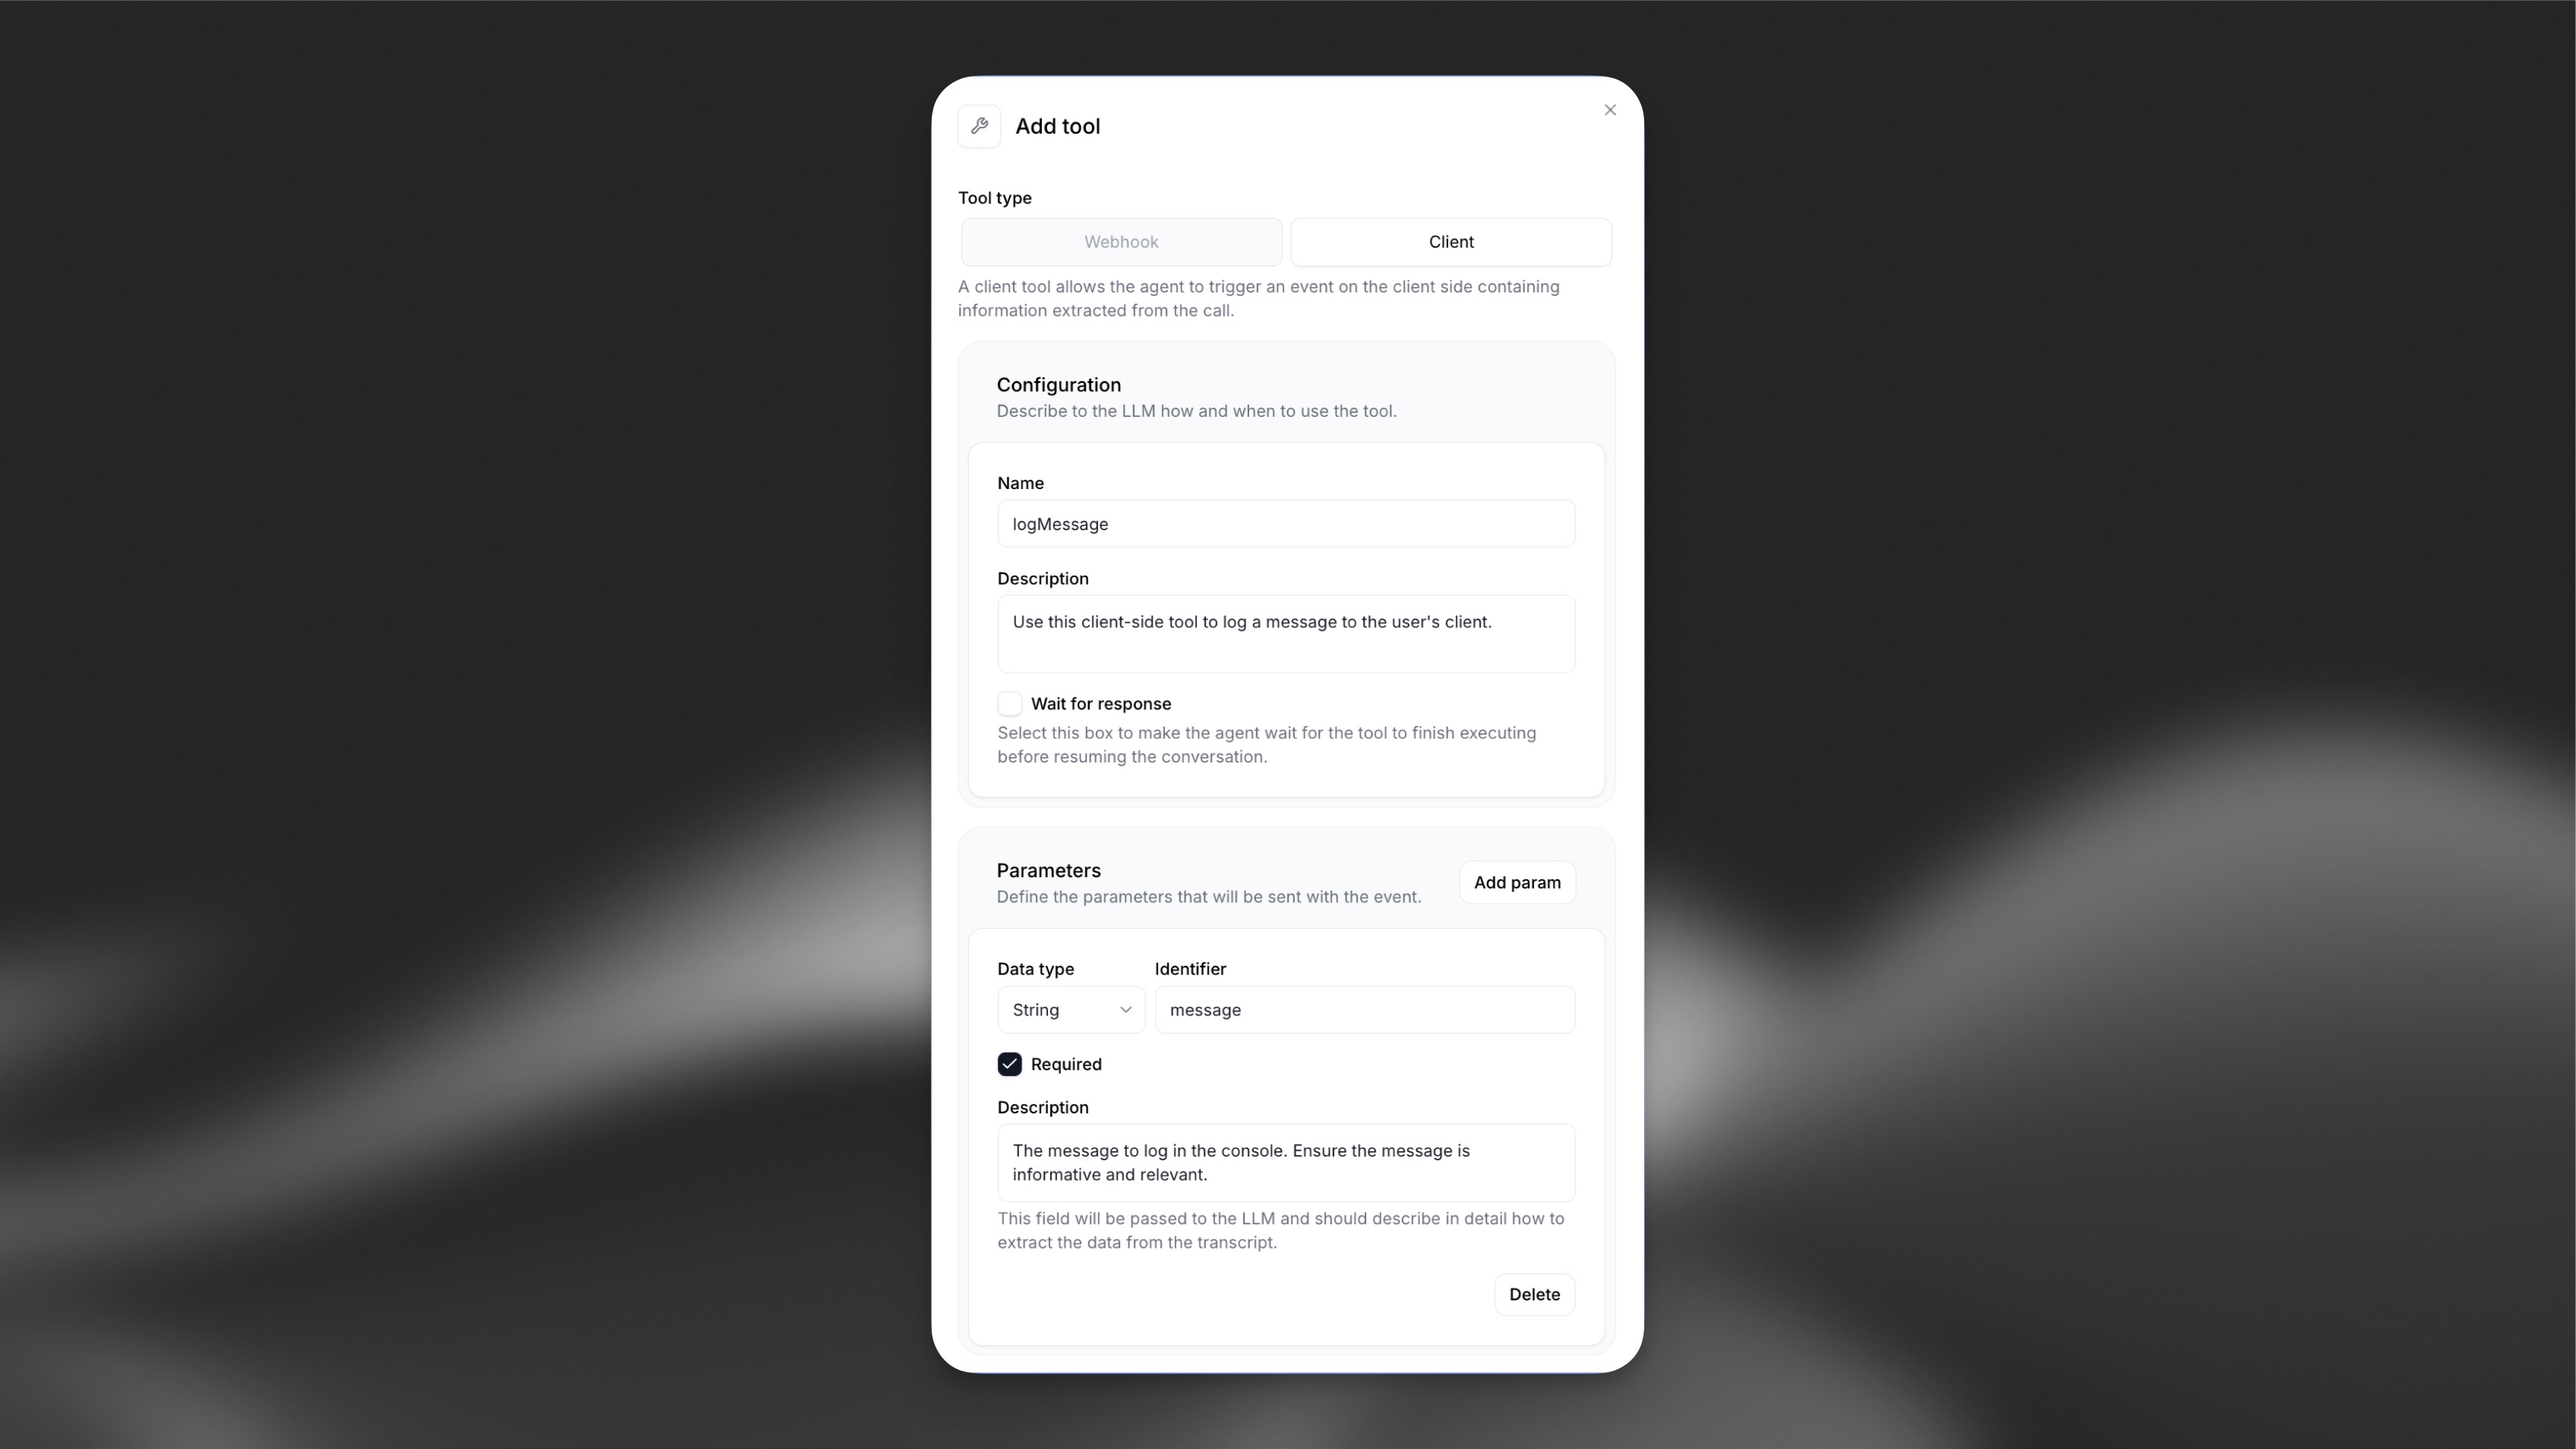
Section titled “Create a new client-side tool”Configure a client tool named logMessage with a required string parameter message ("The message to log in the console").
Add via the dashboard
Section titled “Add via the dashboard”Navigate to your agent dashboard. In the Tools section, click Add Tool. Ensure the Tool Type is set to Client. Then configure the following:
| Setting | Parameter |
|---|---|
| Name | logMessage |
| Description | Use this client-side tool to log a message to the user's client. |
Then create a new parameter message with the following configuration:
| Setting | Parameter |
|---|---|
| Data Type | String |
| Identifier | message |
| Required | true |
| Description | The message to log in the console. Ensure the message is informative and relevant. |
Add via the CLI
Section titled “Add via the CLI”Create a tool config file
Section titled “Create a tool config file”Save the following as tool_configs/log_message.json:
{
  "type": "client",
  "name": "logMessage",
  "description": "Use this client-side tool to log a message to the user's client.",
  "expects_response": false,
  "parameters": {
    "type": "object",
    "properties": {
      "message": {
        "type": "string",
        "description": "The message to log in the console."
      }
    },
    "required": ["message"]
  }
}
Add the tool
Section titled “Add the tool”elevenlabs tools add "logMessage" --type "client" --config-path ./tool_configs/log_message.jsonReference the tool from your agent
Section titled “Reference the tool from your agent”Edit agent_configs/<agent-name>.json to add the tool's ID to conversation_config.agent.prompt.tool_ids, then push:
elevenlabs agents push --agent "<agent-name>"Add via the API
Section titled “Add via the API”from elevenlabs import ElevenLabs, ToolRequestModel
elevenlabs = ElevenLabs()
tool = elevenlabs.conversational_ai.tools.create(
request=ToolRequestModel(
tool_config={
"type": "client",
"name": "logMessage",
"description": "Use this client-side tool to log a message to the user's client.",
"expects_response": False,
"parameters": {
"type": "object",
"properties": {
"message": {
"type": "string",
"description": "The message to log in the console.",
}
},
"required": ["message"],
},
}
)
)
elevenlabs.conversational_ai.agents.update(
agent_id="agent_7101k5zvyjhmfg983brhmhkd98n6",
conversation_config={
"agent": {"prompt": {"tool_ids": [tool.id]}},
},
)import { ElevenLabsClient } from "@elevenlabs/elevenlabs-js";
const elevenlabs = new ElevenLabsClient();
const tool = await elevenlabs.conversationalAi.tools.create({
toolConfig: {
type: "client",
name: "logMessage",
description: "Use this client-side tool to log a message to the user's client.",
expectsResponse: false,
parameters: {
type: "object",
properties: {
message: {
type: "string",
description: "The message to log in the console.",
},
},
required: ["message"],
},
},
});
await elevenlabs.conversationalAi.agents.update("agent_7101k5zvyjhmfg983brhmhkd98n6", {
conversationConfig: {
agent: { prompt: { toolIds: [tool.id] } },
},
});Register the client tool in your code
Section titled “Register the client tool in your code”Unlike webhook tools, client tools need to be registered in your code.
Use the following code to register the client tool:
Python
from elevenlabs import ElevenLabsfrom elevenlabs.conversational_ai.conversation import Conversation, ClientToolsdef log_message(parameters): message = parameters.get("message") print(message)client_tools = ClientTools()client_tools.register("logMessage", log_message)conversation = Conversation( client=ElevenLabs(api_key="your-api-key"), agent_id="agent_7101k5zvyjhmfg983brhmhkd98n6", requires_auth=True, client_tools=client_tools, # ...)conversation.start_session()JavaScript
// ...const conversation = await Conversation.startSession({ // ... clientTools: { logMessage: async ({message}) => { console.log(message); } }, // ...});Swift
// ...var clientTools = ElevenLabsSDK.ClientTools()clientTools.register("logMessage") { parameters async throws -> String? in guard let message = parameters["message"] as? String else { throw ElevenLabsSDK.ClientToolError.invalidParameters } print(message) return message}Testing
Section titled “Testing”Initiate a conversation with your agent and say something like:
Log a message to the console that says Hello World
You should see a Hello World log appear in your console.
Next steps
Section titled “Next steps”Now that you've set up a basic client-side event, you can:
- Explore more complex client tools like opening modals, navigating to pages, or interacting with the DOM.
- Combine client tools with server-side webhooks for full-stack interactions.
- Use client tools to enhance user engagement and provide real-time feedback during conversations.
Passing client tool results to the conversation context
Section titled “Passing client tool results to the conversation context”When you want your agent to receive data back from a client tool, ensure that you tick the Wait for response option in the tool configuration.

Once the client tool is added, when the function is called the agent will wait for its response and append the response to the conversation context.
Python
def get_customer_details():
    # Fetch customer details (e.g., from an API or database)
    customer_data = {
        "id": 123,
        "name": "Alice",
        "subscription": "Pro"
    }
    # Return the customer data; it can also be a JSON string if needed.
    return customer_data

client_tools = ClientTools()
client_tools.register("getCustomerDetails", get_customer_details)

conversation = Conversation(
    client=ElevenLabs(api_key="your-api-key"),
    agent_id="agent_7101k5zvyjhmfg983brhmhkd98n6",
    requires_auth=True,
    client_tools=client_tools,
    # ...
)

conversation.start_session()
JavaScript
const clientTools = {
  getCustomerDetails: async () => {
    // Fetch customer details (e.g., from an API)
    const customerData = {
      id: 123,
      name: "Alice",
      subscription: "Pro"
    };
    // Return data directly to the agent.
    return customerData;
  }
};

// Start the conversation with client tools configured.
const conversation = await Conversation.startSession({ clientTools });
In this example, when the agent calls getCustomerDetails, the function will execute on the client and the agent will receive the returned data, which is then used as part of the conversation context. The values from the response can also optionally be assigned to dynamic variables, similar to webhook tools. Note system tools cannot update dynamic variables.
Troubleshooting
Section titled “Troubleshooting”Tools not being triggered
Section titled “Tools not being triggered”- Ensure the tool and parameter names in the agent configuration match those registered in your code.
- View the conversation transcript in the agent dashboard to verify the tool is being executed.
Console errors
Section titled “Console errors”- Open the browser console to check for any errors.
- Ensure that your code has necessary error handling for undefined or unexpected parameters.
Best practices
Section titled “Best practices”Name tools intuitively, with detailed descriptions
Section titled “Name tools intuitively, with detailed descriptions”If you find the assistant does not make calls to the correct tools, you may need to update your tool names and descriptions so the assistant more clearly understands when it should select each tool. Avoid using abbreviations or acronyms to shorten tool and argument names.
You can also include detailed descriptions for when a tool should be called. For complex tools, you should include descriptions for each of the arguments to help the assistant know what it needs to ask the user to collect that argument.
Name tool parameters intuitively, with detailed descriptions
Section titled “Name tool parameters intuitively, with detailed descriptions”Use clear and descriptive names for tool parameters. If applicable, specify the expected format for a parameter in the description (e.g., YYYY-mm-dd or dd/mm/yy for a date).
Consider providing additional information about how and when to call tools in your assistant's system prompt
Section titled “Consider providing additional information about how and when to call tools in your assistant's system prompt”Providing clear instructions in your system prompt can significantly improve the assistant's tool calling accuracy. For example, guide the assistant with instructions like the following:
Use `check_order_status` when the user inquires about the status of their order, such as 'Where is my order?' or 'Has my order shipped yet?'.Provide context for complex scenarios. For example:
Before scheduling a meeting with `schedule_meeting`, check the user's calendar for availability using check_availability to avoid conflicts.LLM selection
Section titled “LLM selection”It's important to note that the choice of LLM matters to the success of function calls. Some LLMs can struggle with extracting the relevant parameters from the conversation.